1. Uvod
This manual provides detailed instructions for the installation, operation, and maintenance of your GAOMON 24000 BTU 19 SEER2 Mini Split AC System. This high-performance inverter system offers efficient cooling and heating for spaces up to 1500 sq.ft, featuring Wi-Fi connectivity, remote control, and low-noise operation. Please read this manual thoroughly before installation and use to ensure proper function and safety.
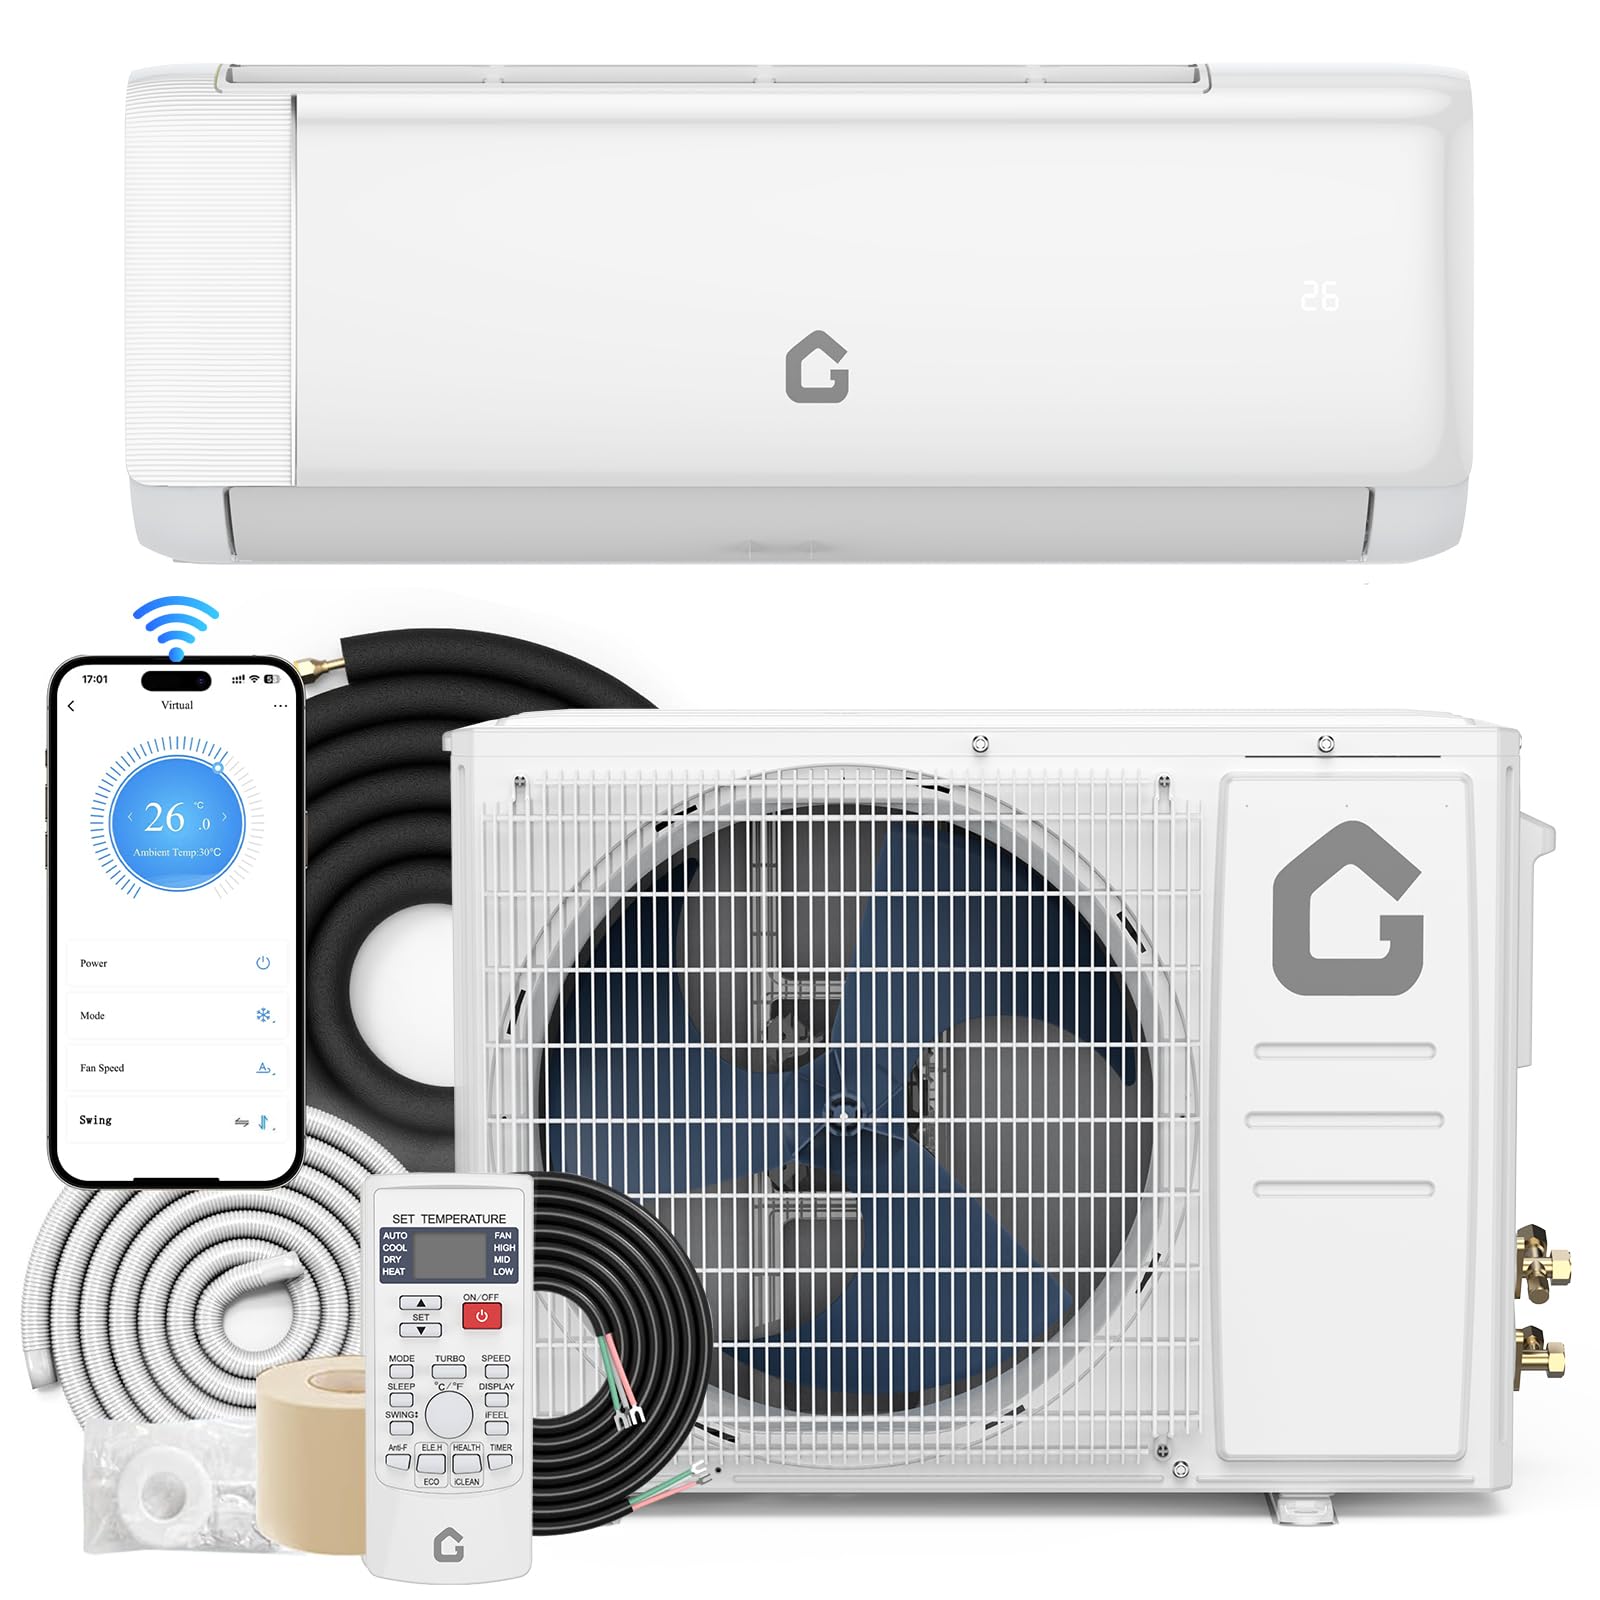
Figure 1: GAOMON 24000 BTU Mini Split AC System
2. Sigurnosne informacije
WARNING: Professional installation is required for this system. Improper installation can lead to electric shock, fire, or serious injury.
- Always ensure the power supply is disconnected before performing any installation or maintenance.
- Wear appropriate personal protective equipment (PPE) during installation, including safety glasses, gloves, and a helmet if working at heights.
- Osigurajte da svi električni priključci budu u skladu s lokalnim propisima i propisima.
- Ne pokušavajte sami popravljati ili modificirati uređaj. Obratite se kvalificiranom servisnom osoblju.
- Držite djecu i kućne ljubimce dalje od uređaja tokom rada i održavanja.
Video 1: Ovaj video pruža pregledview of the installation process for the Mini Split AC Unit, highlighting necessary tools and safety precautions.
3. Sadržaj paketa
The GAOMON Mini Split AC system is shipped in two packages. Please verify all components are present upon delivery:
- 1 x Vanjska jedinica
- 1 x Unutrašnja jedinica
- 1 x 13 stopa bakrene spojne cijevi - zračna cijev
- 1 x 13 stopa bakrene spojne cijevi - cijev za tekućinu
- 1 x 6.5 ft odvodno crijevo
- 1 x 13 stopa komunikacijskih žica
- 1 x daljinski upravljač
- 1 x Uputstvo za upotrebu
Note: Shut-off valves housing and side protection grille are excluded. The air filter is washable and easy to clean.

Figure 2: Visual representation of the components included in the GAOMON Mini Split AC package.
4. Specifikacije
| Feature | Vrijednost |
|---|---|
| Broj modela | PHO_163 |
| Dimenzije proizvoda | 42.87 x 22.44 x 39.37 inča |
| Težina artikla | 82 funte |
| Brand | GAOMON |
| Form Factor | Mini-Split |
| Kapacitet | 1500 kubnih stopa |
| Pokrivenost poda | Do 1500 kvadratnih stopa |
| Voltage | 230 Volts |
| Nivo buke | 42 decibela |
| Snaga hlađenja | 24000 britanskih termalnih jedinica (BTU) |
| Sezonski omjer energetske efikasnosti (SEER) | 19 |
| Posebne karakteristike | Auto Clean, Heating & Cooling Function, Silent Mode, Sleep Mode, WiFi Enabled |

Figure 3: Detailed dimensions and key specifications of the GAOMON Mini Split AC System.
5. Vodič za instalaciju
Professional installation is strongly recommended for this appliance.
5.1. Priprema
Potrebni alati i materijali
- Rupa testera
- Multimetar
- Rezač cijevi
- Hex ključevi
- Rashladno sredstvo (R410A)
- Moment ključ
- Podesivi ključ
- Merna traka
- Manometar
- Safety belt (for high installations)
- Alat za šišanje
- Bracket (for outdoor unit)
- Nivo
- Phillips odvijač
- Elektrosonda
- Vakum pumpa
- Kliješta
- Copper tube (if extending lines)
Environmental Checks
- Ensure there is no heat source or steam source near the installation area.
- Avoid obstructions around the inlet and outlet of both indoor and outdoor units.
- The area should be free from smoke or oil.
- Do not install in areas with flammable or explosive gas, or corrosive gas.
5.2. Instalacija unutrašnje jedinice
Odaberite Lokacija instalacije
- The wall for the indoor unit must be hard, flat, and firm to prevent vibration and noise.
- Maintain a minimum clearance of 15cm to the ceiling.
- Maintain a minimum clearance of 20cm to obstacles on either side.
- The unit should be installed between 230-260cm from the floor.
Popravite montažnu ploču
Place the mounting plate on the wall and use a level to ensure it is horizontal. Select the position for at least 5 screws to firmly fix the plate.
Izbušite rupu u zidu
Nakon što odredite gdje će cijev prolaziti kroz zid, izbušite rupu u zidu. Rupa u zidu treba biti nagnuta prema van za 5-10 stepeni, s promjerom od 60-80 mm. Koristite vrećicu protiv prašine kako biste izbjegli prašinu prilikom bušenja.
Install Connection Cable
Provucite kabel za napajanje sa stražnje strane unutarnje jedinice i pričvrstite ga na terminalnu ploču. Pričvrstite kabel pomoću stezaljke.amp. Remove the knock-out panel with a knife and remove burrs to prevent the drain pipe from being broken.
Connection of Refrigerant Piping
Use both hands to turn the pipe in the desired direction. Aim at the pipe center, tighten the taper nut with fingers, then tighten with two wrenches. Use a torque wrench for precise tightening according to the pipe size (refer to the table in the installation video).
Ugradite odvodno crijevo
Connect the drain hose with the water outlet pipe, and fix it firmly with adhesive tape. The length should be more than 5cm to prevent water leakage.
Zamotajte cijevi
Wrap the refrigerant piping, wires, and drain pipe with wrapping tape.
Montirajte unutrašnju jedinicu
Put the refrigerant piping out of the wall hole. Put the indoor unit on the mounting plate. Push the lower part of the indoor unit until a 'click' sound is heard to ensure it is firmly fixed to the wall.
Pipe Protecting Ring and Putty
To protect piping and wires, a pipe protecting ring shall be installed and sealed with putty.
5.3. Instalacija vanjske jedinice
Odaberite Lokacija instalacije
The outdoor unit must be installed in a firm and flat place to prevent vibration and noise.
- Maintain a minimum clearance of 20cm to the obstruction above.
- Maintain a minimum clearance of 30cm to obstacles on the left and right sides.
- Maintain a minimum clearance of 10cm for air intake on the right side.
- Maintain a minimum clearance of 200cm for air exhaust in front.
Install Outdoor Unit Bracket
If installing the air conditioner in a higher place, the operator should wear a safety belt and helmet. Use a level to ensure the bracket is horizontal and vertical. Use at least 6 expansion bolts to make sure brackets are fixed firmly on the wall.
Popravite vanjsku jedinicu
Postavite vanjsku jedinicu na nosače. Koristite 4 vijka za pričvršćivanje nožica vanjske jedinice.
Spojite cjevovod rashladnog sredstva
Remove the nut from the stop valves. Aim at the pipe center of the stop valve, tighten the taper nut with fingers, then tighten with two wrenches. Screw the 2 caps back on. Use a torque wrench for precise tightening according to the pipe size (refer to the table in the installation video).
Usisavanje
Before vacuuming, check all the nuts of the indoor and outdoor unit are tightened. Connect the stop valve, charging hose, manifold valve, and vacuum pump as shown in the diagram (refer to the installation video). Turn on handle Lo to vacuumize. Vacuumize for at least 15 minutes, making sure the value on the pressure gauge is ≤0.1MPa. Keep pressure for 3-5 minutes after vacuumizing, ensuring pressure springback is ≤0.05MPa. Open the 1/4 liquid valve, and remove the charging hose.
Fix Cables
Skinite poklopac električne kutije. Pričvrstite kablove na terminalnu ploču prema dijagramu ožičenja na poklopcu E-dijelova. Morate slijediti dijagram ožičenja unutar poklopca kutije. Koristite clamp za pričvršćivanje kablova. Vratite poklopac električne kutije.
Refrigerant Adjustment
When the length of the connecting pipe is changed, an extra amount of refrigerant may need to be added or reduced to ensure optimal operation and performance.
| Dužina priključne cijevi | Dodano ili smanjeno rashladno sredstvo | Količina rashladnog sredstva za jedinicu |
|---|---|---|
| <3m | CC≤12000Btu: smanjenje od 20g/m² | ≤1Kg |
| CC≥18000Btu: smanjiti 50g/m² | ≤2Kg | |
| 3-5m | Nije potrebno | - |
| 5-15m | CC≤12000Btu: dodajte 20g/m² | ≤1Kg |
| CC≥18000Btu: dodajte 30g/m² | ≤2Kg |
Video 2: This video demonstrates the complete installation process for the Mini Split AC Unit, including both indoor and outdoor components.
6. Uputstvo za upotrebu
6.1. Funkcije daljinskog upravljača
The backlit LCD remote controller allows effortless system control. Key functions include:
- Način hlađenja: For rapid cooling.
- Način zagrijavanja: Za brzo zagrijavanje.
- Suvi način rada: One-key drying mode to quickly reduce indoor humidity.
- Samo ventilator: Low, Mid, High, Turbo 4 wind speeds with 50ft long distance air flow.
- Automatski režim: Automatically selects operating mode based on ambient temperature.
- Uključen/isključen ekran: Controls the unit's display.
- Režim spavanja: Adjusts temperature and fan speed for comfortable sleep and quiet operation (41 dB).
- ECO način rada za uštedu energije: Optimizuje rad za smanjenu potrošnju energije.
- ZDRAVSTVENI način rada: Activates negative ions, electrostatic dust removal, and PM2.5 removal.
- iFEEL način rada: Senses temperature at the remote control's location for precise comfort.
- 24-satni tajmer: Zakažite vrijeme uključivanja/isključivanja.
- 4D automatsko njihanje: Ensures even air distribution.

Slika 4: Gotovoview daljinskog upravljača i njegovih različitih funkcija.
6.2. Wi-Fi Setup and Smart Control
The unit is Wi-Fi enabled and Google-compatible, allowing control via a smartphone app.
Video 3: This video demonstrates the process of setting up Wi-Fi connectivity for your Mini Split Air Conditioner, enabling smart control via an app.

Figure 5: The mobile application interface for intelligent control of the AC unit, compatible with Amazon Alexa and Google Assistant.
7. Održavanje
7.1. Čišćenje filtera za zrak
The air filter is washable and easy to clean. Regular cleaning of the air filter is essential for maintaining optimal performance and air quality. Refer to the full user guide for detailed instructions on how to remove, clean, and reinsert the air filter.
7.2. Funkcija samočišćenja
The unit features an automatic defrosting and self-cleaning function to maintain internal hygiene and efficiency. This includes a 57°C high-temperature self-cleaning and sterilization process.

Figure 6: Illustration of the 57°C high-temperature self-cleaning and sterilization process.
8. Otkrivanje problema
If you encounter any issues with your GAOMON Mini Split AC System, please refer to the following common problems and solutions before contacting customer support:
- Uređaj se ne uključuje: Check power supply, circuit breaker, and ensure the remote control has working batteries.
- Bez hlađenja/grijanja: Provjerite je li odabran ispravan način rada, postavke temperature i osigurajte da su filteri za zrak čisti.
- Neobična buka: Check for loose parts, obstructions in the fan, or improper installation of the outdoor unit.
- curenje vode: Ensure the drain hose is properly installed and sloped, and not blocked.
- Remote control missing: If the remote control is missing, contact customer support for a replacement.
- Problemi s Wi-Fi vezom: Ensure your Wi-Fi network is 2.4GHz, check router settings, and follow the app's troubleshooting steps.
For more complex issues or if the problem persists, please contact GAOMON customer support.
9. Garancija i podrška
The GAOMON 24000 BTU 19 SEER2 Mini Split AC System comes with a Doživotna garancija. For warranty claims, technical support, or any questions regarding your product, please refer to the contact information provided in your purchase documentation or visit the official GAOMON website.


