1. Uvod
This manual provides detailed instructions for the installation, operation, and maintenance of your Fdit Programmable Thermostatic Heating Valve, Model Fditfkbedxoh3r. This device is designed to enhance comfort and energy efficiency in your home or hotel by intelligently controlling heating temperatures. Please read this manual thoroughly before use to ensure proper function and safety.
2. Sigurnosne informacije
- Uvjerite se da je napajanje isključeno prije instalacije ili održavanja.
- Ne pokušavajte sami rastavljati ili popravljati uređaj. Za servis se obratite kvalifikovanom osoblju.
- Držite uređaj dalje od vode i prekomjerne vlage.
- Baterije odložite u skladu sa lokalnim propisima.
- This device includes a child lock feature for safety.
3. Sadržaj paketa
Provjerite da li su sve stavke prisutne u paketu:
- 1 x Thermostatic Valve
- 9 x Installation Accessories (various adapters and rings)
- 1 x vijak
- 1 x matica
- 1 x Korisnički priručnik (ovaj dokument)
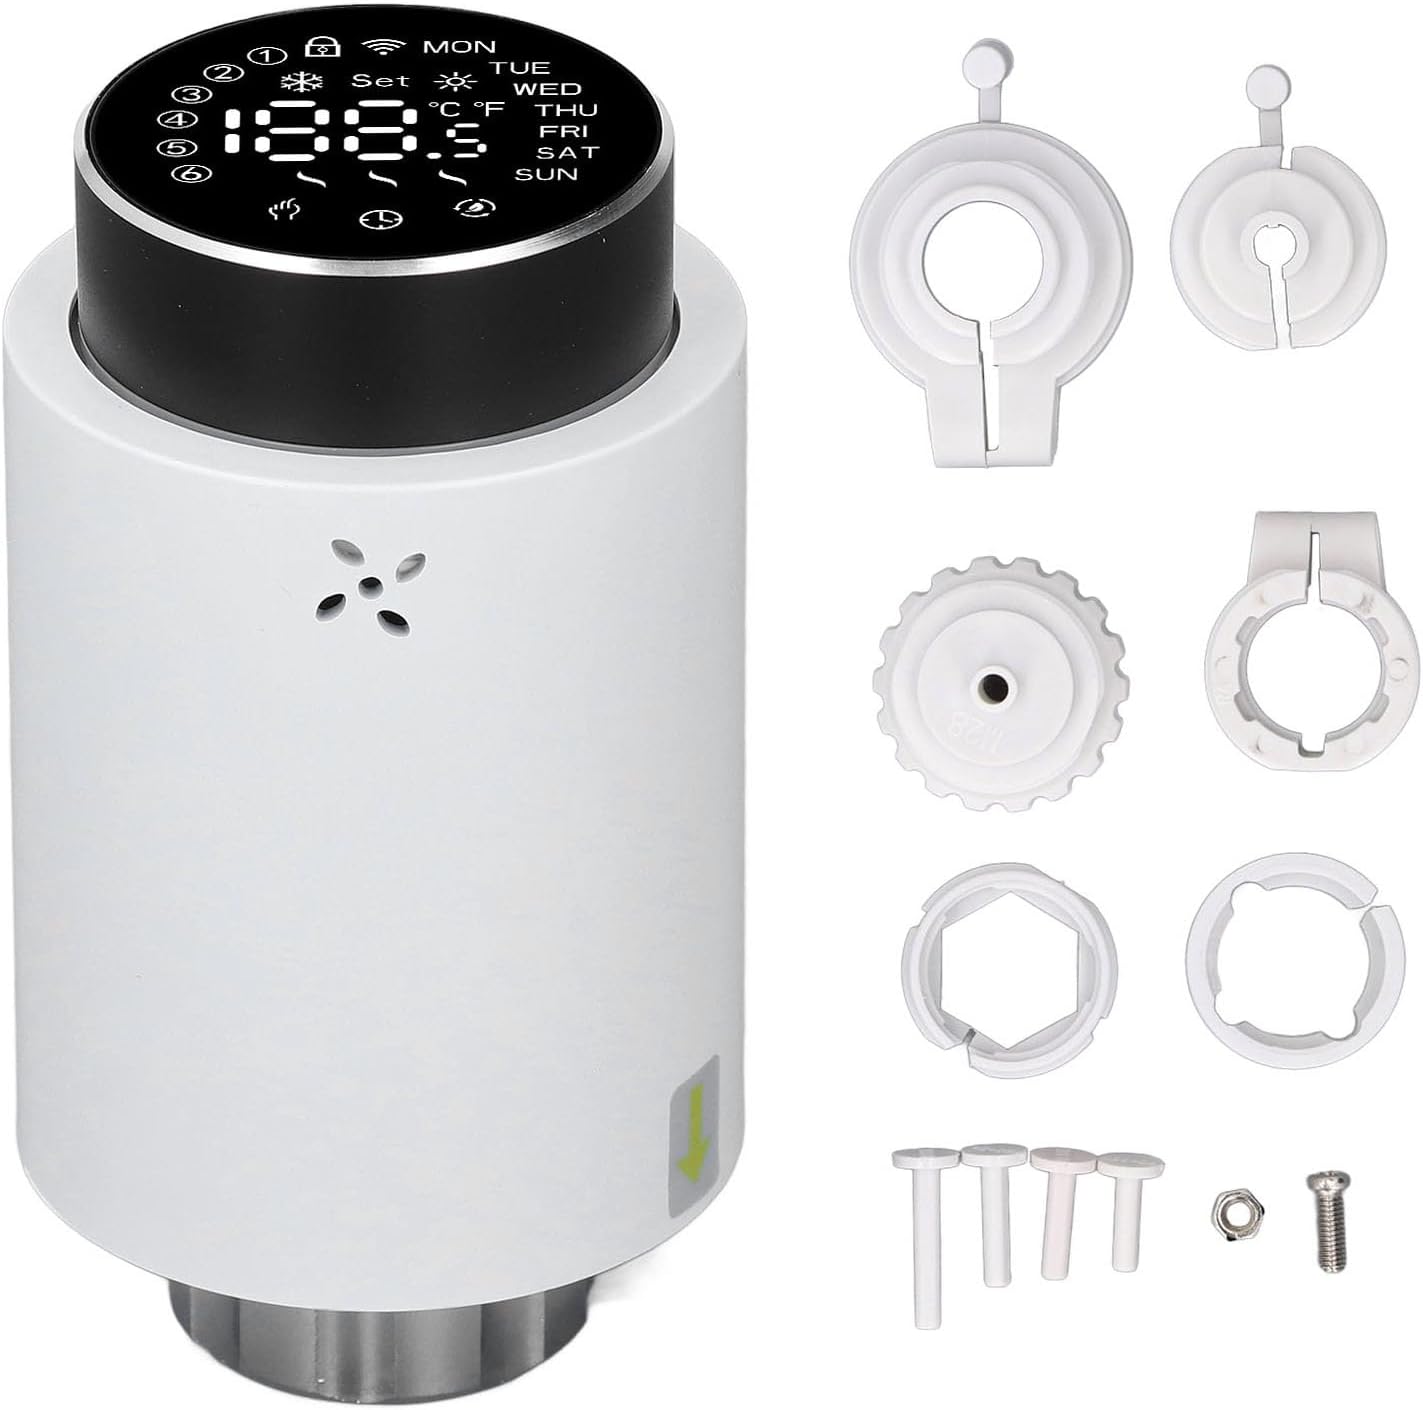
Image 3.1: The Fdit Thermostatic Valve shown with its complete set of installation accessories, including various adapters, rings, a screw, and a nut.
4. Proizvod je gotovview
The Fdit Programmable Thermostatic Heating Valve features a clear LED display and a rotary knob for easy temperature adjustment and mode selection. It is designed for seamless integration with existing heating systems.

Slika 4.1: Prednja strana view of the thermostatic valve, highlighting the LED display which shows current temperature, day of the week, and various status icons.

Image 4.2: A detailed close-up of the valve's LED display, clearly showing temperature readings in both Celsius and Fahrenheit, along with day indicators (MON, TUE, WED, THU, FRI, SAT, SUN) and various operational icons.
5. Instalacija
The Fdit Thermostatic Valve is designed for easy installation and is compatible with all common valves. No drainage or intervention in your heating system is required.
- Pripremite ventil: Ensure your existing radiator valve is in the fully open position.
- Uklonite staru glavu (ako je primjenjivo): If replacing an existing thermostatic head, carefully unscrew and remove it.
- Odaberite adapter: Choose the appropriate installation accessory (adapter) from the included set that matches your existing valve body.
- Pričvrstite adapter: Securely attach the selected adapter to the valve body.
- Mount Thermostatic Valve: Align the Fdit Thermostatic Valve with the adapter and screw it on until it is firmly in place. Ensure a snug fit without overtightening.
- Umetnite baterije: Open the battery compartment and insert 2 x AA batteries (not included), observing polarity.

Slika 5.1: Donji dio view of the thermostatic valve, illustrating the threaded connection mechanism used for attachment to the radiator valve body.
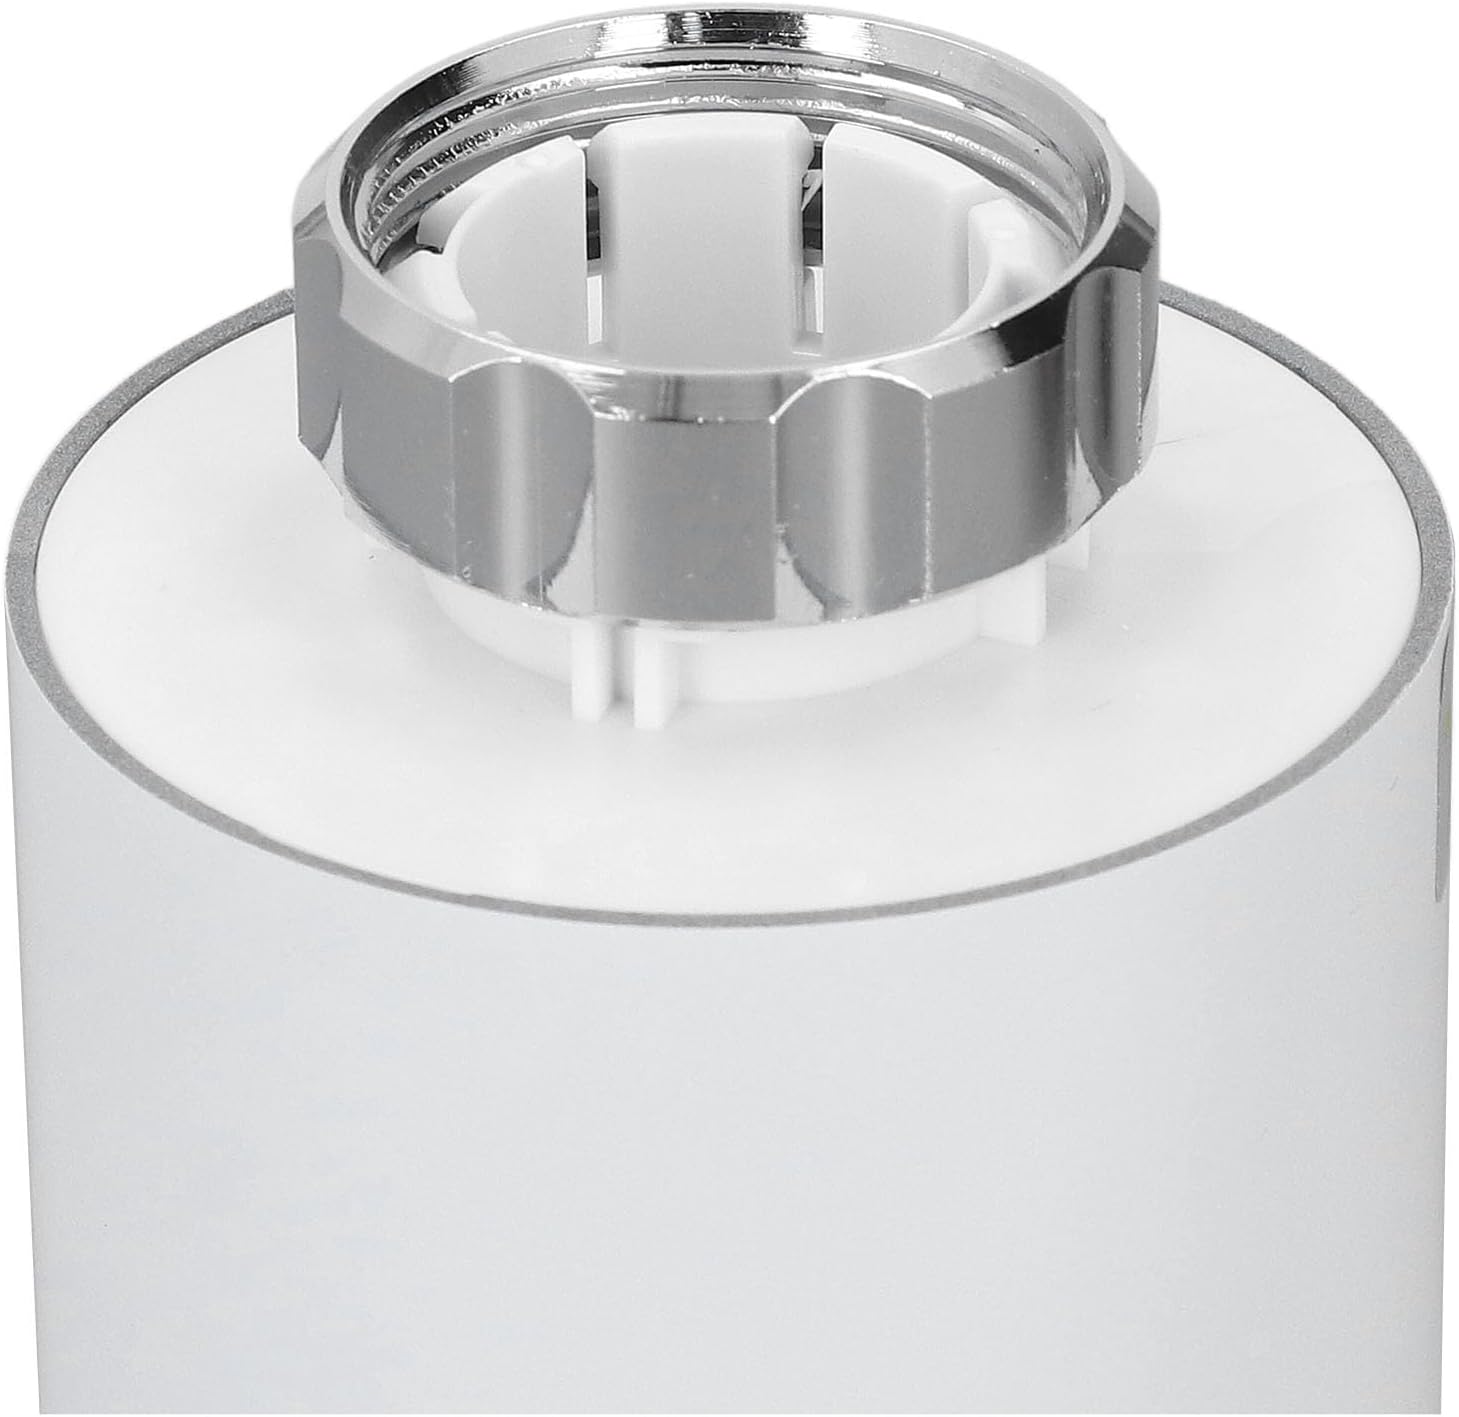
Slika 5.2: Krupni plan view of the valve's connection point, showing the internal structure and the metal ring for securing it to the radiator valve.
6. Uputstvo za upotrebu
The Fdit Thermostatic Valve offers both manual and smart control options for optimal temperature management.
6.1. Ručna kontrola
Rotate the knob button on the top of the valve to manually adjust the desired temperature. The LED screen will display the set temperature.

Image 6.1: Close-up of the top rotary knob, used for manual temperature adjustments and menu navigation.
6.2. Smart Control (App & Voice)
Control the valve remotely using the application for Tuya and for Smart Life. The device also supports voice control for hands-free operation. Refer to the respective app's instructions for pairing and advanced settings.
6.3. Temperature Range & Quick Heating
The valve can adjust environmental temperatures between 5℃ and 45℃. Utilize the additional heating function for quick warmth, achieving desired temperatures within five minutes. The specially designed engine operates below 25 decibels for a quiet environment.
7. Održavanje
7.1. Zamjena baterije
The device is powered by 2 x AA batteries. When the battery indicator appears on the display, replace the batteries promptly to ensure continuous operation. Open the battery compartment, remove old batteries, and insert new ones, ensuring correct polarity.
7.2. Čišćenje
Wipe the exterior of the valve with a soft, dry cloth. Do not use abrasive cleaners or solvents, as these may damage the surface or internal components.
8. Otkrivanje problema
- Uređaj ne reaguje: Check battery levels and replace if necessary. Ensure the valve is securely attached to the radiator.
- Netačno očitavanje temperature: Verify the sensor is not obstructed. Allow some time for the device to stabilize after initial setup.
- Problemi s povezivanjem aplikacije: Ensure your smartphone is connected to the internet and the valve is within range of your Wi-Fi network (if applicable, for 3.0 hub). Restart the app and the valve if problems persist.
- Grijanje se ne aktivira: Confirm the set temperature is higher than the current room temperature. Check if the valve is in manual or automatic mode and adjust as needed.
9. Specifikacije
| Tip | Termostatski ventil |
| Materijal | ABS, PC |
| Napajanje | 3V, 2 x AA batteries (not included) |
| Maximum Drive | Approx. 5.5 mm / 0.22 in |
| Preciznost | ± 0.5 ℃ |
| Established Temperature Range | 5-45 ℃ / 41-113 ℉ |
| Visualization Temperature Range | 0-70 ℃ / 32-158 ℉ |
| Radna temperatura | 0-45 ℃ / 32-113 ℉ |
| Operativna vlažnost | 5-95% RH (bez kondenzacije) |
| Temperatura skladištenja | -10-85 ℃ / 14-185 ℉ |
| Time Error | < 1% |
| Sigurnosni nivo | IP 20 |
| Dugme | Gumb dugmeta |
| Aplikacija | For Tuya and for Smart Life application |
| Povezivanje | For Zigbee 3.0, requires Hub (hub not included) |
10. Garancija i podrška
For warranty information, technical support, or service inquiries, please contact the seller or manufacturer directly. Retain your proof of purchase for warranty claims. You can visit the Fdit Store for more information: Fdit Store.