1. Uvod
Thank you for choosing the navycrest A2Pro 4K & 5G WiFi Dash Cam. This device is designed to provide comprehensive front and rear vehicle recording, ensuring your safety and peace of mind on the road. Featuring 4K front recording, 5G WiFi connectivity, and 24/7 parking monitoring with the included hardwire kit, the A2Pro offers advanced functionality for reliable vehicle surveillance. Please read this manual thoroughly before operation to ensure proper installation and usage.
2. Šta se nalazi u kutiji
Pažljivo raspakujte sve komponente i provjerite ih na donjoj listi:
- A2Pro Front Dash Camera
- Zadnja kamera
- Hardwire Kit (Type C)
- Nosač usisne čaše
- Memorijska kartica od 64 GB
- Installation Tools (Fuse Taps)

Image: All components included in the A2Pro Dash Cam bundle.
3. Proizvod je gotovview
Familiarize yourself with the main parts of your A2Pro Dash Cam system:
- Front Camera Unit: Main recording unit with 4K lens, 3-inch IPS display, and control buttons.
- stražnja kamera: Connects to the main unit for 2.5K rear recording.
- Nosač usisne čaše: For secure attachment of the front camera to the windshield.
- Hardwire Kit: Enables 24/7 parking mode by connecting directly to your vehicle's fuse box.
- Utor za memorijsku karticu: Supports up to 64GB (included) for video storage.

Image: Front dash camera, rear camera, and a representation of the smartphone application interface.
4. Postavljanje i instalacija
4.1. Installing the Front Dash Camera
- Očistite područje vjetrobranskog stakla na koje namjeravate montirati kameru za automobil.
- Attach the suction cup mount to the front camera.
- Čvrsto pritisnite vakuumsku čašicu na vjetrobransko staklo i zaključajte je na mjestu.
- Podesite ugao kamere kako biste osigurali jasan view puta ispred nas.
- Insert the 64GB memory card into the designated slot until it clicks.
4.2. Ugradnja zadnje kamere
- Identify a suitable location on your rear windshield, ensuring a clear view.
- Temeljno očistite montažnu površinu.
- Pričvrstite zadnju kameru pomoću njene ljepljive podloge.
- Route the rear camera cable to the front dash camera, tucking it neatly along the vehicle's headliner and A-pillars.
- Connect the rear camera cable to the dedicated port on the front dash camera.
4.3. Hardwire Kit Installation for 24/7 Parking Mode
The included Type C Hardwire Kit is essential for enabling the 24/7 Parking Mode feature. This kit connects directly to your vehicle's fuse box to provide continuous power even when the engine is off.
- Pronađite kutiju s osiguračima u vašem vozilu (pogledajte priručnik za vlasnika vašeg vozila).
- Identify a constant power fuse (B+) and an ACC (Accessory) fuse that powers on/off with the ignition.
- Using the provided fuse taps, connect the red wire (B+) of the hardwire kit to the constant power fuse and the yellow wire (ACC) to the accessory fuse.
- Connect the black wire (GND) to a metal bolt or screw on the vehicle's chassis for grounding.
- Route the Type C connector cable from the hardwire kit to the front dash camera and plug it into the Type C power input port.
- Ensure all connections are secure and cables are neatly tucked away to avoid interference with driving.
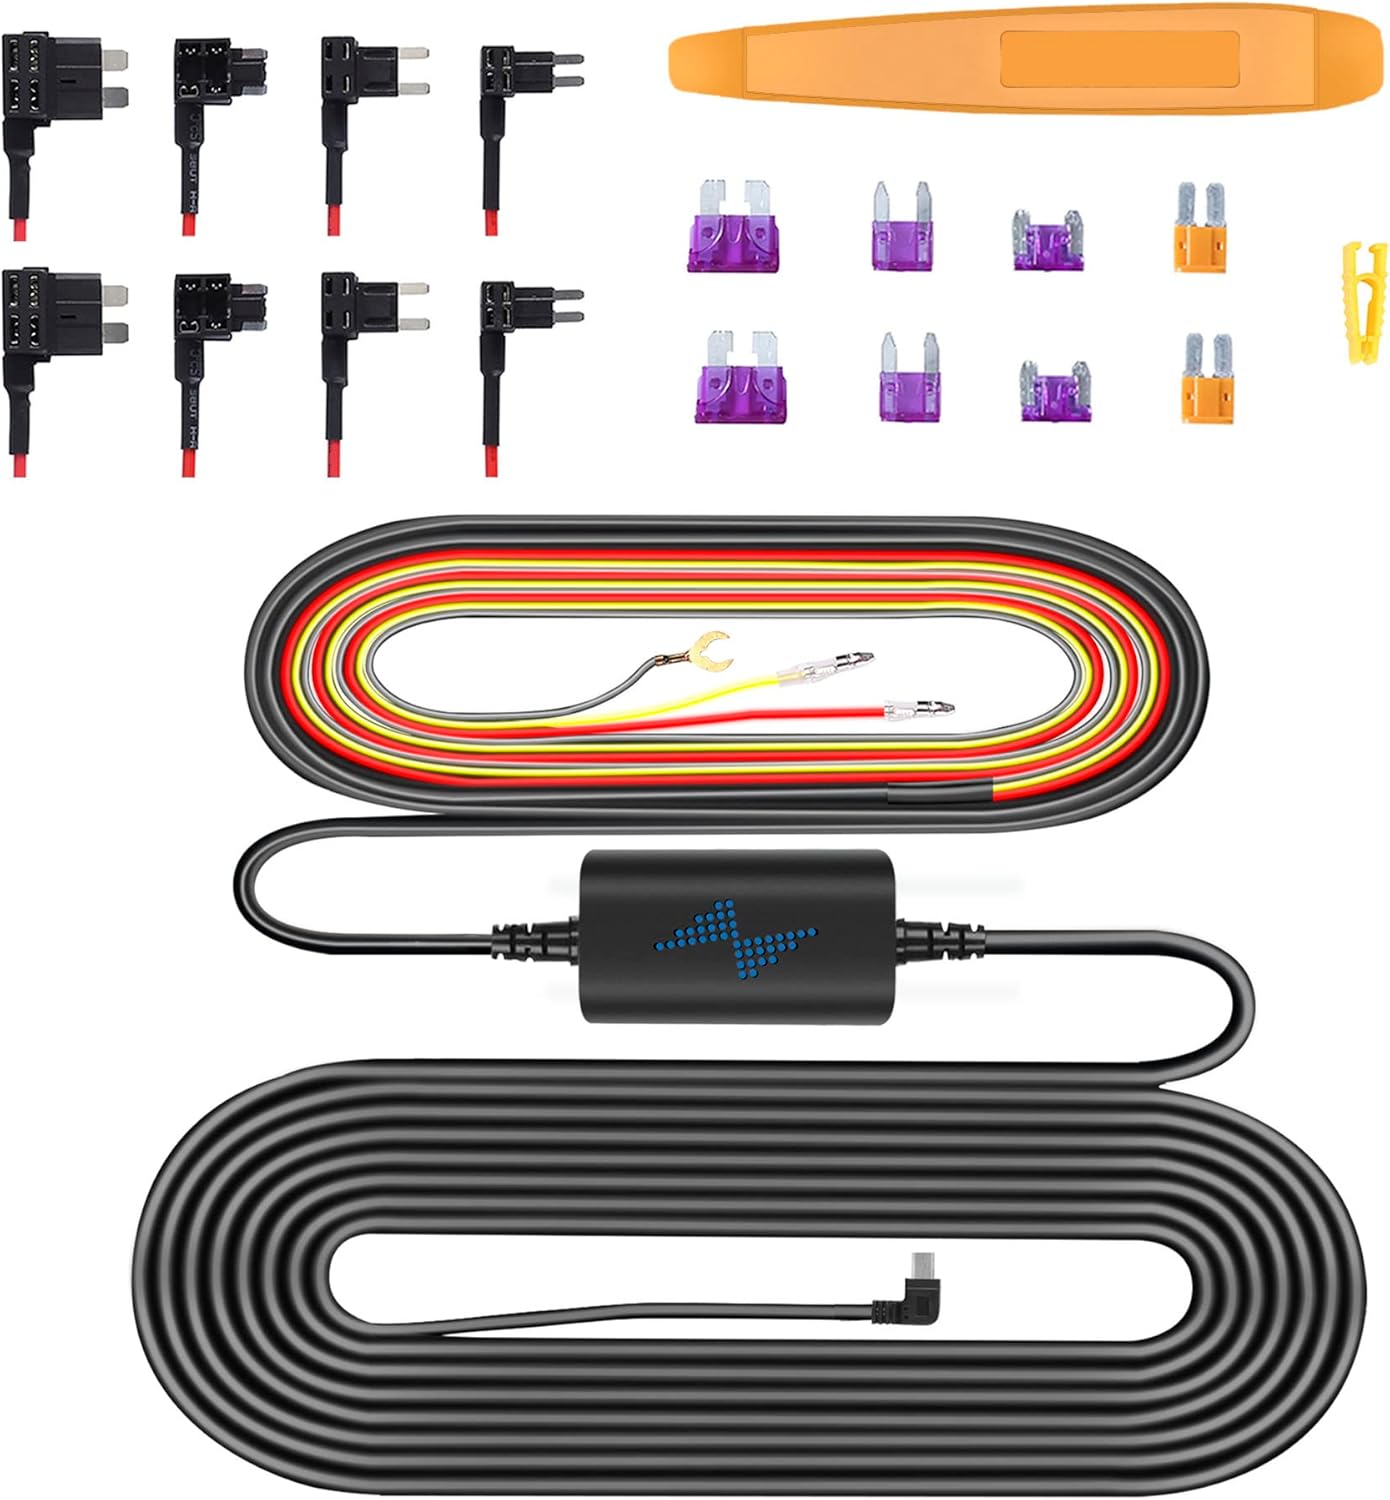
Image: Components of the Type C Hardwire Kit, including various fuse taps for different vehicle types.
5. Uputstvo za upotrebu
5.1. Uključivanje / isključivanje napajanja
- Uključeno: The dash cam will automatically power on and begin recording when connected to a power source and the vehicle's ignition is turned on.
- Iskljuciti: The dash cam will automatically power off shortly after the vehicle's ignition is turned off.
5.2. Osnovno snimanje
- Snimanje u petlji: Kamera za automobil kontinuirano snima video u kratkim segmentima (npr. 1, 3 ili 5 minuta). Kada se memorijska kartica napuni, automatski prepisuje najstariji otključani snimak.tage.
- Snimanje u hitnim slučajevima (G-senzor): In the event of a sudden impact or collision, the built-in G-sensor will automatically detect the event and lock the current video segment, preventing it from being overwritten by loop recording.
5.3. Wi-Fi Connectivity and App Usage
The A2Pro features 5G WiFi for fast connection to your smartphone. Download the dedicated app (refer to the packaging or quick start guide for app name) from your app store.
- Enable Wi-Fi on your dash cam via the settings menu.
- Na pametnom telefonu se povežite s Wi-Fi mrežom kamere za automobil (SSID i lozinka će biti prikazani na ekranu kamere za automobil).
- Otvorite aplikaciju za view live footage, reprodukcija snimljenih videa, preuzimanje filena telefon i prilagodite postavke kamere.
5.4. 24/7 Parking Mode
With the hardwire kit properly installed, the dash cam can monitor your vehicle even when parked. This mode activates when the vehicle's ignition is off.
- Detekcija pokreta: The camera will start recording if it detects motion around your vehicle.
- Detekcija uticaja: If an impact is detected while parked, the camera will automatically record and lock the footage.
- Ubrzano snimanje: Some parking modes offer time-lapse recording, compressing long periods into short videos.

Image: Visual representation of the 24/7 Parking Mode feature, showing the dash cam monitoring a parked vehicle for suspicious events.
6. Održavanje
- Formatiranje memorijske kartice: It is recommended to format the memory card regularly (e.g., once a month) to ensure optimal performance and prevent data corruption. This can be done through the dash cam's settings menu.
- Čišćenje sočiva i ekrana: Use a soft, lint-free cloth to gently wipe the camera lenses and LCD screen. Avoid using abrasive cleaners or solvents.
- Ažuriranja firmvera: Provjerite proizvođača webPeriodično provjeravajte stranicu za ažuriranja firmvera kako biste osigurali da vaša kamera za automobil ima najnovije funkcije i ispravke grešaka.
7. Otkrivanje problema
| Problem | Moguće rješenje |
|---|---|
| Kamera za automobil se ne uključuje. | Check power connection. Ensure the vehicle's ignition is on (if not using hardwire kit). Verify hardwire kit connections if applicable. |
| Snimanje se zaustavlja ili zamrzava. | Format the memory card. Try a different, high-speed (Class 10 or U3) memory card. |
| Problemi s Wi-Fi vezom. | Ensure Wi-Fi is enabled on the dash cam. Restart both the dash cam and your smartphone. Check Wi-Fi password. |
| Režim parkiranja ne radi. | Verify hardwire kit installation and connections. Ensure parking mode is enabled in settings. |
| Loš kvalitet videa. | Clean the camera lenses. Ensure the protective film is removed from the lenses. Check resolution settings. |
8. Specifikacije
| Feature | Detalj |
|---|---|
| Naziv modela | A2Pro |
| Brand | navycrest |
| Rezolucija video snimanja | 4K (Front) + 2.5K (Rear) |
| Tehnologija povezivanja | Wi-Fi (5G) |
| Display Type | LCD |
| Vrsta montaže | Nosač za kontrolnu ploču (vakuumska čašica) |
| Uključene komponente | Memory Card, Suction Cup, Hardwire Kit |
| Vrsta usluge vozila | Auto |
9. Garancija i podrška
For product support, technical assistance, or warranty inquiries, please contact navycrest customer service. Refer to the product packaging or the official navycrest webstranicu za najnovije kontakt informacije.
Molimo sačuvajte svoj dokaz o kupovini za zahtjeve u vezi s garancijom.


