1. Uvod
The PGST Home Security Alarm System provides a comprehensive and customizable solution for protecting your property. This DIY system features a 4.3-inch color IPS touch screen for intuitive operation, supporting both Wi-Fi and 2G/3G/4G cellular networks for reliable communication. It is designed for easy installation and offers continuous updates without requiring monthly fees. The system is compatible with various accessories, including motion detectors, door/window sensors, wireless sirens, remote controls, and RFID tags, allowing you to tailor it to your specific security needs.
2. Sadržaj paketa
The 24-piece PGST Home Security Alarm Kit typically includes the following components:
- 1 x Main Control Panel (Host)
- 5 x Infrared Motion Detectors
- 10 x Door/Window Contact Sensors
- 3 x daljinski upravljači
- 1 x SOS Button
- 3 x RFID Tags
- 1 x Wireless Siren
- Power Adapter and Mounting Hardware
Slika 2.1: Gotovoview of the 24-piece PGST Home Alarm Kit components.
3. Sistem je završenview - Main Control Panel
The central unit of your PGST alarm system features a 4.3-inch full-color IPS capacitive touch screen for easy navigation and control. The main interface displays real-time status, date, and time. It supports multiple languages and provides voice operation and SMS alerts. The panel also includes an SOS button and an RFID reader for quick arming/disarming.
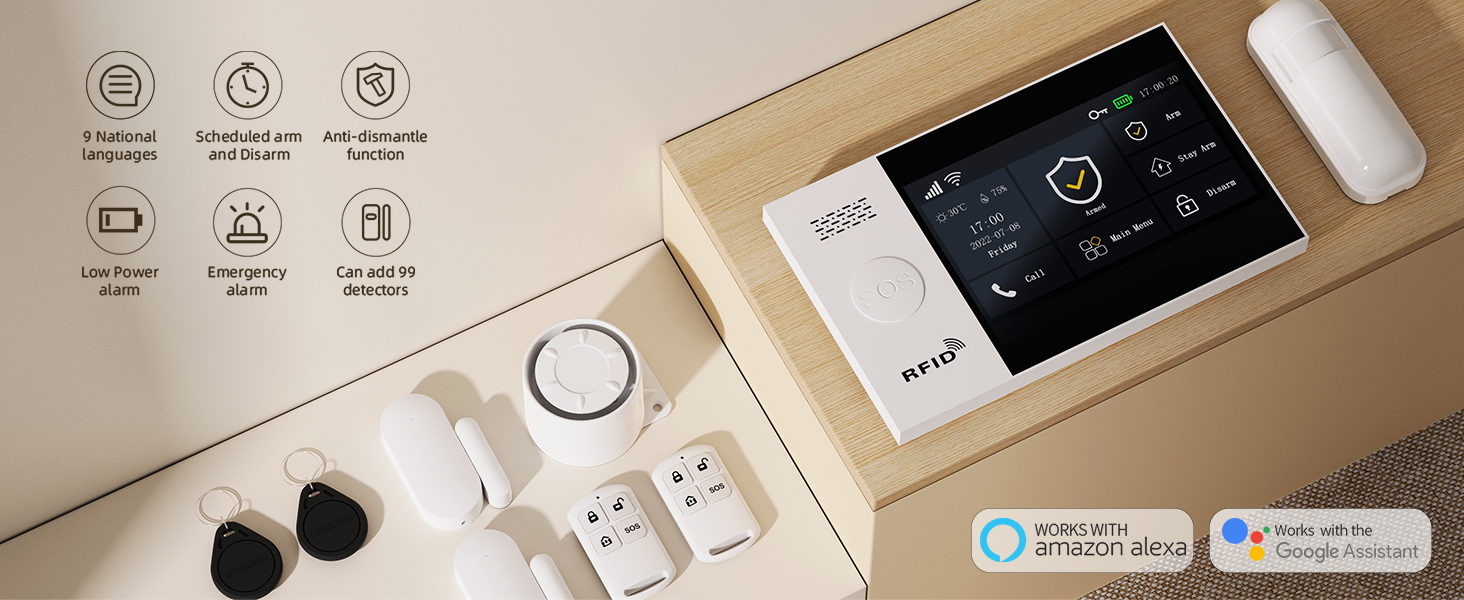
Figure 3.1: The PGST alarm system's main control panel with its 4.3-inch touchscreen.
4. Početno podešavanje
4.1 Uključivanje
Connect the main control panel to a power outlet using the provided adapter. The system will power on automatically. Ensure the internal battery is charged for backup power.
4.2 Network Connection (Wi-Fi & Cellular)
The system supports 2.4GHz Wi-Fi (5G Wi-Fi is not supported) and 2G/3G/4G cellular networks. For cellular functionality (phone calls and SMS alerts), insert a compatible SIM card (not included) into the designated slot on the main panel. Even without a SIM card, you can receive app notifications via Wi-Fi.

Figure 4.1: The alarm system supports both 2.4GHz Wi-Fi and 4G/GSM cellular networks for comprehensive connectivity.
5. Accessory Pairing
To integrate sensors and remote controls with your alarm system, follow the general pairing steps outlined below. The system can support up to 100 sensors and 2 wired sensors.
5.1 General Pairing Process
Navigate to the 'Sensor' menu on the main control panel. Select the type of accessory you wish to pair (e.g., Remote, Sensor, RFID). Press the '+' icon to initiate the learning mode. Activate the accessory (e.g., press a button on the remote, tap an RFID card, trigger a sensor) within the countdown period. The panel will confirm successful pairing.
Video 5.1: This video demonstrates the process of connecting various accessories, including remote controls, RFID cards, infrared motion sensors, door magnetic sensors, and smoke alarms, to the PGST alarm system.
5.2 Uparivanje daljinskog upravljača
From the 'Sensor' menu, select 'Remote'. Press '+' and then press any button on your remote control to pair it with the system. The system will confirm 'Learning OK'.
5.3 RFID Card Pairing
From the 'Sensor' menu, select 'RFID'. Press '+' and then tap the RFID card against the RFID reader area on the main control panel. The system will confirm 'Learning OK'.
5.4 Motion Sensor (Infrared) Pairing
Ensure the infrared sensor is powered on. From the 'Sensor' menu, select 'Sensor'. Press '+' and then trigger the motion sensor by moving in front of it. The system will confirm 'Learning OK'.

Figure 5.1: The motion sensor provides a 32ft (10m) detection range with a 110-degree field of view.
5.5 Door/Window Contact Sensor Pairing
Ensure the door/window sensor is powered on. From the 'Sensor' menu, select 'Sensor'. Press '+' and then separate the two parts of the door/window sensor to trigger it. The system will confirm 'Learning OK'.

Figure 5.2: Door and window contact sensors are designed for real-time monitoring and easy installation.
6. Rad sistema
6.1 Aktiviranje i deaktiviranje
The system can be armed or disarmed using the remote control, RFID card, mobile app, or directly via the touch screen keypad. The main screen displays the current arming status (Armed, Disarmed, Stay Arm).
- ruka: Activates all sensors for full protection.
- razoružati: Deaktivira sve senzore.
- Stay Arm: Activates perimeter sensors (e.g., door/window sensors) while allowing free movement within the property.

Figure 6.1: Remote control for quick arming, disarming, and SOS activation.

Figure 6.2: RFID tags offer a code-free method for changing the system's status.
6.2 SOS funkcija
In an emergency, press the SOS button on the main panel or the remote control. The system will immediately trigger an alarm and send alerts to pre-programmed contacts.

Figure 6.3: The SOS button provides immediate emergency alerts.
6.3 Setting Keypad Lock Password
You can set a user password for the keypad lock to prevent unauthorized access. Navigate to Menu > Settings > Password > User and enter your desired password. Once set, the alarm can only be stopped by entering the correct password when the screen lock is active.
Video 6.1: This video demonstrates how to set and manage the keypad lock password on the PGST alarm system.
6.4 Glasovno upravljanje (kompatibilno s Alexom)
The PGST alarm system is compatible with Amazon Alexa. Once integrated, you can use voice commands to arm or disarm your system. Refer to the mobile app for detailed instructions on connecting with Alexa.

Figure 6.4: Control your alarm system hands-free using voice commands with Alexa.
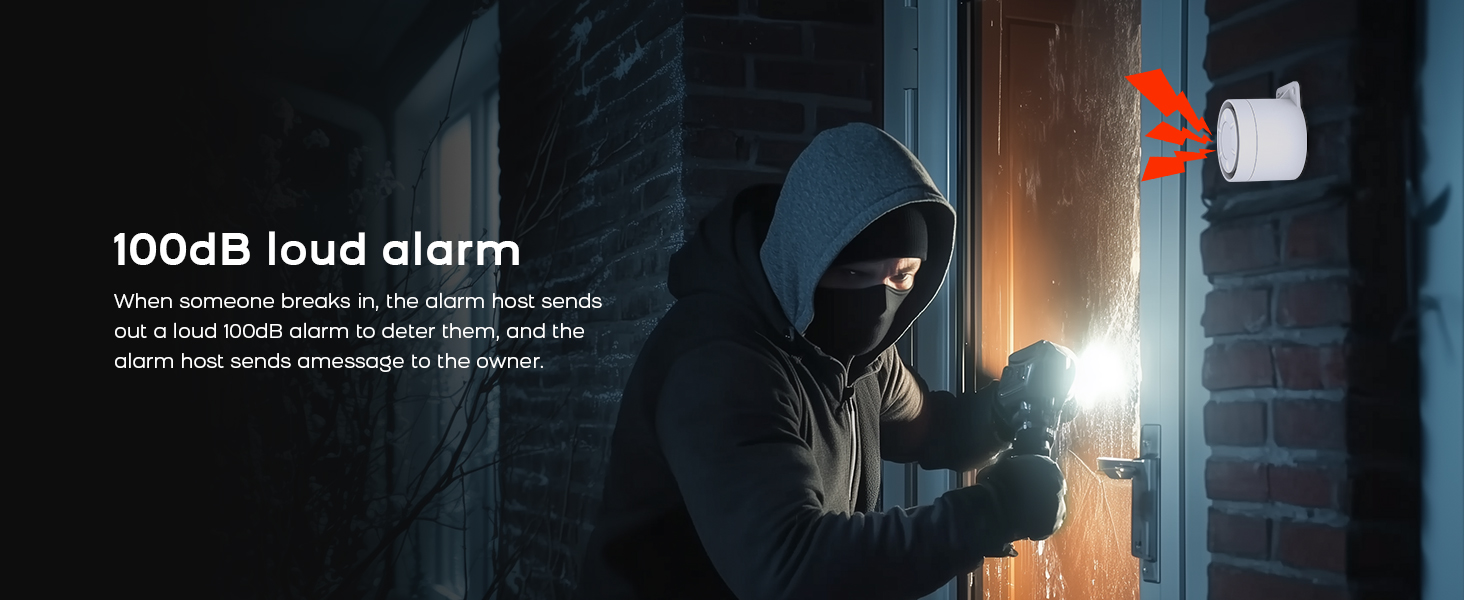
6.5 Obavještenja o upozorenjima
When an alarm is triggered, the system will activate a 100dB siren and send instant push alerts to your smartphone via the app. If a SIM card is installed, it can also send SMS messages and make phone calls to pre-set numbers.

Figure 6.5: The system provides immediate alerts via app, SMS, and phone calls upon detecting an intrusion.
7. Sensor Placement Guidelines
7.1 Motion Sensors
Install motion sensors in areas where intruders are likely to pass. Optimal installation height is between 1.8 to 2.2 meters (approximately 5.9 to 7.2 feet) for effective detection. Avoid placing them directly facing heat sources or windows where direct sunlight or strong drafts might cause false alarms.

Figure 7.1: Motion sensors provide instant alerts and 24/7 protection when movement is detected.
7.2 Door/Window Contact Sensors
Install these sensors on doors, windows, cupboards, or any entry points. They monitor the open/closed status in real-time. When a protected entry is opened while the system is armed, it triggers an alarm. These sensors can also be used to prevent children from leaving the house unnoticed.

Figure 7.2: Door/window sensors can be installed on various entry points for comprehensive coverage.
8. Napredne funkcije
8.1 Višejezična podrška
The system supports multiple languages, including English, Italian, Polish, Spanish, Russian, Greek, German, French, Portuguese, Chinese, and Romanian, allowing users to operate it in their preferred language.

Figure 8.1: The system offers multi-language support for a diverse user base.
8.2 Independent Zone Settings
Configure independent delay alarms and arming settings for different zones within your property. This allows for customized security protocols based on specific areas or times.
8.3 Anti-Tamper Funkcija
The main control panel is equipped with a physical anti-tamper mechanism. Any forced removal of the unit will trigger an immediate alarm, enhancing the system's security against unauthorized interference.
9. Održavanje
9.1 Informacije o bateriji
The main control panel includes a Lithium Ion battery for backup power during outages. Sensors are typically battery-powered. Refer to individual sensor manuals for specific battery types and replacement instructions. Ensure batteries are replaced promptly when low battery alerts are received.
9.2 Čišćenje
Clean the control panel and sensors with a soft, dry cloth. Avoid using abrasive cleaners or solvents that could damage the surfaces or internal components.
10. Otkrivanje problema
10.1 No Wi-Fi Connectivity
If Wi-Fi is unavailable, the alarm system retains all its functions and can still send alerts to your phone using a cellular SIM card (if installed). Ensure your Wi-Fi network is 2.4GHz, as 5G networks are not supported.
10.2 Senzor se ne aktivira
Check the sensor's battery level. Ensure the sensor is correctly paired with the main control panel. Verify that the sensor is placed within the system's effective range and that there are no obstructions interfering with its operation.
10.3 Lažni alarmi
Review sensor placement to ensure they are not triggered by pets, drafts, or direct sunlight. Adjust sensitivity settings if available. Ensure all doors and windows are properly closed when arming the system.
11. Specifikacije
| Brand | PGST |
| Broj modela | PG107-4GUS-F |
| Izvor napajanja | Napajanje baterijama (litijum-jonska uključena) |
| Kompatibilni uređaji | Smartphone |
| Dimenzije artikla (D x Š x V) | 2.4 x 1.9 x 1.8 inča |
| Tehnologija povezivanja | Wireless (2.4GHz Wi-Fi, 2G/3G/4G) |
| Vrsta instalacije | Samoljepljiva |
| Vrsta upozorenja | Motion, Door/Window Open, Fire, SOS |
| Težina artikla | 1.76 funti (0.8 kilograma) |
| Kontrolni metod | Aplikacija, dodir, glas |
| Materijal | PVC |
12. Garancija i podrška
PGST offers lifetime technical support for its products. For any questions, troubleshooting assistance, or warranty claims, please contact PGST customer service through the official channels provided with your product or on the PGST website.


