1. Uvod
This manual provides detailed instructions for the installation, operation, and maintenance of your Xigmatek Aqua V AIR Arctic Mid-Tower PC Case. Please read this manual thoroughly before beginning any installation to ensure proper setup and safe operation. Retain this manual for future reference.
2. Sigurnosne informacije
Pridržavajte se sljedećih sigurnosnih mjera opreza tokom instalacije i rada:
- Uvijek isključite napajanje iz zidne utičnice prije instaliranja ili uklanjanja bilo kakvih komponenti.
- Nosite antistatičku narukvicu kako biste spriječili oštećenje osjetljivih komponenti uzrokovano elektrostatičkim pražnjenjem (ESD).
- Handle components carefully. Avoid touching pins or circuit boards directly.
- Osigurajte odgovarajuću ventilaciju oko kućišta računara kako biste spriječili pregrijavanje.
- Držite male dijelove i alat podalje od djece.
- Do not attempt to modify the case or its components, as this may void your warranty and pose safety risks.
3. Sadržaj paketa
Provjerite da li su sve stavke prisutne u paketu:
- Xigmatek Aqua V AIR Arctic Mid-Tower PC Case
- Komplet dodatne opreme (vijci, odstojnici, vezice za kablove)
- Korisnički priručnik (ovaj dokument)
If any items are missing or damaged, contact your retailer or Xigmatek support.
4. Proizvod je gotovview
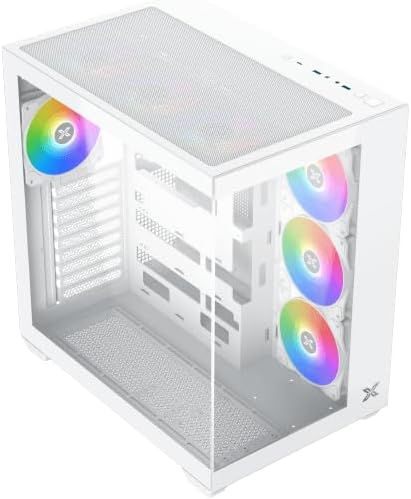
The Xigmatek Aqua V AIR Arctic is a mid-tower PC case designed for high-performance gaming configurations. It features tempered glass panels for component visibility and optimized airflow with pre-installed ARGB fans.

Slika 4.1: Naprijed lijevo view of the Xigmatek Aqua V AIR Arctic PC case, showcasing the tempered glass front and side panels, and the pre-installed ARGB fans.

Slika 4.2: Pozadi view of the PC case, showing the I/O shield cutout, expansion slots, and rear fan mount.
Slika 4.3: Ugao od vrha prema dolje view, highlighting the top mesh panel for additional cooling and the internal layout.
5. Postavljanje i instalacija
Follow these steps to install your PC components into the Xigmatek Aqua V AIR Arctic case.
5.1. Priprema slučaja
- Postavite kućište na ravnu, stabilnu površinu.
- Uklonite bočnu ploču od kaljenog stakla odvrtanjem vijaka s palcem na stražnjoj strani i pažljivim skidanjem. Postavite je na meku, neabrazivnu površinu kako biste spriječili ogrebotine.
- Remove the opposite steel side panel by unscrewing the thumb screws and sliding it off.
5.2. Instalacija matične ploče
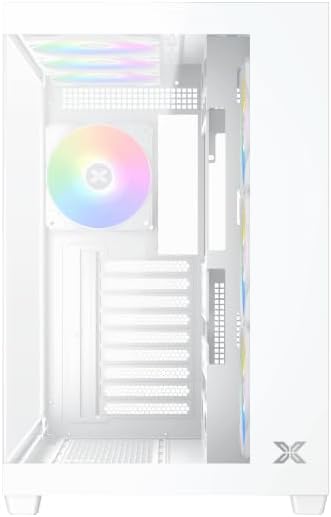
Slika 5.1: Unutrašnjost view of the case, illustrating the motherboard mounting area and cable routing cutouts.
- Instalirajte I/O štitnik u izrez na stražnjoj strani kućišta.
- Align your motherboard with the pre-installed standoffs. Ensure the standoffs match your motherboard's form factor (ATX, Micro ATX).
- Secure the motherboard using the provided screws from the accessory kit. Do not overtighten.
5.3. Instalacija jedinice za napajanje (PSU)
- Locate the PSU mounting bracket at the bottom rear of the case.
- Slide your PSU into the designated compartment from the rear of the case.
- Secure the PSU to the case using the screws provided with your power supply.
5.4. Instalacija pogona za pohranu podataka
The case supports multiple storage drives:
- 2.5" SSD diskovi: Mount directly to the SSD trays located behind the motherboard tray. Secure with screws.
- 3.5" tvrdi diskovi: Install into the drive cage located beneath the PSU shroud. Slide the drive into the tray and secure with screws.
5.5. Instalacija grafičke kartice (GPU) i kartice za proširenje
- Uklonite potrebne poklopce slotova za proširenje na stražnjoj strani kućišta.
- Insert your graphics card or other expansion cards into the appropriate PCIe slots on the motherboard.
- Secure the cards with the provided screws.
5.6. Upravljanje kablovima

Slika 5.2: View behind the motherboard tray, illustrating the ample space and tie-down points for effective cable management.
Iskoristite izreze za usmjeravanje kablova i tačke za vezivanje iza ležišta matične ploče da biste organizovali kablove. Ovo poboljšava protok vazduha i estetiku.
- Connect all necessary power cables from the PSU to the motherboard, GPU, and storage drives.
- Connect front panel cables (USB, audio, power/reset switches, LED indicators) to the corresponding headers on your motherboard. Refer to your motherboard manual for specific header locations.
- Connect the ARGB fan cables to the integrated fan controller or directly to your motherboard's ARGB headers if available.
5.7. Fan and Radiator Support
The Xigmatek Aqua V AIR Arctic comes with 7 pre-installed 120mm ARGB fans. Additional cooling options are available:
- Prednji dio: Supports up to 3 x 120mm or 2 x 140mm fans / 240mm, 280mm, 360mm radiators.
- Vrh: Supports up to 3 x 120mm or 2 x 140mm fans / 240mm, 280mm, 360mm radiators.
- pozadi: Supports 1 x 120mm fan.
- dno: Podržava do 3 x 120 mm ventilatora.
Ensure proper fan orientation for optimal airflow (intake at front/bottom, exhaust at rear/top).
6. Operativni
Once all components are installed and cables are connected, replace the side panels. Connect your monitor, keyboard, mouse, and power cable. Press the power button on the front panel to start your system.
The pre-installed ARGB fans can be controlled via the integrated controller (if present) or through compatible motherboard software, allowing customization of lighting effects and fan speeds.
7. Održavanje
Redovno održavanje pomaže u osiguravanju optimalnih performansi i dugotrajnosti komponenti vašeg računara.
- Čišćenje prašine: Periodically clean dust filters (top, front, bottom) to maintain good airflow. Use compressed air to remove dust from inside the case and components.
- Eksterijerno čišćenje: Obrišite vanjske površine mekom krpom, damp krpom. Izbjegavajte abrazivna sredstva za čišćenje ili rastvarače.
- Provjera upravljanja kablovima: Occasionally check cable routing to ensure no cables are obstructing fans or airflow.
8. Otkrivanje problema
Ako naiđete na probleme, pogledajte sljedeće uobičajene korake za rješavanje problema:
- Sistem se ne uključuje:
- Provjerite je li napajanje uključeno i pravilno spojeno na zidnu utičnicu.
- Verify all power cables (24-pin ATX, 8-pin CPU, PCIe, SATA) are securely connected.
- Provjerite priključke prekidača za napajanje na prednjoj ploči na matičnoj ploči.
- Nema izlaza za prikaz:
- Ensure the monitor cable is connected to the graphics card (not the motherboard I/O if using a dedicated GPU).
- Ponovo instalirajte grafičku karticu i RAM module.
- Fans not spinning or ARGB not working:
- Provjerite priključke napajanja ventilatora na matičnu ploču ili kontroleru ventilatora.
- Verify ARGB connections to the controller or motherboard headers.
- Ensure any fan control software or BIOS settings are correctly configured.
For more complex issues, consult your component manuals or contact Xigmatek technical support.
9. Specifikacije
| Feature | Detalj |
|---|---|
| Naziv modela | Aqua V AIR Arctic |
| Broj modela | EN45837 |
| Tip slučaja | Mid-Tower |
| Kompatibilnost matične ploče | ATX, Micro ATX |
| Materijal | Steel Alloy, Tempered Glass |
| Boja | Bijelo |
| Unaprijed instalirani ventilatori | 7 x 120mm ARGB ventilatora |
| Maksimalna dužina GPU-a | 410 mm |
| USB portovi | 3 |
| Težina | 8.8 kilograma |
10. Garancija i podrška
Xigmatek products are manufactured to high quality standards. For warranty information, please refer to the warranty card included with your product or visit the official Xigmatek website. For technical support or inquiries, please contact Xigmatek customer service through their official channels.
Službeno Webstranica: www.xigmatek.com


