1. Uvod
This manual provides comprehensive instructions for the assembly, operation, maintenance, and troubleshooting of your VICTRIP Seeker S Electric Bike. Please read this manual thoroughly before your first ride to ensure safe and optimal performance.
The Seeker S Electric Bike features a 350W (Peak 540W) brushless motor, a 36V/9Ah UL2849-certified lithium-ion battery, 7-speed gears, and front suspension. Its step-thru frame design offers easy accessibility for riders of all ages and abilities, with a maximum load capacity of 330 lbs.
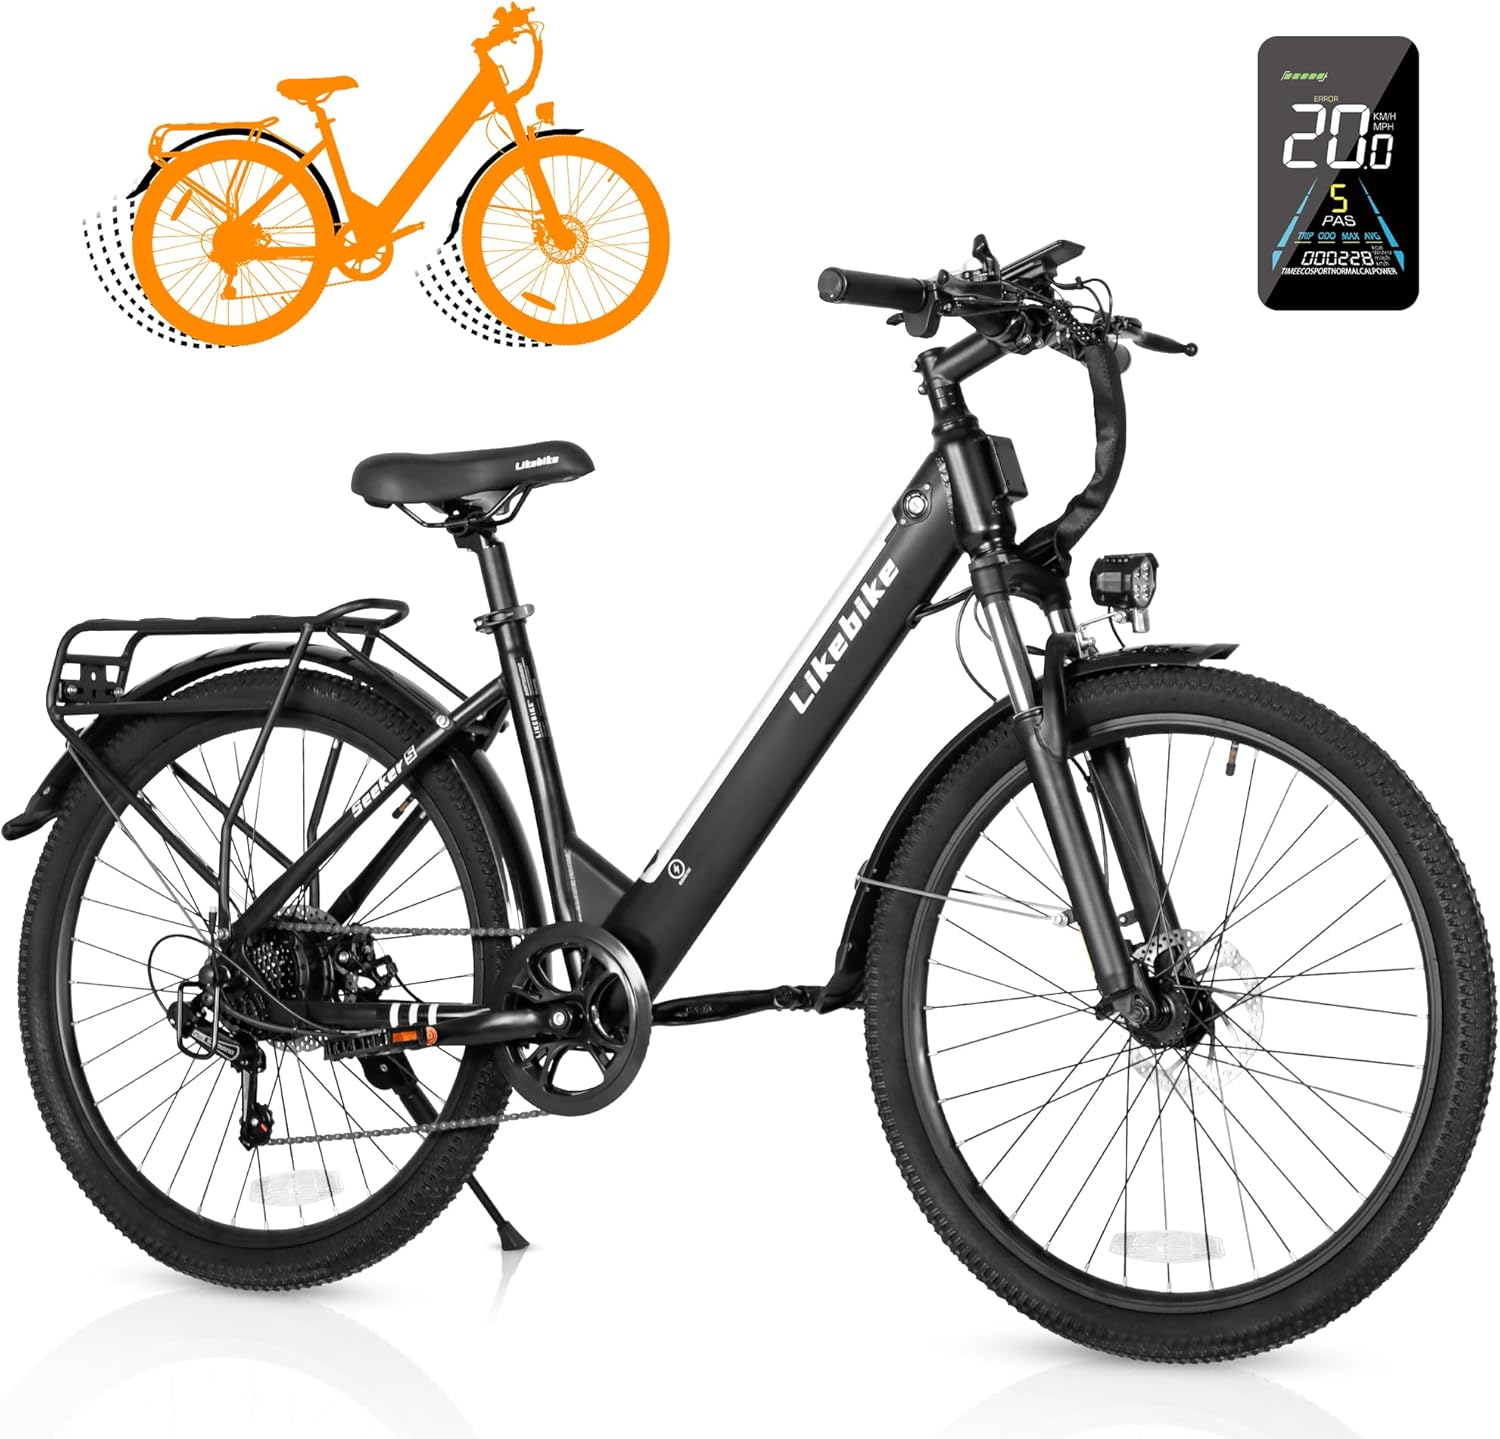
Figure 1: VICTRIP Seeker S Electric Bike overview.
2. Značajke proizvoda
- Dizajn okvira: Step-Thru design for easy mounting and dismounting. Net weight of 58 lbs, maximum load capacity of 330 lbs. Detachable semi-hidden 324Wh (9Ah) lithium-ion battery for improved water and dust resistance and anti-theft. Range of 15 miles (pure electric) or 35 miles (PAS).
- Powerful Riding Performance: 350W (Peak 540W) brushless motor with a max speed of 20 MPH. Features Pure Electric Mode, Pedal-Assist Mode, Walking Mode, and normal bike riding.
- Personalized Cycling: Colorful LCD display tracks riding data (current speed, mileage). Customizable speed levels. Bright headlight, flashable reflector, and electric horn for safety.
- Fleksibilna upravljivost: Lockable front suspension absorbs shocks. Front and rear power-off brakes for quick and safe stopping. 7-speed gear for quick climbing response.

Figure 2: Key features of the Seeker S Electric Bike including motor, display, speed, frame, and battery.
3. Postavljanje i montaža
Your VICTRIP Seeker S Electric Bike comes 85% pre-assembled. Follow these steps to complete the assembly. An installation tool set, manual, charger, electric bike body, and rechargeable battery are included.
3.1 Raspakivanje i početni pregled
Carefully open the packaging and remove all components. Inspect for any damage during transit. Ensure all parts listed in the manual are present.
Video 1: Seeker S Unboxing and Assembly Guide. This video demonstrates the complete assembly process from unboxing to final setup.
The assembly video provides a visual guide for the following steps:
3.2 Attaching the Kickstand
Locate the kickstand and its mounting bolts. Attach the kickstand to the designated area near the rear wheel, ensuring it is securely fastened.
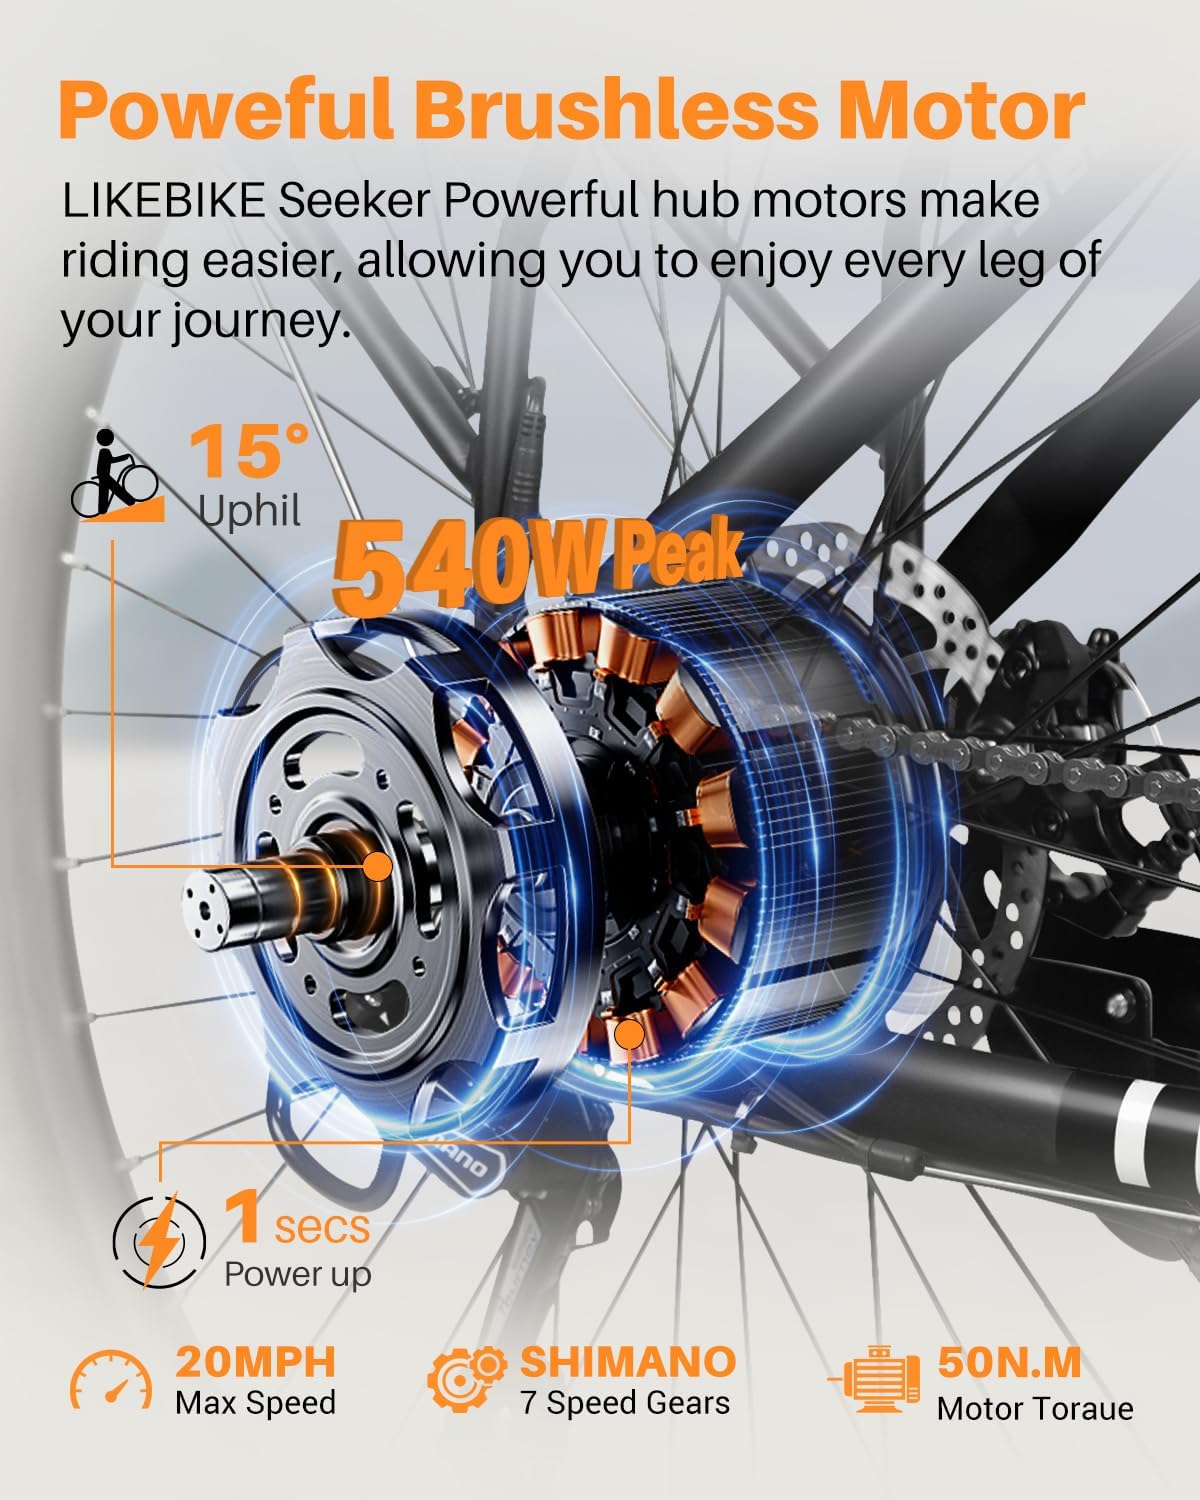
Figure 3: Installation of the kickstand on the bike frame.
3.3 Installing the Front Fork and Handlebars
Insert the front fork into the head tube of the bike frame. Ensure all bearings and spacers are correctly positioned. Then, attach the handlebars to the stem, aligning them properly before tightening the bolts.

Figure 4: Steps for installing the front fork and securing the handlebars.
3.4 Attaching Front Fender and Headlight
Mount the front fender to the front fork using the provided screws. Secure the headlight to its designated bracket on the front fork or handlebars, ensuring proper wiring connection.

Figure 5: Process of attaching the front fender and headlight for improved visibility and protection.
3.5 Instalacija prednjeg točka
Carefully insert the front wheel into the front fork dropouts, ensuring the brake rotor is correctly seated within the brake caliper. Secure the wheel with the quick-release skewer or axle nuts.

Figure 6: Steps for installing the front wheel, ensuring proper alignment with the brake system.
3.6 Attaching Rear Fender and Rear Rack
Mount the rear fender to the rear frame. Then, attach the rear cargo rack, securing it to the designated mounting points on the frame. Ensure all connections are tight and stable.

Figure 7: Process of attaching the rear fender and the rear cargo rack for carrying items.
3.7 Installing the Seat Post and Pedals
Insert the seat post into the seat tube and adjust to your preferred height, then secure it with the quick-release clamp. Attach the pedals to the crank arms, ensuring the left and right pedals are on the correct sides (L for left, R for right, typically indicated on the pedal spindle).

Figure 8: Steps for installing the seat post and pedals, crucial for comfortable and safe riding.
4. Uputstvo za upotrebu
4.1 Uključivanje/isključivanje i funkcije prikaza
To power on the bike, long press the power button on the control panel. The colorful LCD display will activate, showing current speed, battery level, pedal assist level, and mileage. To power off, long press the power button again.

Slika 9: Gotovoview of the smart LCD display and control panel, showing various indicators and controls.
4.2 Načini vožnje
The Seeker S offers multiple riding modes for versatile use:
- Čisto električni način rada: Engages the motor without pedaling, controlled by the throttle.
- Režim pomoći pri pedaliranju (PAS): Provides motor assistance while you pedal. Levels 1-5 can be selected to adjust the assistance level.
- Klasični biciklistički način rada: No motor assistance, functions as a traditional bicycle.
- Način hodanja: Pruža pomoć pri hodanju uz bicikl pri maloj brzini.
- Način krstarenja: Održava zadatu brzinu bez stalnog dodavanja gasa.

Figure 10: Visual representation of the four riding modes and five pedal-assist levels available on the e-bike.
4.3 Cruise Control Activation
To activate cruise control, long press the "+" button on the control panel. The cruise sign will appear on the display. Maintain the desired speed using the throttle for 7 seconds. Release the throttle, and the bike will enter cruise mode. To disengage, rotate the throttle or apply the brakes.
Video 2: How to turn on cruise control. This video demonstrates the steps to engage and disengage the cruise control feature.
4.4 Setting a Password
To set a password for your display, power on the device. Press and hold the "+" and "-" buttons simultaneously to enter the internal settings. Navigate to "13P" using the "+" or "-" buttons. Click the "i" button to enter the password setting. Use the "+" or "-" buttons to select numbers for your password, pressing "i" to move to the next digit. After setting the last number, press "i" to save and return to "13P". Press and hold "i" to return to the main page. To close the password, follow the same steps and change "PSD-y" to "PSD-n".
Video 3: How to set a password. This video guides you through the process of setting and disabling a password for the e-bike's display.
4.5 Changing Speed or Unlocking Speed Limit
To change the maximum speed or unlock the speed limit, power on the device. Press and hold the "+" and "-" buttons simultaneously to enter the internal settings. Navigate to "06P" using the "+" or "-" buttons. Click the "i" button to enter the setting. Use the "+" button to change the maximum speed. Click the "i" button to save the setting (06P will flash). Press and hold the "i" button again to return to the main page.
Video 4: How to change speed or unlocking the speed limit. This video demonstrates how to adjust the maximum speed setting on your e-bike.
5. Održavanje
Redovno održavanje osigurava dugotrajnost i siguran rad vašeg električnog bicikla.
- Održavanje baterije: Redovno punite bateriju, čak i kada se ne koristi, kako biste održali njeno zdravlje. Izbjegavajte potpuno pražnjenje baterije. Čuvajte je na hladnom i suhom mjestu.
- Pritisak u gumama: Check tire pressure before each ride. Maintain recommended PSI for optimal performance and safety.
- kočnice: Redovno provjeravajte istrošenost kočionih pločica i osigurajte da ručice kočnica pružaju čvrstu i responzivnu zaustavnu snagu. Podesite ili zamijenite po potrebi.
- Podmazivanje lanca: Održavajte lanac čistim i podmazanim kako biste osigurali glatko mijenjanje brzina i spriječili hrđanje.
- Generalno čišćenje: Redovno čistite bicikl pomoću oglasaamp krpom. Izbjegavajte pranje električnih komponenti pod visokim pritiskom.
- Pričvršćivači: Povremeno provjeravajte zategnutost svih vijaka i matica, posebno na ključnim komponentama poput kotača, upravljača i cijevi sjedišta.
6. Otkrivanje problema
Evo nekih uobičajenih problema i njihovih potencijalnih rješenja:
- Defective or Damaged Ebike: If you receive a defective or damaged ebike, contact the seller immediately through Amazon Messages or via the contact information provided in the manual for a solution.
- Teškoća montaže: The bike is 85% pre-assembled. Refer to the guidance video on the Amazon product page for assistance. If you encounter specific questions during assembly, contact customer support.
- Flat Tire upon Arrival: If the bike arrives with a flat tire, especially the rear tire connected to the gears, contact customer support for assistance.
- Limited Battery Range: Ensure the battery is fully charged before each ride. Battery range can be affected by terrain, rider weight, and assist level. If the issue persists, contact support.
- Squeaky Brakes: This can often be resolved by cleaning the brake rotors and pads. If squeaking continues, brake pads may need adjustment or replacement.
7. Specifikacije
| Specifikacija | Detalj |
|---|---|
| Vrsta bicikla | Električni bicikl |
| Dobni raspon (opis) | Odrasli |
| Brand | VICTRIP |
| Broj brzina | 7 |
| Boja | Crna |
| Veličina kotača | 26 inča |
| Materijal okvira | Carbon Steel |
| Tip suspenzije | Front |
| Posebna karakteristika | Headlight/Taillight, UL 2849 Certified, Color LCD Display |
| Uključene komponente | 1 x Installation Tool Set, 1x Manual, 1 x Charger, 1 x Electric Bike Body, 1 x Rechargeable Battery |
| Veličina | 26 inča |
| Brake Style | Disc |
| Wheel Width | 1.95 inča |
| Specifične upotrebe za proizvod | Put |
| Težina artikla | 58.1 funti |
| Tema | Biciklizam |
| Stil | Standard |
| Naziv modela | Seeker S |
| Izvor napajanja | Electric and Pedals |
| Wattage | 350 vati |
| Materijal kotača | Aluminijum |
| Godina | 2024 |
| Sadržaj energije litijumske baterije | 324 vatnih sati |
| Vrsta garancije | Ograničeno |
| Preporuka za maksimalnu težinu | 330 funti |
| Obavezna montaža | Da |
| Vrsta mjenjača brzina na biciklu | Thumb |
| Broj drške | 2 |
| Nivo vještina | Pocetnik |
| Proizvođač | Shenzhen Like Zhixing Technology Co., Ltd |
| Stavka Dimenzije pakovanja D x Š x V | 54 x 27 x 10 inča |

Figure 11: Detailed dimensions and weight capacity of the Seeker S Electric Bike.
8. Garancija i podrška
The VICTRIP Seeker S Electric Bike comes with a one-year limited warranty covering the electric motor, battery, and charger. For any issues or support needs, please do not hesitate to contact us. You can reach out through Amazon Messages or refer to the contact information provided in your product manual.
For assembly assistance, a guidance video is available on the Amazon product page. The assembly service mentioned on the product page is provided and charged by Amazon's third-party company.