Uvod
This manual provides detailed instructions for the assembly, operation, maintenance, and troubleshooting of your VASAGLE 7-Tier Vertical Shoe Rack, Model ULBS200L01. Please read this manual thoroughly before assembly and use to ensure safe and correct operation.
Sigurnosne smjernice
To prevent injury or damage to the product, please adhere to the following safety instructions:
- Komplet protiv prevrtanja: Always secure the shoe rack to the wall using the provided anti-tip kit. This prevents accidental tipping, especially in households with children or pets.
- Ograničenja težine: Do not exceed the maximum static load of 22 lb (10 kg) per shelf. Each hook has a maximum static load of 11 lb (5 kg). Overloading can compromise stability and cause damage.
- Montaža: Ensure all components are correctly assembled and tightened according to the instructions. Do not use power tools at high torque settings, as this may damage the particleboard.
- plasman: Place the shoe rack on a flat, stable surface. Avoid placing it in areas with high humidity or direct sunlight to prevent material degradation.
- djeca: Držite male dijelove i materijale za pakovanje dalje od djece tokom sastavljanja.
Sadržaj paketa
Prije početka montaže provjerite da li su sve komponente prisutne:
- 1 x Shoe Rack (Disassembled components)
- 1 x Accessory Kit (Hardware, screws, etc.)
- 1 x Anti-Tip Kit (Wall anchors, straps)
- 1 x Upute (Ovaj priručnik)
Uputstva za sastavljanje
Follow these steps to assemble your 7-Tier Vertical Shoe Rack. It is recommended to assemble the unit on a soft, clean surface to prevent scratches.
- Identifikujte komponente: Lay out all parts and hardware. Refer to the included parts list to identify each piece.
- Sastavite bočne panele: Attach the horizontal shelves to the main vertical side panels using the provided screws and cam locks. Ensure the shelves are oriented correctly, with the raised back edge facing upwards.
- Secure Back Panels: Install the small back panels to prevent shoes from falling backward.
- Pričvrstite gornju ploču: Secure the top shelf to the assembled structure.
- Instalirajte kuke: The two accessory hooks can be installed on either the left or right side of the top section, as preferred. Use the designated pre-drilled holes.
- Instalirajte komplet protiv prevrtanja: For safety, attach the anti-tip kit to the top rear of the shoe rack and secure it to a wall stud or appropriate wall anchor point.
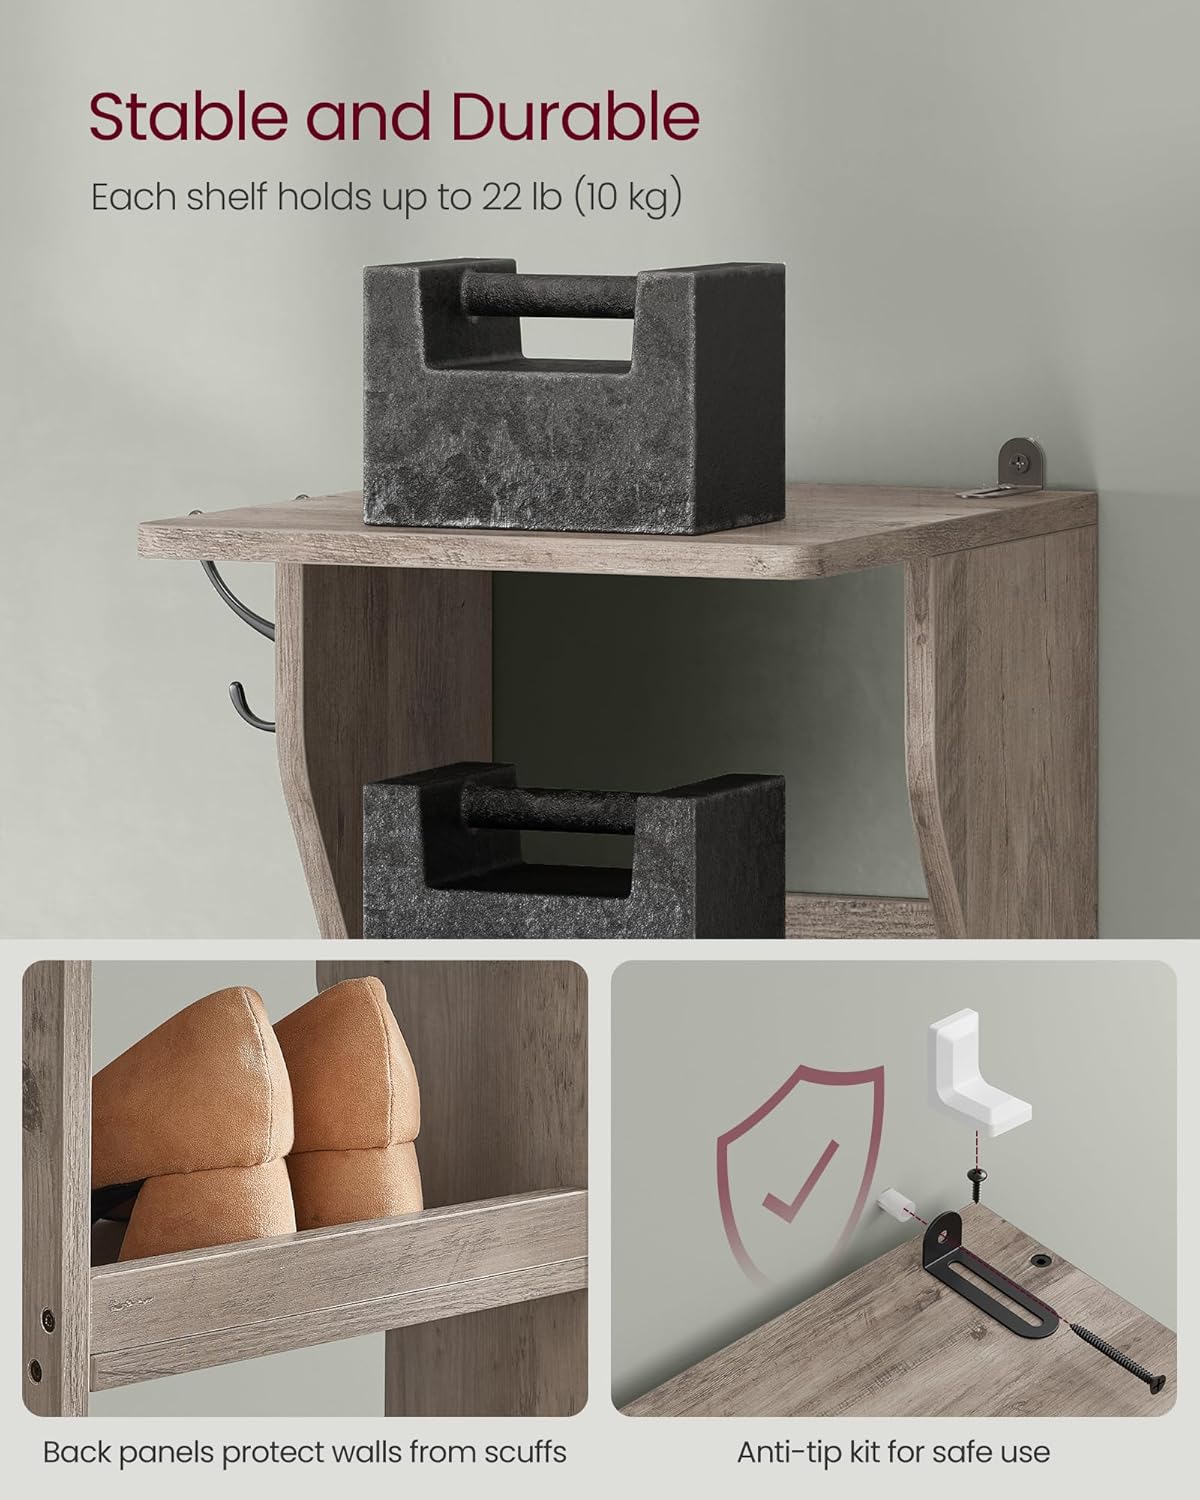
Image: Detail of the anti-tip kit and back panel design for stability.

Image: Close-up of the two extra hooks, which can be installed on either side for small accessories.
Uputstvo za upotrebu
Using your VASAGLE 7-Tier Vertical Shoe Rack is straightforward:
- Shoe Placement: Place shoes on each of the seven tiers. The design allows for easy access and visibility of your footwear.
- Tall Footwear: The 6.7-inch (17 cm) distance between shelves accommodates various shoe types, including loafers, sneakers, and some boots.
- Kuke za pribor: Utilize the side hooks for hanging items such as keys, small bags, scarves, or umbrellas.
- Iskorištenost prostora: The slim, vertical design is optimized for small spaces like entryways, bedrooms, or narrow corners.

Image: The VASAGLE 7-Tier Vertical Shoe Rack in an entryway setting, showcasing its storage capacity and design.

Image: The shoe rack efficiently placed in a small corner, highlighting its space-saving feature.

Image: Detail showing the ample 6.7-inch (17 cm) shelf height, suitable for various shoe types including high-tops.
Održavanje
Proper care will extend the life of your shoe rack:
- čišćenje: Obrišite površine oglasomamp krpom. Izbjegavajte jake hemikalije ili abrazivna sredstva za čišćenje koja bi mogla oštetiti završnu obradu.
- Prosipanje: Clean up spills immediately to prevent staining or water damage to the particleboard.
- inspekcija: Povremeno provjeravajte sve vijke i spojeve kako biste bili sigurni da su čvrsto zategnuti. Po potrebi ih ponovo zategnite.
- Uslovi okoline: Izbjegavajte dugotrajno izlaganje direktnoj sunčevoj svjetlosti ili ekstremnim promjenama temperature, što može uzrokovati savijanje ili blijeđenje.
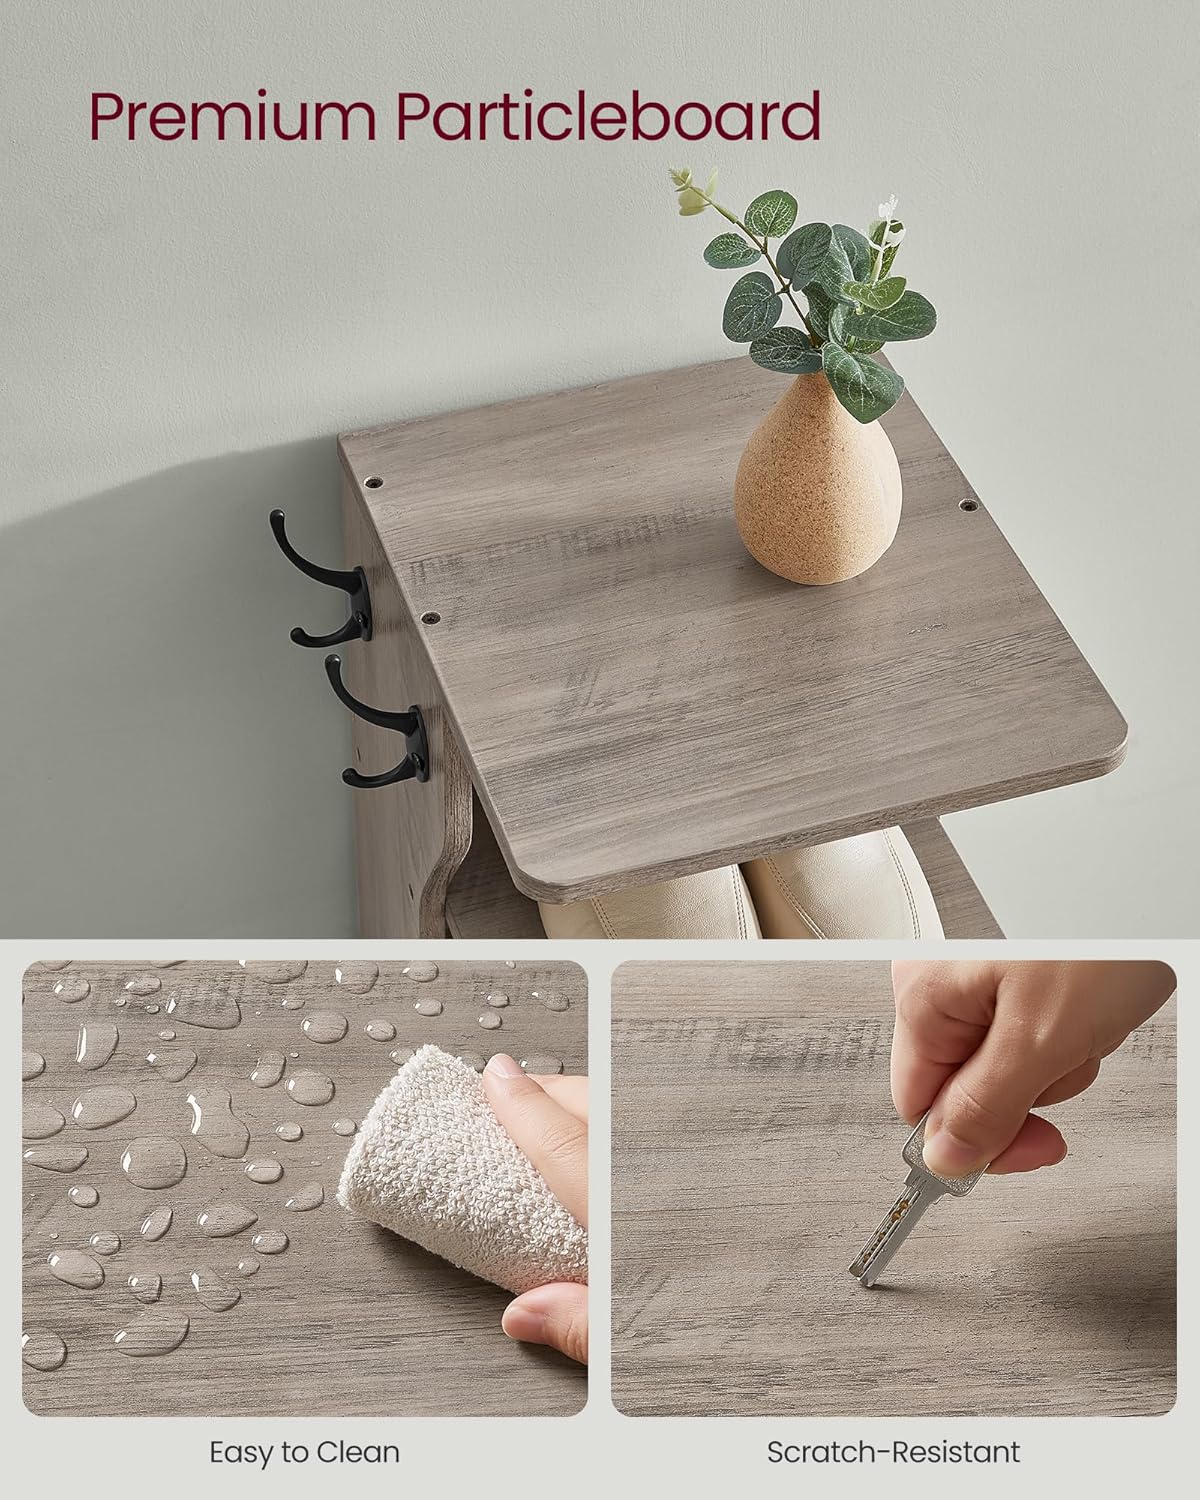
Image: Demonstrating the easy-to-clean and scratch-resistant surface of the premium particleboard.
Rješavanje problema
Uobičajeni problemi i njihova rješenja:
- Klizanje/Nestabilnost:
- Uvjerite se da su svi zavrtnji potpuno zategnuti.
- Verify the unit is placed on a level surface.
- Confirm the anti-tip kit is correctly installed and secured to the wall.
- Shoes Sliding Off:
- Ensure the raised back edge of each shelf is facing upwards to act as a stopper.
- dijelovi koji nedostaju:
- Double-check the packaging. If parts are still missing, contact customer support.
Specifikacije
| Feature | Detalj |
|---|---|
| Naziv modela | 7-Tier Vertical Shoe Rack |
| Broj modela | ULBS200L01 |
| Brand | VASAGLE |
| Dimenzije (D x Š x V) | 30 cm D x 26.4 cm Š x 110.4 cm V |
| Broj polica | 7 |
| Shelf Thickness (Height between shelves) | 6.7 inča (17 cm) |
| Materijal | Konstruisano drvo (iverica) |
| Boja | Heather Greige |
| Ograničenje težine po polici | 22 lb (10 kg) |
| Weight Limit per Hook | 11 lb (5 kg) |
| Težina artikla | 17 funti (7.7 kg) |
| Obavezna montaža | Da |
| Posebne karakteristike | Durable, Easy Assembly, Space-Saving, Integrated Hooks, Anti-Tip Kit |

Image: Visual representation of the product dimensions and maximum weight capacities.
Garancija i podrška
For warranty information, product support, or to purchase replacement parts, please contact VASAGLE customer service. Refer to your purchase documentation for specific warranty terms and contact details.
Služba za korisnike: Please visit the official VASAGLE webweb-mjesto ili pogledajte kontakt informacije koje ste dobili uz kupovinu.


