1. Uvod
This manual provides detailed instructions for the safe and effective use of your ScopeAround SA200S Digital Otoscope. This device is designed for visual inspection of the ear canal and eardrum, featuring an integrated 1.85-inch IPS screen, a 720p HD camera, and adjustable LED lighting. It also supports photo and video capture for documentation.
Molimo vas da pažljivo pročitate ovaj priručnik prije upotrebe uređaja i sačuvate ga za buduću upotrebu.
2. Sigurnosne informacije
- Ne ubacujte otoskop previše duboko u ušni kanal kako biste izbjegli ozljede.
- Always use the provided specula to prevent direct contact with the ear canal.
- Clean the lens and accessories thoroughly before and after each use to prevent cross-contamination. Refer to the "Maintenance and Cleaning" section.
- Keep the device out of reach of children. Adult supervision is required if used on children.
- Do not use the device if you experience pain or discomfort. Consult a medical professional.
- Izbjegavajte izlaganje uređaja ekstremnim temperaturama, direktnoj sunčevoj svjetlosti ili vlazi.
- Ne pokušavajte sami rastaviti ili popraviti uređaj. Obratite se korisničkoj podršci za pomoć.
- The built-in battery pack is non-removable.

Figure 2.1: Safe and Dangerous Ear Canal Insertion
3. Sadržaj paketa
Provjerite da li su sve stavke prisutne u paketu:
- SA200S Digital Otoscope with Screen
- Ear Picks (x4)
- Specula (x5)
- Alcohol Pads
- Q-vrhovi
- Memorijska kartica od 8 GB
- USB kabel (tip-C)
- Uputstvo za upotrebu

Slika 3.1: Sadržaj paketa
4. Proizvod je gotovview
The ScopeAround SA200S Digital Otoscope is an all-in-one device designed for convenient ear examination. It features a high-resolution camera and an integrated display for direct viewing.

Figure 4.1: ScopeAround SA200S Digital Otoscope
4.1 Komponente uređaja

Figure 4.2: Labeled Components of the Otoscope
- Navigation Buttons UP: Used to navigate menus or adjust settings.
- Navigation Buttons Down: Used to navigate menus or adjust settings.
- Utor za memorijsku karticu: For inserting the 8GB memory card (included).
- Dugme za fotografiju/video: Press to capture photos or start/stop video recording.
- Power Button / LED Light Adjustment: Long press to power on/off. Short press to cycle through LED brightness levels.
- 1.85-inčni IPS LCD ekran: Integrated display for real-time viewing.
- Dugme za postavke: Pristupite postavkama uređaja.
- Dugme OK: Confirm selections in menus.
- Otoscope Camera: The camera probe for ear canal inspection.
- Port tipa C: Za punjenje i prijenos podataka.
5. Podešavanje
5.1 Punjenje uređaja
Before first use, fully charge the otoscope. Connect the provided USB Type-C cable to the device's Type-C port and a compatible USB power adapter (not included). The charging indicator will show the charging status. A full charge provides approximately 3 hours of working time.
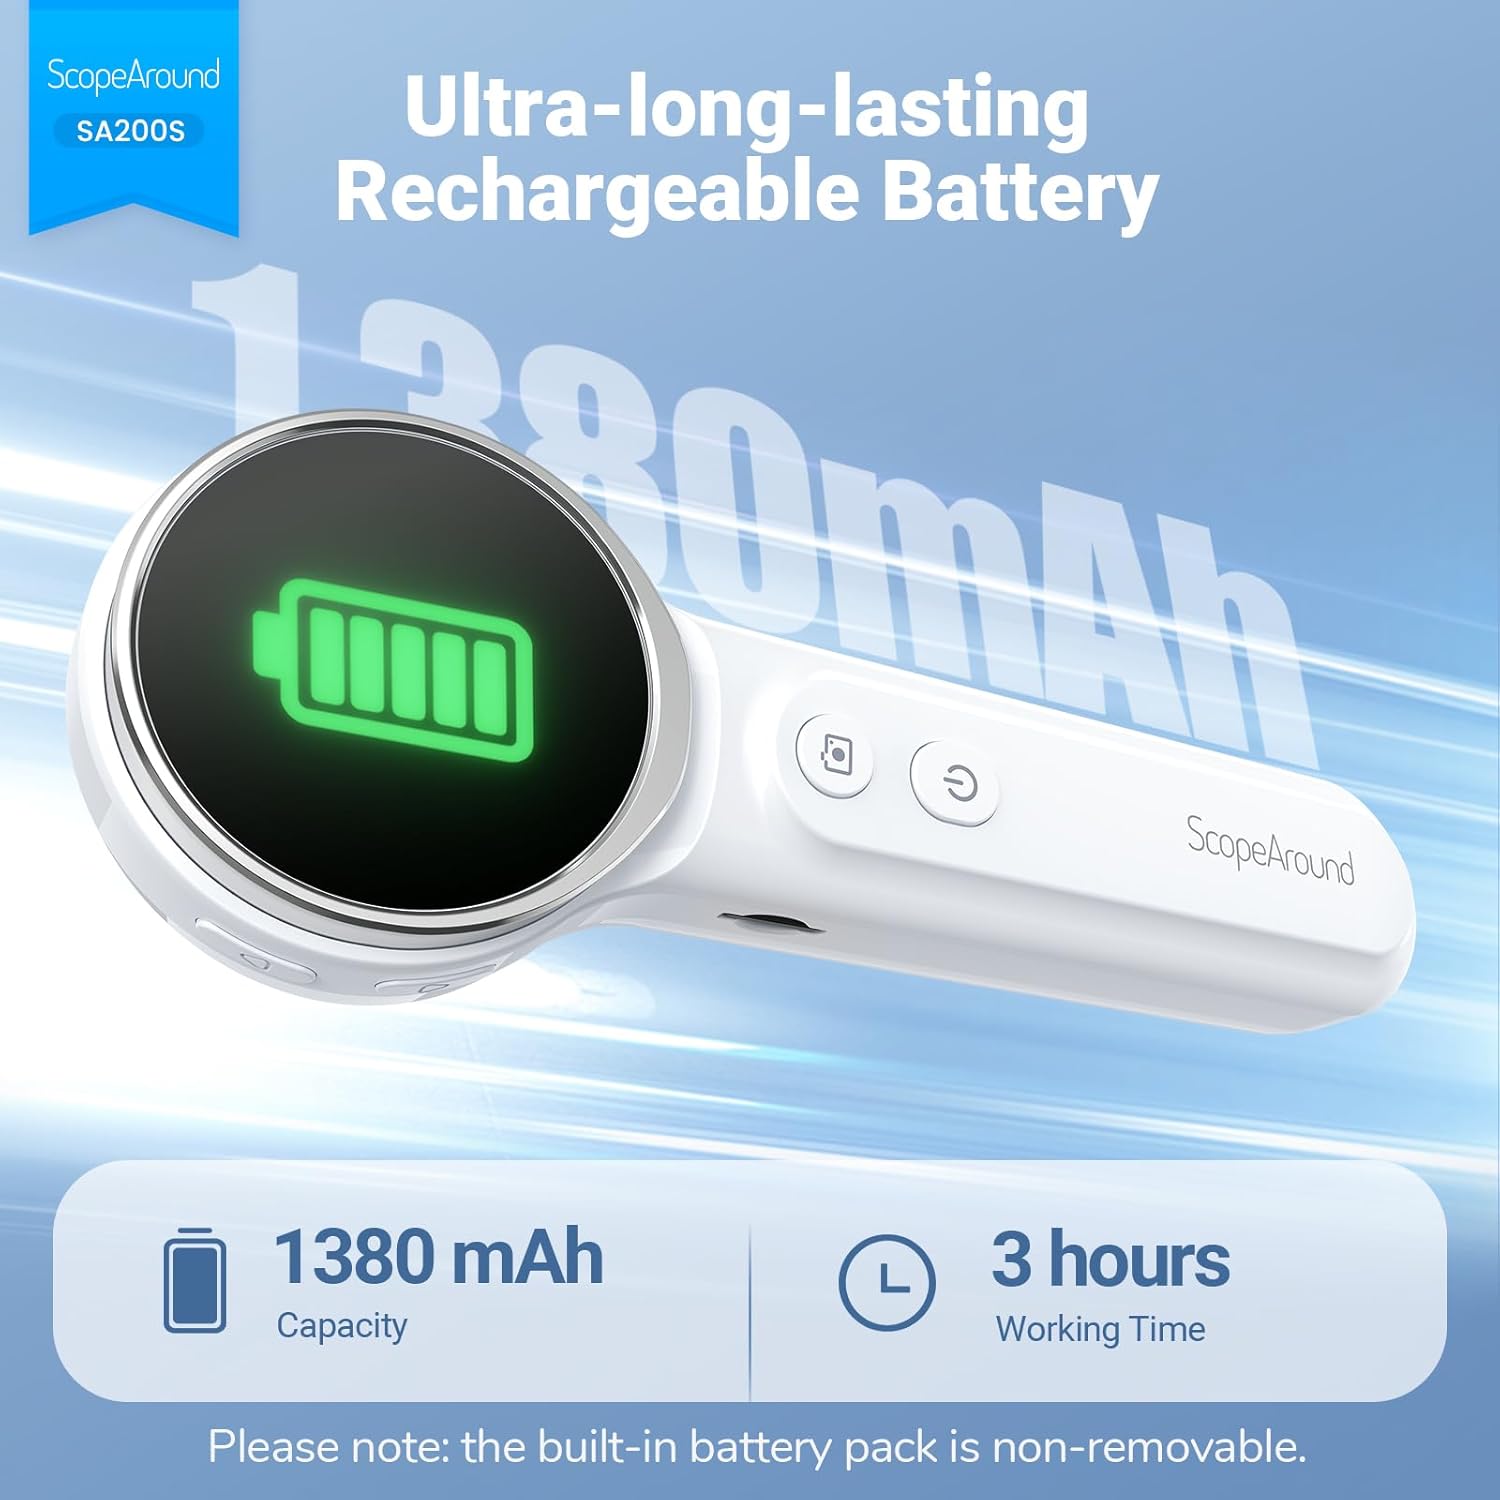
Slika 5.1: Punjenje i vijek trajanja baterije
5.2 Pričvršćivanje dodatne opreme
Select an appropriate speculum and ear pick. Gently attach the chosen speculum to the tip of the otoscope camera. If using an ear pick, ensure it is securely fitted over the camera tip, inside the speculum, before insertion into the ear.
5.3 Uključivanje/isključivanje
- To power on: Long press the Dugme za napajanje (5) until the screen illuminates.
- To power off: Long press the Dugme za napajanje (5) again until the screen turns off.
5.4 Povezivanje s aplikacijom (opcionalno)
For additional features and a larger viewing experience, you can connect the otoscope to your smartphone or tablet via Wi-Fi.
- Preuzmite aplikaciju: Scan the QR code provided in the manual or on the device packaging, or search for "Smart Otoscope" in the Apple App Store or Google Play Store. You can also visit gto.so/smart-otoscope.
- Power On Otoscope: Dugo pritisnite dugme za napajanje na otoskopu da biste ga uključili.
- Povežite Wi-Fi: On your smartphone or tablet, go to Wi-Fi settings and connect to the network named "Smart Otoscope_XXX". The default password is 55556666.
- Pokreni aplikaciju: Open the "Smart Otoscope" app. The live view from the otoscope camera should appear.

Figure 5.2: Wi-Fi Connection Steps
Note: Once connected to the app, you can operate the device and view the feed on your phone.
6. Uputstvo za upotrebu
6.1 Basic Ear Examination
- Ensure a clean speculum is attached to the otoscope camera.
- Gently pull the outer ear up and back to straighten the ear canal.
- Carefully insert the speculum tip into the ear canal while observing the integrated 1.85-inch IPS screen. Do not force the device.
- Polako podešavajte ugao i dubinu kako biste dobili jasan view ušnog kanala i bubne opne.

Figure 6.1: Self-Examination with Integrated Screen
6.2 Adjusting LED Lights and Brightness
The otoscope features 6 adjustable LED lights with 3 brightness settings for optimal visibility.
- Kratko pritisnite Dugme za napajanje (5) to cycle through the 3 brightness levels.

Figure 6.2: Camera Specifications and Brightness Settings
6.3 Magnification Levels
The device supports 3 levels of magnification (1.0x, 1.3x, 1.5x) for detailed viewing. Use the Navigation Buttons UP/DOWN (1, 2) to adjust magnification.

Figure 6.3: Adjustable Magnification and Image Rotation
6.4 Snimanje fotografija i videa
The otoscope allows you to capture images and record videos directly to the included 8GB memory card.
- To take a photo: Press the Foto/Video dugme (4) jednom.
- To record a video: Long press the Foto/Video dugme (4) to start recording. Long press again to stop recording.

Figure 6.4: Photo and Video Capture Interface (App View)
6.5 Prenos Files
To transfer captured photos and videos to a computer:
- Connect the otoscope to your computer using the provided USB Type-C cable.
- The device should appear as a removable storage device. You can then access the files on the 8GB memory card.
- Alternatively, remove the 8GB memory card from the slot (3) and insert it into a compatible card reader connected to your computer.

Slika 6.5: File Transfer for Sharing Insights
7. Održavanje i čišćenje
Proper maintenance ensures the longevity and hygiene of your otoscope.
- Čišćenje sočiva: Use the provided Q-tips and alcohol pads to gently clean the camera lens before and after each use. Ensure no residue remains.
- Pribor za čišćenje: Wash the reusable ear picks and specula with soap and water, then sterilize them with alcohol pads. Allow them to dry completely before storage or reuse.
- Tijelo uređaja: Wipe the main body of the otoscope with a soft, dry cloth. Do not immerse the device in water.
- Skladištenje: Uređaj čuvajte na hladnom i suhom mjestu, dalje od direktne sunčeve svjetlosti i ekstremnih temperatura.

Figure 7.1: Cleaning the Otoscope Lens
8. Otkrivanje problema
| Problem | Mogući uzrok | Rješenje |
|---|---|---|
| Uređaj se ne uključuje. | Niska baterija. | U potpunosti napunite uređaj pomoću priloženog USB kabla. |
| Nema slike na ekranu. | Device not powered on; Camera lens obstructed. | Ensure device is powered on. Check and clean the camera lens. |
| Slika je mutna ili nejasna. | Dirty lens; Incorrect focal distance; Magnification setting. | Clean the camera lens. Adjust the distance from the ear canal. Adjust magnification using navigation buttons. |
| Nije moguće povezati se na Wi-Fi. | Incorrect Wi-Fi password; Device not in pairing mode; App issue. | Ensure the otoscope is powered on. Verify the Wi-Fi password (55556666). Restart the otoscope and your phone/tablet. Reinstall the app if necessary. |
| Nije moguće sačuvati fotografije/video zapise. | Memory card full or faulty; Memory card not inserted. | Check if the 8GB memory card is correctly inserted. Ensure there is sufficient space. Try formatting the card (if data is backed up) or using a different card. |
9. Specifikacije
| Feature | Detalj |
|---|---|
| Naziv modela | SA200S |
| Veličina ekrana | 1.85-inčni IPS LCD |
| Rezolucija kamere | 720p HD |
| Prečnik sočiva | 3.9mm Ultra-thin Lens |
| Izvor svjetlosti | 6 LED Lights (3 brightness settings) |
| Focal Distance | 0.39 - 1.18 inča |
| Real Angle of View | 78 stepeni |
| Uvećanje | Up to 1.5x (1.0x, 1.3x, 1.5x) |
| Kapacitet baterije | 1380mAh litijum -polimer |
| Radno vrijeme | Približno 3 sata |
| Povezivanje | Wi-Fi (for app connection) |
| Skladištenje | Memorijska kartica od 8 GB (uključena) |
| Port za punjenje | Tip-C |
| Kompatibilni uređaji | Android/iPhone smartphones and tablets (Not compatible with Macbook & Windows PC) |
| Težina artikla | 12 unce |
| Dimenzije | 7.52 x 4.61 x 2.68 inča (pakovanje) |
| Materijal | Plastika |
| Boja | Bijelo |
10. Garancija i podrška
ScopeAround is committed to providing high-quality products and customer satisfaction. For any questions, technical support, or warranty inquiries, please contact our US-based after-sales support team.
Contact information can typically be found on the product packaging, the official ScopeAround webweb-stranice ili putem vaše platforme za kupovinu.