1. Uvod i sigurnosne informacije
Thank you for choosing the Candy CW50-BP12307-S Front-Load Washing Machine. This manual provides essential information for the safe and efficient use of your appliance. Please read it thoroughly before installation and operation, and keep it for future reference.
1.1 Opšta sigurnosna upozorenja
- Uvijek isključite uređaj iz električne mreže prije čišćenja ili održavanja.
- Ovaj uređaj nije namijenjen za upotrebu od strane osoba (uključujući djecu) sa smanjenim fizičkim, senzornim ili mentalnim sposobnostima, ili nedostatkom iskustva i znanja, osim ako im je dat nadzor ili upute o korištenju uređaja od strane osobe odgovorne za njihovu sigurnost.
- Djeca trebaju biti pod nadzorom kako bi se osiguralo da se ne igraju s uređajem.
- Ne postavljajte aparat u oglasamp place or where it may be exposed to water.
- Ensure all packaging materials are removed before use.
- Ne koristite produžne kablove ili višestruke adaptere.
- Do not open the detergent drawer during the wash cycle.
- Ne dirajte uređaj mokrim rukama ili nogama.
2. Proizvod je gotovview
Upoznajte se s glavnim komponentama vaše mašine za pranje veša.
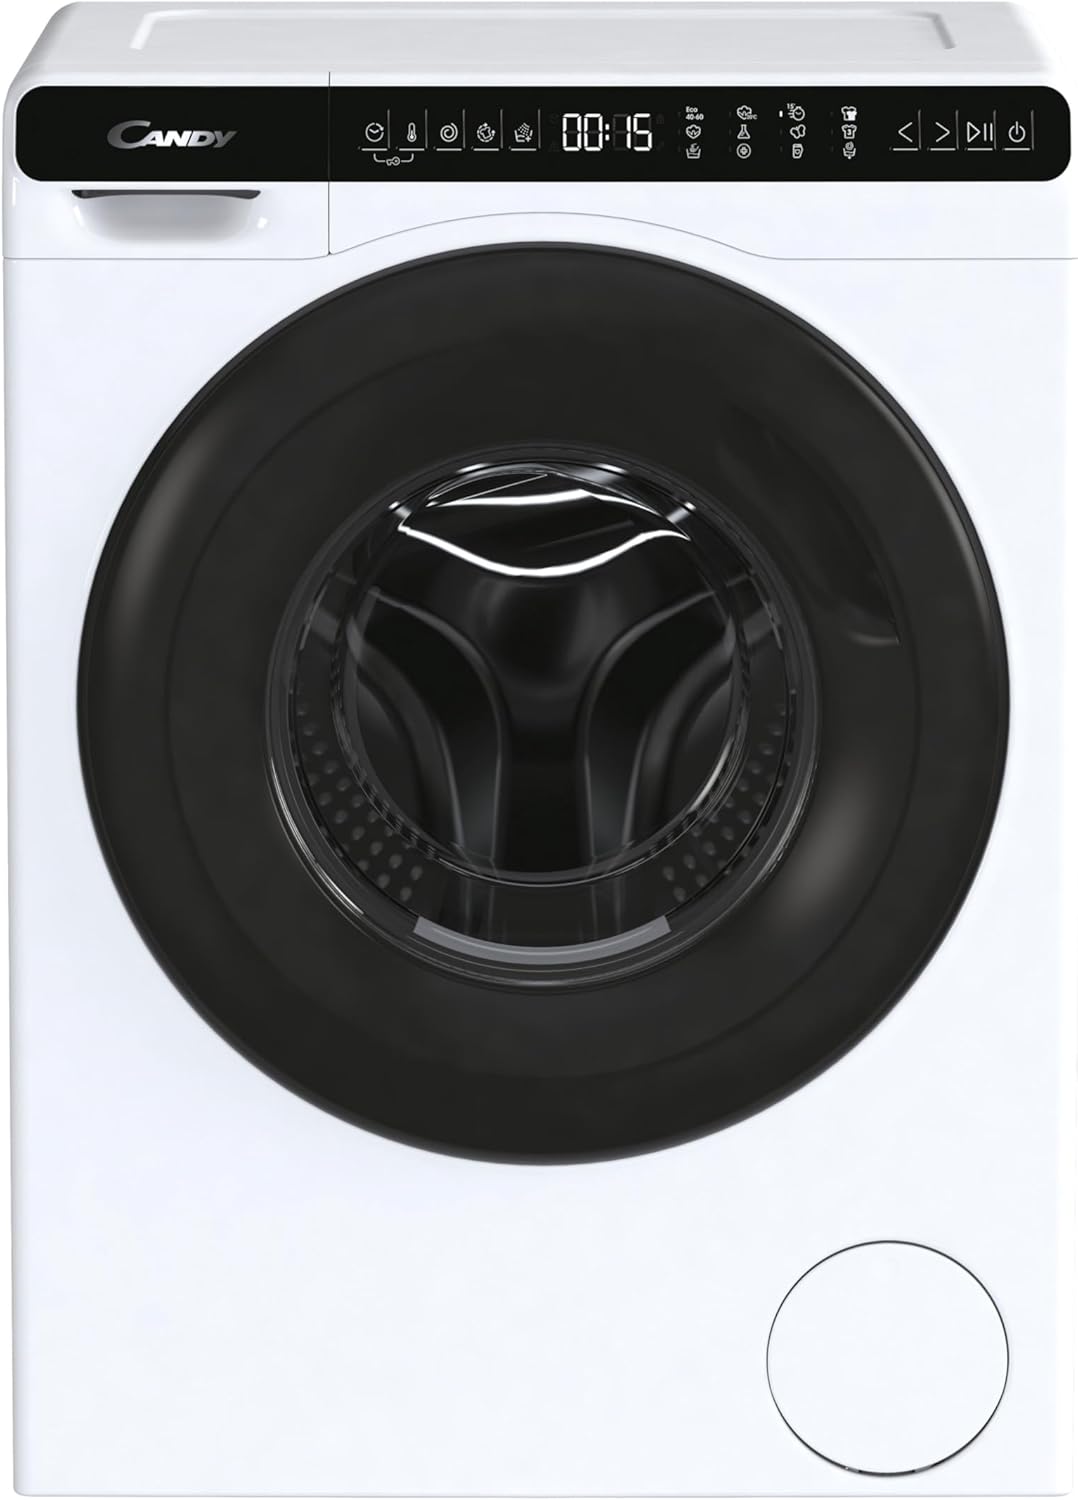
Slika 2.1: Front view of the Candy CW50-BP12307-S washing machine. This image displays the appliance with its door closed, showcasing the control panel at the top and the main drum access.

Slika 2.2: Close-up of the control panel and door. This image highlights the digital display, program selection buttons, and the ergonomic handle of the washing machine door.
2.1 Kontrolna tabla
The control panel allows you to select wash programs, adjust settings, and monitor the wash cycle. Refer to the detailed diagram below for specific button functions.

Slika 2.3: Detaljno view of the Candy CW50-BP12307-S control panel. This image provides a clear look at the various icons and buttons for program selection, temperature, spin speed, and additional functions.
- Birač programa: Turn to choose your desired wash program.
- Prikaz: Prikazuje preostalo vrijeme, odabrane opcije i kodove grešaka.
- Dugme Start/Pauza: Initiates or pauses the wash cycle.
- Dugmad za opcije: Modify temperature, spin speed, or add extra rinses.
3. Postavljanje i instalacija
Pravilna instalacija je ključna za performanse i dugotrajnost vaše mašine za pranje veša.
3.1 Raspakivanje
- Uklonite sav materijal za pakovanje, uključujući polistirensku podlogu i sve umetke iz bubnja.
- Remove the transport bolts located at the rear of the machine. These bolts secure the drum during transit and mora be removed before use. Keep them for future transport.
3.2 Pozicioniranje i nivelisanje
Place the washing machine on a firm, flat surface. Use the adjustable leveling feet to ensure the appliance is perfectly stable and level. An unlevel machine can cause excessive vibration and noise.
- Loosen the lock nut on each foot.
- Rotate the foot to adjust the height.
- Use a spirit level to check for perfect leveling.
- Tighten the lock nuts against the machine base to secure the feet.
3.3 Priključci za vodu i odvod
- Spojite crijevo za dovod vode na slavinu za hladnu vodu s navojem od 3/4". Provjerite je li spoj čvrst kako biste spriječili curenje.
- Position the drain hose into a standpipe or over the edge of a sink, ensuring it is securely fixed to prevent displacement during draining. The drain hose should be between 60 cm and 100 cm from the floor.
3.4 Električni priključak
- Connect the power plug to a grounded electrical outlet.
- Osigurajte voltage i frekvencija odgovaraju specifikacijama na natpisnoj pločici uređaja.
4. Uputstvo za upotrebu
4.1 Preparing the Laundry
- Sortirajte veš po vrsti tkanine, boji i stepenu zaprljanosti.
- Provjerite etikete za njegu odjeće za upute o pranju.
- Ispraznite džepove i zatvorite patentne zatvarače i dugmad.
4.2 Punjenje mašine za pranje veša

Slika 4.1: The washing machine with its door open, ready for loading. This view shows the spacious drum and the door hinge mechanism.
- Otvorite vrata mašine za pranje rublja.
- Load the laundry loosely into the drum, ensuring not to overload. The maximum capacity is 5 kg.
- Čvrsto zatvorite vrata dok se ne zatvore klikom.
4.3 Dodavanje deterdženta i aditiva
Open the detergent drawer and add detergent and fabric softener to the appropriate compartments. Refer to your detergent packaging for recommended dosages.
4.4 Odabir programa pranja
- Turn the program selector knob to choose the desired wash program (e.g., Cotton, Synthetics, Delicates, Eco 40-60).
- If necessary, adjust the temperature and spin speed using the option buttons.
- Pritisnite dugme Start/Pauza da započnete ciklus.
Napomena: The display will show the estimated remaining time for the cycle.
5. Održavanje i čišćenje
Redovno održavanje osigurava optimalne performanse i produžava vijek trajanja vašeg uređaja.
5.1 Čišćenje fioke za deterdžent
- Potpuno izvucite ladicu za deterdžent.
- Isperite ga pod mlazom vode kako biste uklonili sve ostatke deterdženta.
- Očistite kućište ladice četkom.
- Vratite ladicu.
5.2 Čišćenje odvodnog filtera
The drain filter should be cleaned periodically to prevent blockages.
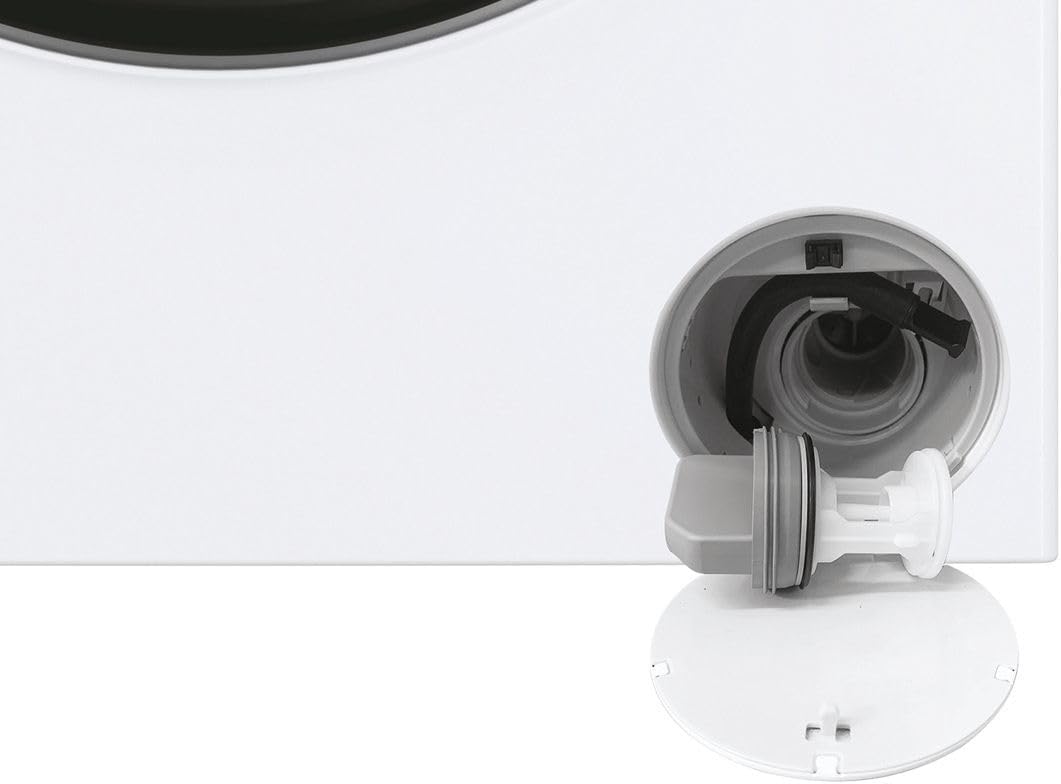
Slika 5.1: Close-up view of the drain filter compartment, showing the filter removed for cleaning. This component is essential for preventing blockages.
- Otvorite mali poklopac na donjoj prednjoj strani uređaja.
- Place a shallow container underneath to collect any residual water.
- Polako odvrnite filter u smjeru suprotnom od kazaljke na satu i uklonite ga.
- Očistite filter pod mlazom vode, uklanjajući sve dlačice ili strane predmete.
- Screw the filter back in clockwise and close the cover.
5.3 Čišćenje bubnja
Run a maintenance wash (e.g., a hot cycle with no laundry and a descaling agent) periodically to clean the drum and remove detergent residues.
5.4 Vanjsko čišćenje
Obrišite vanjski dio perilice rublja mekom,amp tkanina. Nemojte koristiti abrazivna sredstva za čišćenje ili rastvarače.
6. Otkrivanje problema
Prije kontaktiranja servisa, molimo provjerite sljedeće uobičajene probleme i rješenja.
| Problem | Mogući uzrok | Rješenje |
|---|---|---|
| Mašina se ne pokreće | Nema struje; Vrata nisu zatvorena; Program nije odabran; Tipka Start/Pauza nije pritisnuta. | Check power supply; Ensure door is firmly closed; Select a program; Press Start/Pause. |
| Voda se ne puni | Slavina za vodu zatvorena; Dovodno crijevo savijeno; Pritisak vode prenizak. | Otvorite slavinu za vodu; Ispravite crijevo; Provjerite dovod vode. |
| Voda ne odvodi | Drain hose kinked or blocked; Drain filter blocked. | Straighten or clear drain hose; Clean drain filter (refer to Section 5.2). |
| Pretjerane vibracije/buka | Machine not level; Transport bolts not removed; Overloaded drum. | Podesite nožice za nivelisanje; Uklonite transportne vijke; Smanjite količinu veša. |
| Ostaci deterdženta u fioci | Nedovoljan pritisak vode; Zgrudnjavanje deterdženta. | Check water pressure; Clean detergent drawer; Use less detergent or liquid detergent. |
Ako problem i dalje postoji nakon isprobavanja ovih rješenja, obratite se korisničkoj podršci.
7. Specifikacije
| Feature | Detalj |
|---|---|
| Model | CW50-BP12307-S |
| Brand | Candy |
| Tip | Mašina za pranje veša sa prednjim punjenjem |
| Kapacitet | 5 kilograma |
| Maksimalna brzina centrifuge | 1200 o/min |
| Boja | White with Black accents |
| Težina artikla | 52 kilograma |
| Posebna karakteristika | Podesiva stopica za nivelisanje |
| Dimenzije (V x Š x D) | Please refer to the product label or official Candy website for exact dimensions. |
| Napajanje | Refer to the rating plate on the appliance. |
8. Garancija i korisnička podrška
8.1 Informacije o garanciji
Your Candy CW50-BP12307-S washing machine comes with a manufacturer's warranty. Please refer to the warranty card included with your purchase for specific terms, conditions, and duration. Keep your proof of purchase for warranty claims.
8.2 Korisnička podrška
For technical assistance, spare parts, or warranty service, please contact Candy customer support. Contact details can typically be found on the official Candy webweb stranici ili u vašoj garantnoj dokumentaciji.
When contacting support, please have your model number (CW50-BP12307-S) and serial number ready. The serial number is usually located on a label inside the door or at the back of the appliance.


