1. Uvod
This manual provides essential information for the safe and efficient operation of your Reloop RP-7000 MK2 Direct Drive High Torque Turntable. Please read these instructions thoroughly before using the product to ensure proper setup, optimal performance, and longevity of your equipment. Keep this manual for future reference.
2. Sigurnosna uputstva
- Napajanje: Uređaj priključite samo na AC utičnicu navedene jačinetage. Provjerite da kabel za napajanje nije oštećen ili priklješten.
- Vlaga: Do not expose the unit to rain, moisture, or excessive humidity. Avoid placing liquid-filled objects on the turntable.
- ventilacija: Osigurajte odgovarajuću ventilaciju oko uređaja. Ne blokirajte ventilacijske otvore.
- plasman: Place the turntable on a stable, level surface away from direct sunlight, heat sources, and strong magnetic fields.
- čišćenje: Isključite napajanje prije čišćenja. Koristite meku, suhu krpu. Izbjegavajte tekuća sredstva za čišćenje ili rastvarače.
- servisiranje: Ne pokušavajte sami servisirati uređaj. Za sve servisne radove obratite se kvalifikovanom osoblju.
3. Sadržaj paketa
Provjerite da li se u vašem paketu nalaze sve dolje navedene stavke. Ako neke stavke nedostaju ili su oštećene, odmah se obratite prodavaču.
- Reloop RP-7000 MK2 Direct Drive High Torque Turntable (x2)
- Dust Cover (x2)
- Digital Turntable Stylus Scale
- Record Care Solution
- Power Cable
- RCA kabel
- Uzemljena žica
- Slipmat
- Protuteg
- Headshell with Cartridge (pre-mounted or separate, depending on region/bundle)

Slika 1: Gotovoview of the Reloop RP-7000 MK2 turntable bundle components.
4. Podešavanje
4.1 Raspakivanje i postavljanje
- Carefully remove all components from the packaging. Retain packaging for future transport.
- Place the turntable on a flat, stable, and vibration-free surface. Ensure there is enough space for the dust cover to open fully.
- Attach the dust cover by aligning its hinges with the slots on the turntable's rear.

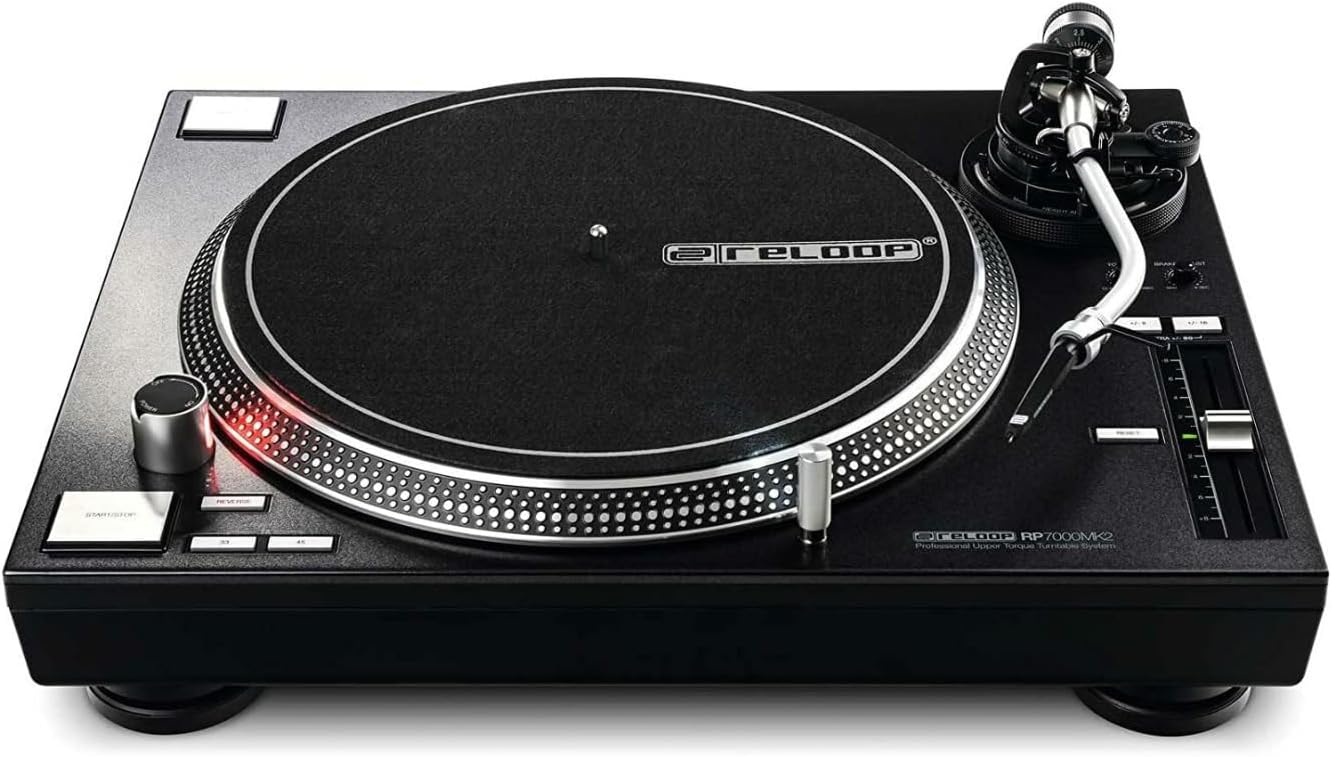
Slika 2: Turntable with the dust cover in place.
4.2 Platter and Slipmat Installation
- Pažljivo postavite tanjir na središnju osovinu. Pazite da bude u ravnini.
- Postavite slipmat na vrh tanjira.
4.3 Podešavanje ručice i zvučnice
- If not pre-mounted, attach the headshell with the cartridge to the tonearm. Secure it by turning the locking ring.
- Screw the counterweight onto the rear of the tonearm.
- Balansiranje ručice tona: Otpustite tonarm clamp. Adjust the counterweight until the tonearm is perfectly balanced and floats horizontally.
- Postavi silu praćenja: Return the tonearm to its rest and clamp it. Rotate the numbered ring on the counterweight to '0' without moving the counterweight itself. Then, rotate the entire counterweight to the recommended tracking force for your cartridge (typically 2-4 grams for DJ cartridges).
- Set protiv klizanja: Adjust the anti-skate dial to match the tracking force setting.
4.4 Using the Digital Stylus Scale
The included digital stylus scale allows for precise measurement of your cartridge's tracking force, ensuring optimal sound quality and minimizing record wear.
- Place the stylus scale on the platter.
- Uključite vagu pomoću dugmeta za napajanje.
- Carefully lower the stylus onto the designated measuring point on the scale.
- Read the tracking force displayed. Adjust the tonearm's counterweight as needed until the desired force is achieved.

Slika 3: Digital Stylus Scale for precise tracking force measurement.
4.5 Veze
- Audio izlaz: Connect the RCA cables from the turntable's audio output to the PHONO input of your mixer or amplifier. If your mixer/amplifier does not have a PHONO input, you will need an external phono preamplifier.
- Žica za uzemljenje: Spojite žicu za uzemljenje s gramofona na priključak za uzemljenje na mikseru ili amplifier to reduce hum.
- Snaga: Connect the power cable to the turntable and then to a suitable AC power outlet.
5. Uputstvo za upotrebu
5.1 Osnovna reprodukcija
- Place a record on the slipmat.
- Select the appropriate speed (33, 45, or 78 RPM) using the speed selector buttons.
- Pritisnite START/STOP dugme za početak rotacije tanjira.
- Pažljivo podignite ručicu gramofona pomoću poluge za podešavanje zvuka i postavite iglu preko željenog žlijeba na ploči.
- Spustite polugu za označavanje kako biste nježno postavili iglu na ploču.
- To stop playback, lift the tonearm using the cueing lever, return it to the tonearm rest, and press the START/STOP dugme.
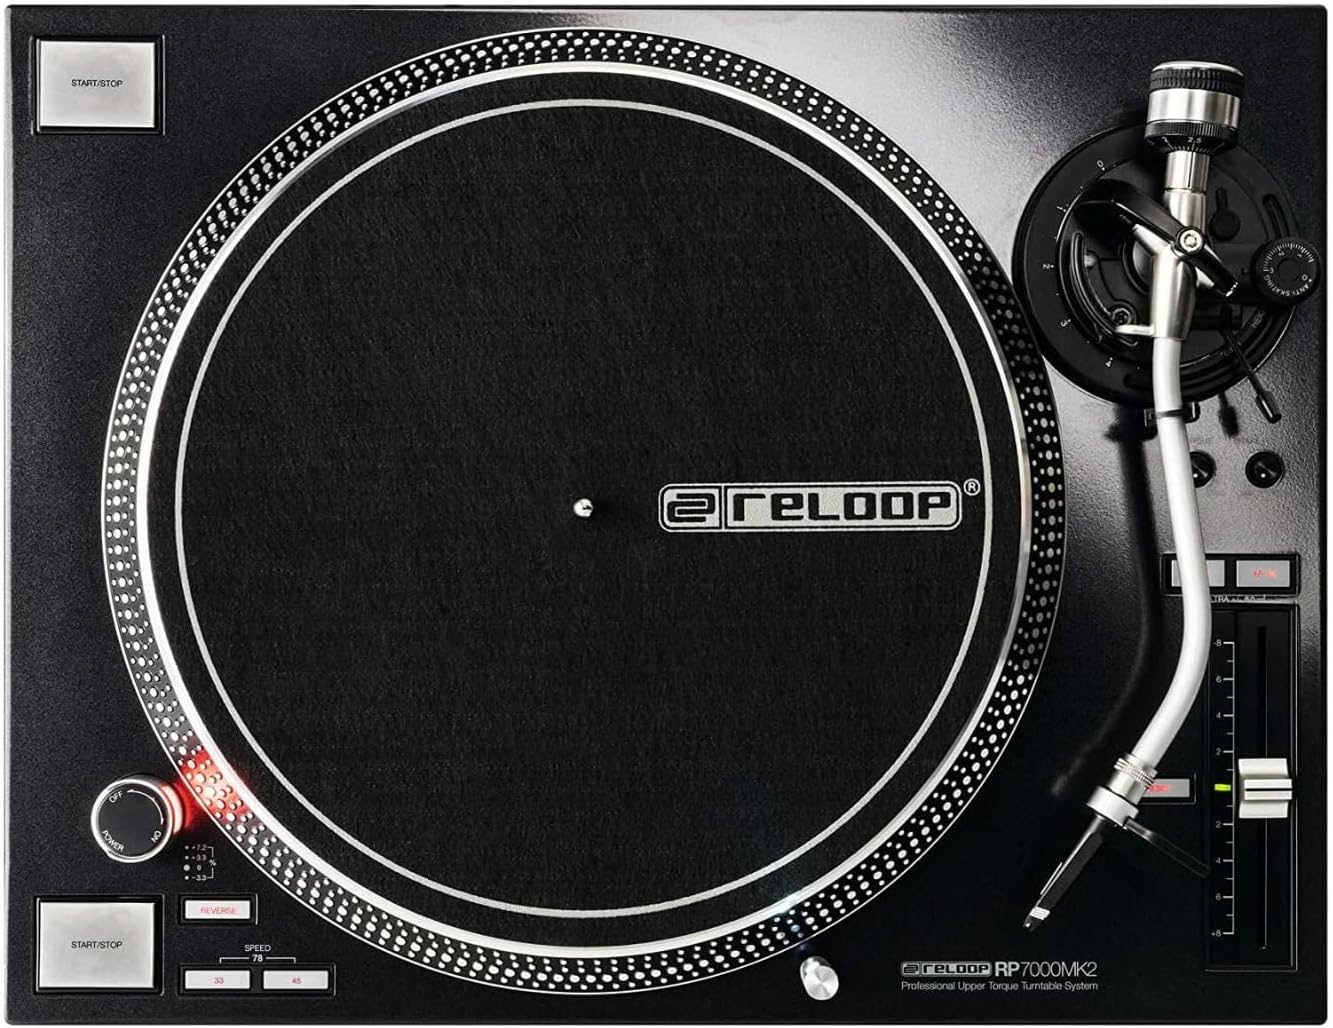
Slika 4: Turntable platter and control layout.
5.2 Kontrola visine tona
The pitch fader allows you to adjust the playback speed (BPM) of the record. Move the fader up or down to increase or decrease the pitch. The pitch range can be selected using the range buttons (e.g., +/- 8%, 16%, 50%).
5.3 Funkcija obrnutog hoda
The RP-7000 MK2 features a reverse playback function. Press the REVERSE button to change the direction of platter rotation. Press it again to return to normal playback.
6. Održavanje
6.1 Čišćenje gramofona
- Uvijek isključite napajanje prije čišćenja.
- Use a soft, dry, lint-free cloth to wipe the surface of the turntable and dust cover.
- Izbjegavajte upotrebu abrazivnih sredstava za čišćenje, rastvarača ili hemijskih sprejeva, jer oni mogu oštetiti završnu obradu.
6.2 Održavanje olovke
- Gently brush the stylus from back to front using a soft stylus brush to remove dust and debris.
- Izbjegavajte dodirivanje olovke prstima.
6.3 Briga o evidenciji
The included record care solution helps maintain the quality of your vinyl records and prolong their lifespan.
- Apply a small amount of record care solution to a clean, soft, lint-free cloth or a dedicated record cleaning brush.
- Gently wipe the record surface in a circular motion, following the grooves.
- Allow the record to dry completely before playing.
Slika 5: Record Care Solution for maintaining vinyl quality.
7. Otkrivanje problema
| Problem | Mogući uzrok | Rješenje |
|---|---|---|
| Nema struje | Kabl za napajanje nije priključen; utičnica nije aktivna | Provjerite priključak kabela za napajanje; testirajte utičnicu s drugim uređajem |
| Nema zvuka ili je mala jačina zvuka | RCA cables incorrect; no PHONO input; amplifier/mixer settings | Ensure RCA cables are connected to PHONO input; check amplifier/mixer input selection and volume |
| Zujanje | Uzemljenje nije povezano; smetnje | Connect ground wire; move turntable away from other electronic devices |
| Preskakanje ili izobličenje zvuka | Incorrect tracking force; dirty stylus/record; damaged stylus | Adjust tracking force using stylus scale; clean stylus and record; replace stylus if damaged |
| Plato se ne okreće | START/STOP button not pressed; motor issue | Press START/STOP; if problem persists, contact support |
8. Specifikacije
| Feature | Detalj |
|---|---|
| Naziv modela | RP-7000 MK2 |
| Brand | Reloop |
| Tip motora | Direct Drive DC Motor |
| Posebna karakteristika | High Torque |
| Dimenzije proizvoda | 27.9 x 20 x 18.6 inča |
| Materijal | Metal |
| Boja | Crna |
| Kompatibilni uređaji | Speaker, Headphone, Personal Computer, MP3 Player, Laptop |
| Format signala | Digital |
9. Garancija i podrška
Reloop products are designed for reliability and performance. For warranty information, please refer to the warranty card included with your product or visit the official Reloop website. For technical support or service inquiries, please contact your authorized Reloop dealer or distributor.
Proizvođač: Reloop
Datum prve dostupnosti: 8. jul 2022


