1. Uvod
This manual provides detailed instructions for the installation, operation, and maintenance of the VIVOTEK ND9323P H.265 8-Channel Embedded PoE Network Video Recorder (NVR). Please read this manual thoroughly before using the product to ensure proper and safe operation. Keep this manual for future reference.
2. Sigurnosne informacije
Observe the following safety precautions to prevent damage to the NVR and to ensure user safety:
- Napajanje: Use only the power adapter supplied with the NVR. Ensure the power source matches the NVR's voltage zahtjeve.
- ventilacija: Ne blokirajte ventilacijske otvore. Instalirajte NVR u dobro prozračenom prostoru kako biste spriječili pregrijavanje.
- Okruženje: Avoid exposing the NVR to water, moisture, extreme temperatures, or direct sunlight. Do not place heavy objects on the NVR.
- servisiranje: Ne pokušavajte sami servisirati ovaj proizvod. Sve servise prepustite kvalificiranom servisnom osoblju.
- Rukovanje: Handle the NVR with care. Avoid dropping or subjecting it to strong impacts.
3. Sadržaj paketa
Carefully unpack the box and ensure all items are present and in good condition. If any items are missing or damaged, contact your vendor immediately.
- VIVOTEK ND9323P NVR uređaj
- Adapter za napajanje
- USB miš
- Vodič za brzu instalaciju
- Accessory Pack (Screws for HDD installation, Ethernet cable)
- Case (referring to the NVR enclosure itself)
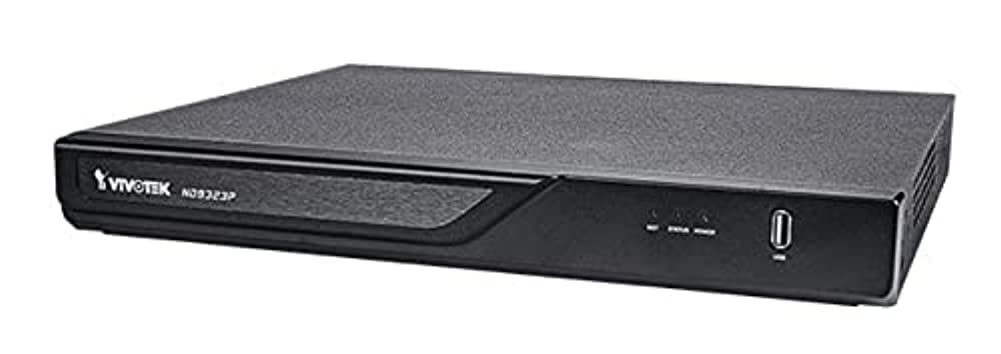
Figure 3.1: VIVOTEK ND9323P NVR unit. This image shows the front panel of the NVR, typically featuring status indicators and USB ports.
4. Proizvod je gotovview
The VIVOTEK ND9323P is an 8-channel embedded Network Video Recorder designed for IP surveillance systems. It supports H.265 video compression for efficient storage and bandwidth usage. With its integrated Power over Ethernet (PoE) ports, it simplifies camera installation by providing both power and data connectivity through a single Ethernet cable.
4.1 Ključne karakteristike
- 8-Channel Video Input
- H.265/H.264 Video Compression
- 8 x 802.3at/af PoE Ports
- Local Display Output (HDMI/VGA)
- Remote Access via VIVOTEK VIVOCloud App or VMS
- Supports up to 16TB HDD storage (HDD not included)
4.2 Prednja i stražnja ploča
Refer to the Quick Installation Guide for detailed diagrams of the front and rear panels, indicating ports and indicators.
- Prednja ploča: Power LED, HDD LED, Network LED, USB ports.
- Zadnji panel: Power input, LAN port, PoE ports (1-8), HDMI output, VGA output, Audio I/O, USB ports.
5. Podešavanje
5.1 Instalacija tvrdog diska (opcionalno)
The NVR does not typically include a pre-installed hard drive. Follow these steps to install a 3.5-inch SATA hard drive:
- Odvrnite i uklonite gornji poklopac NVR-a.
- Spojite SATA podatkovne i napojne kablove s NVR-a na tvrdi disk.
- Pričvrstite tvrdi disk na kućište NVR-a pomoću priloženih vijaka.
- Vratite gornji poklopac i pričvrstite ga vijcima.
Napomena: Ensure the NVR is powered off and unplugged before installing or removing a hard drive.
5.2 Fizičke veze
- Povežite kamere: Connect your IP cameras to the NVR's PoE ports (1-8) using Ethernet cables. The NVR will provide power and network connectivity to the cameras.
- Povežite se na mrežu: Connect the NVR's LAN port to your local network router or switch using an Ethernet cable.
- Poveži ekran: Spojite monitor na HDMI ili VGA izlazni priključak NVR-a.
- Povezivanje miša: Uključite USB miš u jedan od USB priključaka NVR-a.
- Uključeno: Spojite adapter za napajanje na ulaz za napajanje NVR-a, a zatim ga uključite u utičnicu. NVR će se automatski uključiti.
5.3 Početna konfiguracija
Upon first boot, the NVR will guide you through a setup wizard on the connected monitor:
- Odabir jezika: Odaberite željeni jezik.
- Postavljanje lozinke: Kreirajte jaku lozinku za administratorski račun. Ovo je ključno za sigurnost.
- Mrežne postavke: Configure network settings (DHCP or Static IP). DHCP is recommended for most home users.
- Vrijeme i datum: Podesite tačnu vremensku zonu, datum i vrijeme.
- Inicijalizacija tvrdog diska: If you installed a new hard drive, the NVR will prompt you to format it. Confirm to proceed. Upozorenje: Formatting will erase all data on the drive.
- Pretraga i dodavanje kamere: The NVR will automatically search for connected VIVOTEK cameras. Select and add them to the NVR.
- završiti: Complete the wizard to access the NVR's live view.
6. Upravljanje NVR-om
6.1 Accessing the NVR
You can access and manage the NVR through various methods:
- Lokalni prikaz: Directly via the connected monitor and USB mouse.
- Web Preglednik: Unesite IP adresu NVR-a u web pretraživač na računaru povezanom na istu mrežu.
- VIVOTEK VIVOCloud App: Download the mobile app for remote viewing i upravljanje.
- VIVOTEK VAST 2 VMS: For advanced management and multi-NVR systems.
6.2 Uživo View
Uživo view displays real-time video feeds from all connected cameras. You can switch between single-camera view, mreža s više kamera view, and customize the display layout.
6.3 Postavke snimanja
Configure recording schedules and modes for each camera:
- Kontinuirano snimanje: Zapisi 24/7.
- Snimanje otkrivanja pokreta: Snima samo kada se detektuje pokret.
- Planirano snimanje: Zapisi tokom određenih vremenskih perioda.
- Snimanje događaja: Records based on external triggers or alarms.
Access these settings through the NVR's main menu: Configuration > Recording > Schedule.
6.4 Reprodukcija
To review snimljeno footage:
- Iz glavnog menija izaberite Reprodukcija.
- Odaberite kameru(e) i raspon datuma/vremena koji želite snimitiview.
- Use the timeline and playback controls (play, pause, fast forward, rewind) to navigate through the footage.
6.5 Event Management and Notifications
Configure the NVR to respond to events such as motion detection, camera tampering, or network disconnection. The NVR can send email notifications, trigger alarms, or start recording.
Access these settings via: Configuration > Event.
7. Održavanje
7.1 Ažuriranja firmvera
Regularly check for and install firmware updates to ensure optimal performance, security, and access to new features. Firmware can be updated via the NVR's web interface or local display menu: Configuration > System > Firmware Upgrade.
Oprez: Do not power off the NVR during a firmware upgrade. This can cause permanent damage.
7.2 Upravljanje tvrdim diskom
Monitor the health of your hard drive(s) and ensure sufficient storage space. The NVR will automatically overwrite the oldest recordings when the disk is full, based on your settings.
Access HDD status and settings via: Configuration > Storage > HDD Management.
7.3 Čišćenje
Održavajte NVR uređaj čistim i bez prašine. Za čišćenje koristite meku, suhu krpu. Ne koristite tekuća sredstva za čišćenje ili aerosole.
8. Otkrivanje problema
This section addresses common issues you might encounter with your VIVOTEK ND9323P NVR.
8.1 No Video Display on Monitor
- Provjerite kablove: Provjerite je li HDMI/VGA kabel sigurno spojen i na NVR i na monitor.
- Ulaz monitora: Provjerite je li monitor postavljen na ispravan ulazni izvor (HDMI/VGA).
- NVR Power: Confirm the NVR is powered on and its power LED is illuminated.
8.2 Cameras Not Showing Up / No Image
- PoE veza: Ensure cameras are properly connected to the NVR's PoE ports. Check if the PoE port LEDs on the NVR are active.
- Snaga kamere: If not using PoE, ensure cameras are receiving power from their own power adapters.
- Mrežna povezanost: Verify the NVR and cameras are on the same network segment if not directly connected via PoE.
- Status kamere: Check the camera's own status indicators.
- NVR Camera Management: Idi na Configuration > Camera > Camera Management to ensure cameras are added and enabled. Try rescanning for cameras.
8.3 Cannot Access NVR via Web Browser
- IP adresa: Confirm the NVR's IP address is correct and that your computer is on the same network.
- Mrežni kabl: Ensure the NVR's LAN port is connected to your network.
- Firewall: Temporarily disable your computer's firewall to check if it's blocking access.
- Kompatibilnost pretraživača: Use a recommended web preglednik (npr. Chrome, Firefox).
8.4 Zaboravljena lozinka
If you forget the administrator password, you may need to perform a factory reset. Refer to the VIVOTEK support website or contact technical support for the specific procedure for your model, as this often involves a physical reset button or a specific utility.
9. Specifikacije
The following table lists the key specifications for the VIVOTEK ND9323P NVR:
| Feature | Specifikacija |
|---|---|
| Broj modela | ND9323P |
| Brand | VIVOTEK |
| Broj kanala | 8 |
| Tehnologija povezivanja | Ethernet |
| Kompatibilni uređaji | Camera, Mobile Device |
| Video Compression | H.265, H.264 |
| PoE portovi | 8 x 802.3at/af |
| Dimenzije proizvoda | 19.69 x 19.69 x 11.02 inča |
| Težina artikla | 0.01 unce |
| Proizvođač | Vivotek |
10. Garancija i podrška
VIVOTEK proizvodi su pokriveni ograničenom garancijom. Za detaljne uslove garancije, molimo pogledajte garantni list koji je priložen uz vaš proizvod ili posjetite službenu VIVOTEK stranicu website.
For technical support, product registration, or to download the latest firmware and software, please visit the VIVOTEK support portal:
VIVOTEK Official Support Website
When contacting support, please have your NVR's model number (ND9323P) and serial number ready.


