1. Uvod
This manual provides instructions for the installation, operation, and maintenance of your REOLINK 3W Solar Panel. This solar panel is designed to provide continuous power to compatible REOLINK battery-powered wireless security cameras, ensuring uninterrupted operation without frequent battery changes.
2. Sadržaj paketa
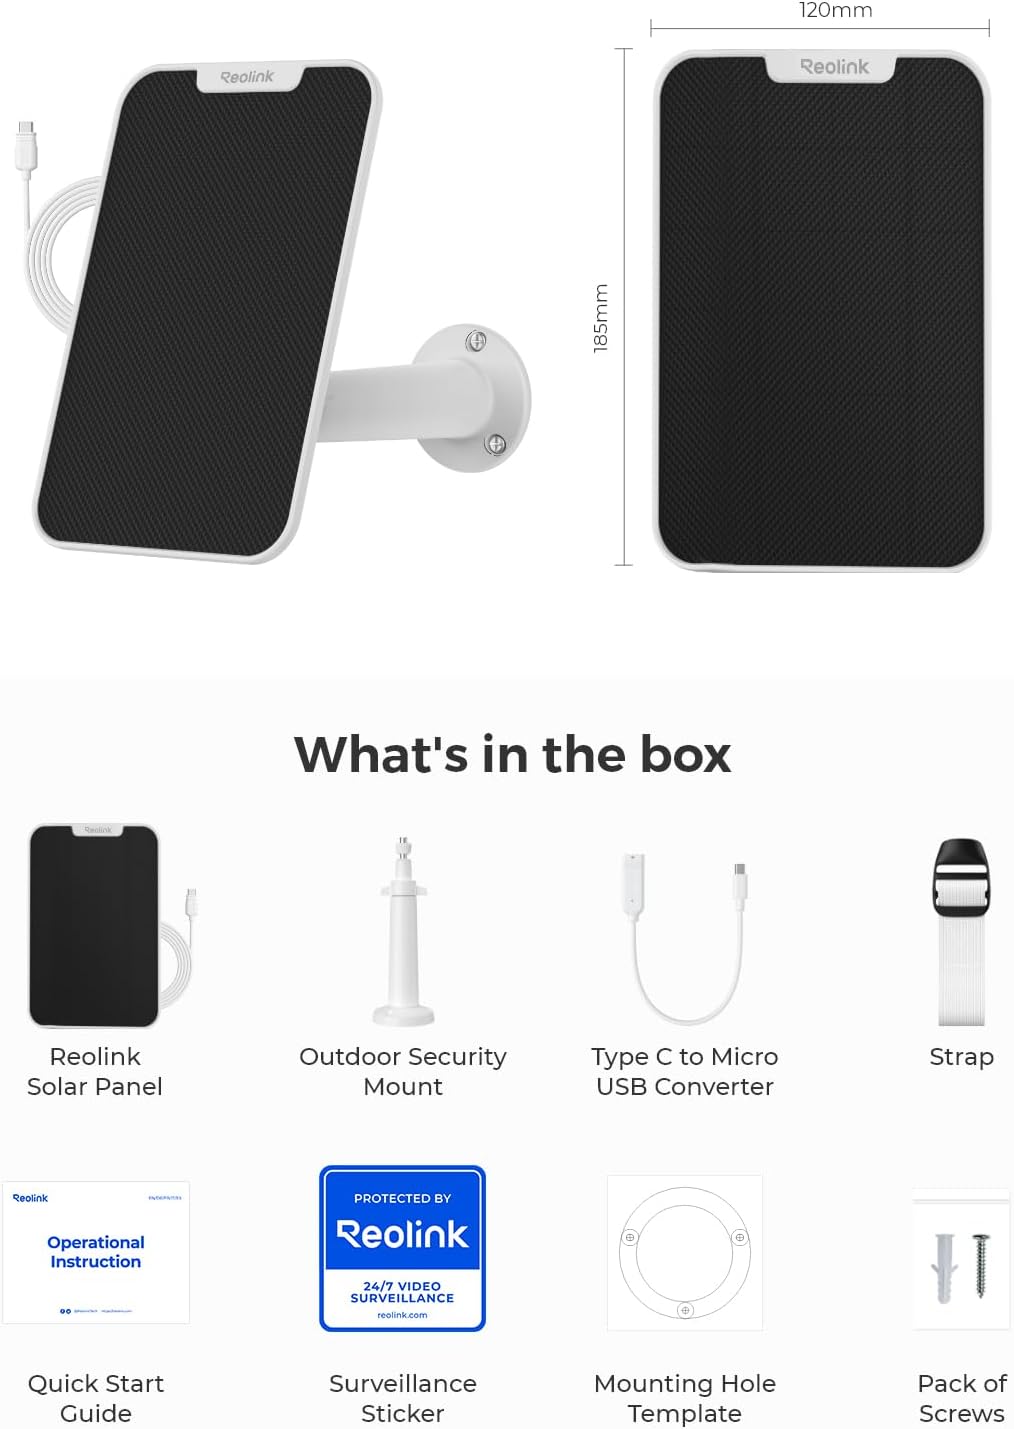
Provjerite da li su sve komponente prisutne u vašem paketu:
- REOLINK 3W Solar Panel
- Vanjski sigurnosni nosač
- Type C to Micro USB Converter
- Predložak rupe za montažu
- Paket vijaka
- Vodič za brzi početak
- Naljepnica za nadzor

An image showing the contents of the REOLINK 3W Solar Panel package, including the solar panel, mounting bracket, USB-C to Micro USB adapter, screws, and documentation.
3. Kompatibilnost
The REOLINK 3W Solar Panel is compatible with specific REOLINK rechargeable battery-powered security cameras that feature either a Micro USB or USB-C charging port. Compatible models include:
- Argus 2E
- Argus 3 Pro
- Argus Eco
- Reolink Go Plus
- Argus PT
- Idi PT Plus

An image illustrating the compatibility of the REOLINK 3W Solar Panel with various REOLINK battery cameras, including Argus PT, Go PT Plus, Go Plus, Argus 3 Pro, Argus Eco Pro, and Argus Eco, highlighting the USB Type-C and Micro USB ports.
4. Vodič za instalaciju
4.1 Odabir lokacije za instalaciju
Select a location for the solar panel that receives maximum direct sunlight throughout the day. Avoid areas with shade from trees, buildings, or other obstructions. The ideal angle for the solar panel is generally the local latitude plus 5 degrees, facing true south (Northern Hemisphere) or true north (Southern Hemisphere).
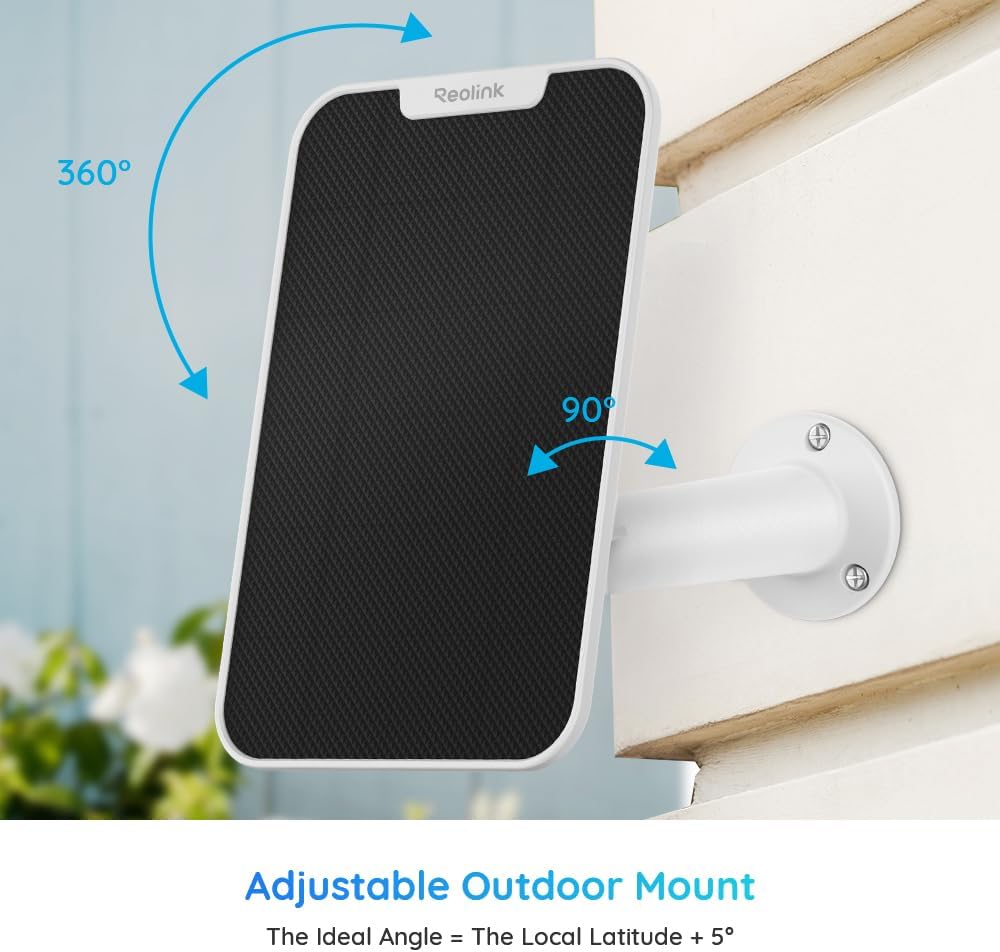
An image showing the REOLINK solar panel mounted on a wall, with arrows indicating 360-degree rotation and 90-degree tilt for optimal sun exposure. The text 'Adjustable Outdoor Mount' and 'The Ideal Angle = The Local Latitude + 5°' are displayed.
A REOLINK solar panel mounted on the side of a white building, angled towards a clear blue sky, demonstrating an ideal installation for maximum sun exposure.
4.2 Montiranje solarnog panela
- Pripremite montažnu površinu: Use the provided mounting hole template to mark the drill points on your chosen surface.
- Izbušite rupe: Izbušite pilot rupe na označenim lokacijama.
- Pričvrstite nosač: Secure the outdoor security mount to the surface using the provided screws.
- Pričvrstite solarnu ploču: Slide the solar panel onto the mounting bracket.
- Podesite ugao: Adjust the solar panel's angle to face the sun directly for optimal charging efficiency. The mount allows for 360-degree rotation and 90-degree tilt.

A diagram illustrating how to secure the mounting bracket to a surface using three screws.

A diagram showing how to slide the solar panel onto the mounting bracket.

A diagram demonstrating how to adjust the solar panel's angle towards the sun for optimal charging.
4.3 Connecting to Your Camera
Connect the solar panel's power cable to your REOLINK battery camera. Use the provided Type C to Micro USB converter if your camera has a Micro USB port. The 4-meter cable provides flexibility in placement. Extension cables (up to 2, totaling 13 meters) are available if needed.

An image showing the REOLINK solar panel with its integrated USB-C cable and a separate USB-C to Micro USB adapter, illustrating its compatibility with different camera charging ports.

A diagram showing the solar panel connected to a security camera via its power cable.
5. Operation and Efficiency
The REOLINK 3W Solar Panel converts sunlight into electrical energy to continuously charge your compatible security camera's battery. This ensures your camera remains powered, reducing the need for manual recharging.

An image depicting the REOLINK solar panel in a sunny outdoor setting, with a lightning bolt icon indicating it is generating green solar energy.
Factors Affecting Efficiency:
- Izlaganje suncu: Direct, unobstructed sunlight is crucial.
- Vremenski uslovi: Rain, clouds, or snow will reduce charging efficiency.
- Angle and Orientation: Proper angling towards the sun maximizes power generation.
- temperatura: Extreme low temperatures can affect battery charging performance.
- Čistoća površine: Dust or debris on the panel surface can hinder performance.
- Upotreba kamere: Frequent camera access or constant motion triggers will drain the camera battery faster, potentially exceeding the solar panel's charging capacity in less ideal conditions.
6. Održavanje
- Redovno čišćenje: Redovno brišite površinu solarnog panela mekom,amp krpom za uklanjanje prašine, prljavštine i ostataka. Čista ploča osigurava maksimalnu apsorpciju sunčeve svjetlosti.
- Podešavanje ugla: Periodically check and adjust the panel's angle to ensure it is optimally positioned for sun exposure, especially during seasonal changes.
- Inspekcija kablova: Inspect the power cable and connectors for any signs of wear or damage. Ensure connections are secure.

A REOLINK solar panel mounted on a wall, with raindrops visible on its surface, demonstrating its waterproof design.

An image of the REOLINK solar panel with raindrops on its surface, highlighting its waterproof feature.
7. Otkrivanje problema
7.1 Solar Panel Not Charging Camera
- Provjerite izloženost sunčevoj svjetlosti: Ensure the panel is receiving direct, unobstructed sunlight for several hours a day. Relocate if necessary.
- Očistite panel: Remove any dust, dirt, or debris from the panel surface.
- Potvrdite veze: Ensure the power cable is securely connected to both the solar panel and the camera.
- Temperaturna razmatranja: In very low temperatures (below 0°C/32°F), battery charging efficiency can be significantly reduced or stopped for safety. The camera battery may drain faster in cold conditions.
- Camera Power Consumption: High camera usage (frequent live view, many motion detections) can consume more power than the solar panel can generate, especially in suboptimal light conditions. Reduce camera activity or consider supplemental charging if this is a persistent issue.
7.2 Cable Length Issues
The standard cable length is 4 meters (13 feet). If a longer cable is required, REOLINK offers 4.5-meter extension cables. Up to two extension cables can be used, extending the total distance to 13 meters (43 feet).
8. Specifikacije
| Feature | Specifikacija |
|---|---|
| Brand | REOLINK |
| Materijal | Monokristalni silicijum |
| Dimenzije proizvoda | 7.3 cm D x 4.74 cm Š x 0.26 cm V |
| Težina artikla | 1.15 funte |
| Maximum Voltage | 6 Volts |
| Maksimalna snaga | 3 Watts |
| Posebna karakteristika | Vodootporan |
| Dužina kabla | 4 metara (13 stopa) |
9. Garancija i podrška
The REOLINK solar panel is supported by a 2-year limited warranty. REOLINK also offers a 30-day money-back guarantee. For technical support, warranty claims, or further assistance, please visit the official REOLINK webstranice ili kontaktirajte njihovu korisničku službu.
Zvanični REOLINK Webstranica: reolink.com


