1. Uvod
Thank you for choosing the Oasser P2A Portable Tyre Inflator. This cordless air compressor is designed for convenient and efficient inflation of tyres for cars, motorcycles, and bicycles, as well as other inflatable items. Featuring a digital pressure gauge and a 2000mAh lithium battery, it provides reliable performance for your inflation needs.

Slika 1.1: The Oasser P2A Portable Tyre Inflator shown with its complete set of accessories, including various nozzles, charging cable, and storage bag.
2. Sigurnosne informacije
Please read all safety warnings and instructions carefully before using this product to avoid electric shock, fire, and serious injury.
- Keep the inflator away from children.
- Ne koristite pumpu za naduvavanje u vlažnim uslovima ili u blizini zapaljivih tečnosti ili gasova.
- Ensure the correct pressure setting for the item being inflated to prevent over-inflation and potential damage or injury. Refer to the item's manufacturer specifications for recommended pressure.
- Ne ostavljajte inflator bez nadzora dok radi.
- Allow the inflator to cool down after prolonged use to prevent overheating.
- Use only the provided charging cable and a compatible USB power source for charging.
- Store the inflator in a dry, cool place when not in use.
3. Komponente i karakteristike proizvoda
The Oasser P2A inflator comes with several components designed for versatile use.

Slika 3.1: Key features of the Oasser P2A inflator, highlighting the LED light, digital LCD display, and the integrated 2000mAh lithium battery.
- Glavna jedinica: Portable air compressor with integrated digital display and controls.
- Litijumska baterija od 2000 mAh: Provides cordless operation.
- Digital Backlit LCD Display: Shows current and target pressure clearly.
- LED svjetlo: Za osvjetljenje u uslovima slabog osvjetljenja.
- Zračna crijeva: Includes both a short and a long air hose for different applications.
- Nozzle Adapters:
- Presta adapter ventila
- Air Nozzle (for inflatables)
- Ball Needle
- USB kabl za punjenje: Za ponovno punjenje uređaja.
- Torba za pohranu: For convenient storage and transport of the inflator and accessories.

Slika 3.2: All accessories included with the Oasser P2A Tyre Inflator, laid out for clear identification.
4. Podešavanje i punjenje
4.1 Početno punjenje
Before first use, fully charge the Oasser P2A inflator. It is recommended to charge the battery to full capacity within 3 days after every use to maintain battery health.
- Connect the provided USB charging cable to the charging port on the inflator.
- Connect the other end of the USB cable to a compatible USB power adapter (e.g., phone charger, computer USB port).
- The charging indicator on the inflator will show the charging status. Charge until the battery indicator shows full.

Slika 4.1: The inflator connected to a USB power source for charging, illustrating its home charging capability.
4.2 Pričvršćivanje crijeva za zrak
Select the appropriate air hose (short or long) and screw it firmly onto the inflator's air outlet. Ensure a tight seal to prevent air leakage during inflation.
5. Uputstvo za upotrebu
5.1 Osnovni koraci inflacije
- Uključi: Press the middle button on the unit to power it on. The digital display will illuminate.
- Spojite crijevo za zrak: Screw the air hose onto the tyre valve. For different items, attach the appropriate nozzle adapter (e.g., Presta valve adapter for bicycles, ball needle for sports balls).
- Postavite željeni pritisak: Use the "+" and "-" buttons to adjust the target pressure. The display will flash four times to confirm the setting.
- Početak inflacije: Press the start button (trigger) to begin inflation. The inflator will automatically stop when the preset pressure is reached.
- Prekini vezu: Once inflation is complete, disconnect the air hose from the valve.

Slika 5.1: Visual guide for the inflation process, from powering on to automatic shut-off.
5.2 Digital Display and LED Light
The digital backlit LCD display provides clear readings of pressure. The integrated LED light can be activated to assist with inflation in dark environments, such as at night or in dimly lit garages.

Slika 5.2: The clear digital display for precise pressure monitoring.

Slika 5.3: The LED light in operation, providing visibility for nighttime use.
5.3 Inflation Capacity
The 2000mAh lithium battery provides sufficient power for multiple inflations on a single charge. For example, it can inflate approximately:
- Up to 4 car tyres (size 185/70R14)
- Up to 10 motorcycle tyres
- Up to 25 bicycle tyres
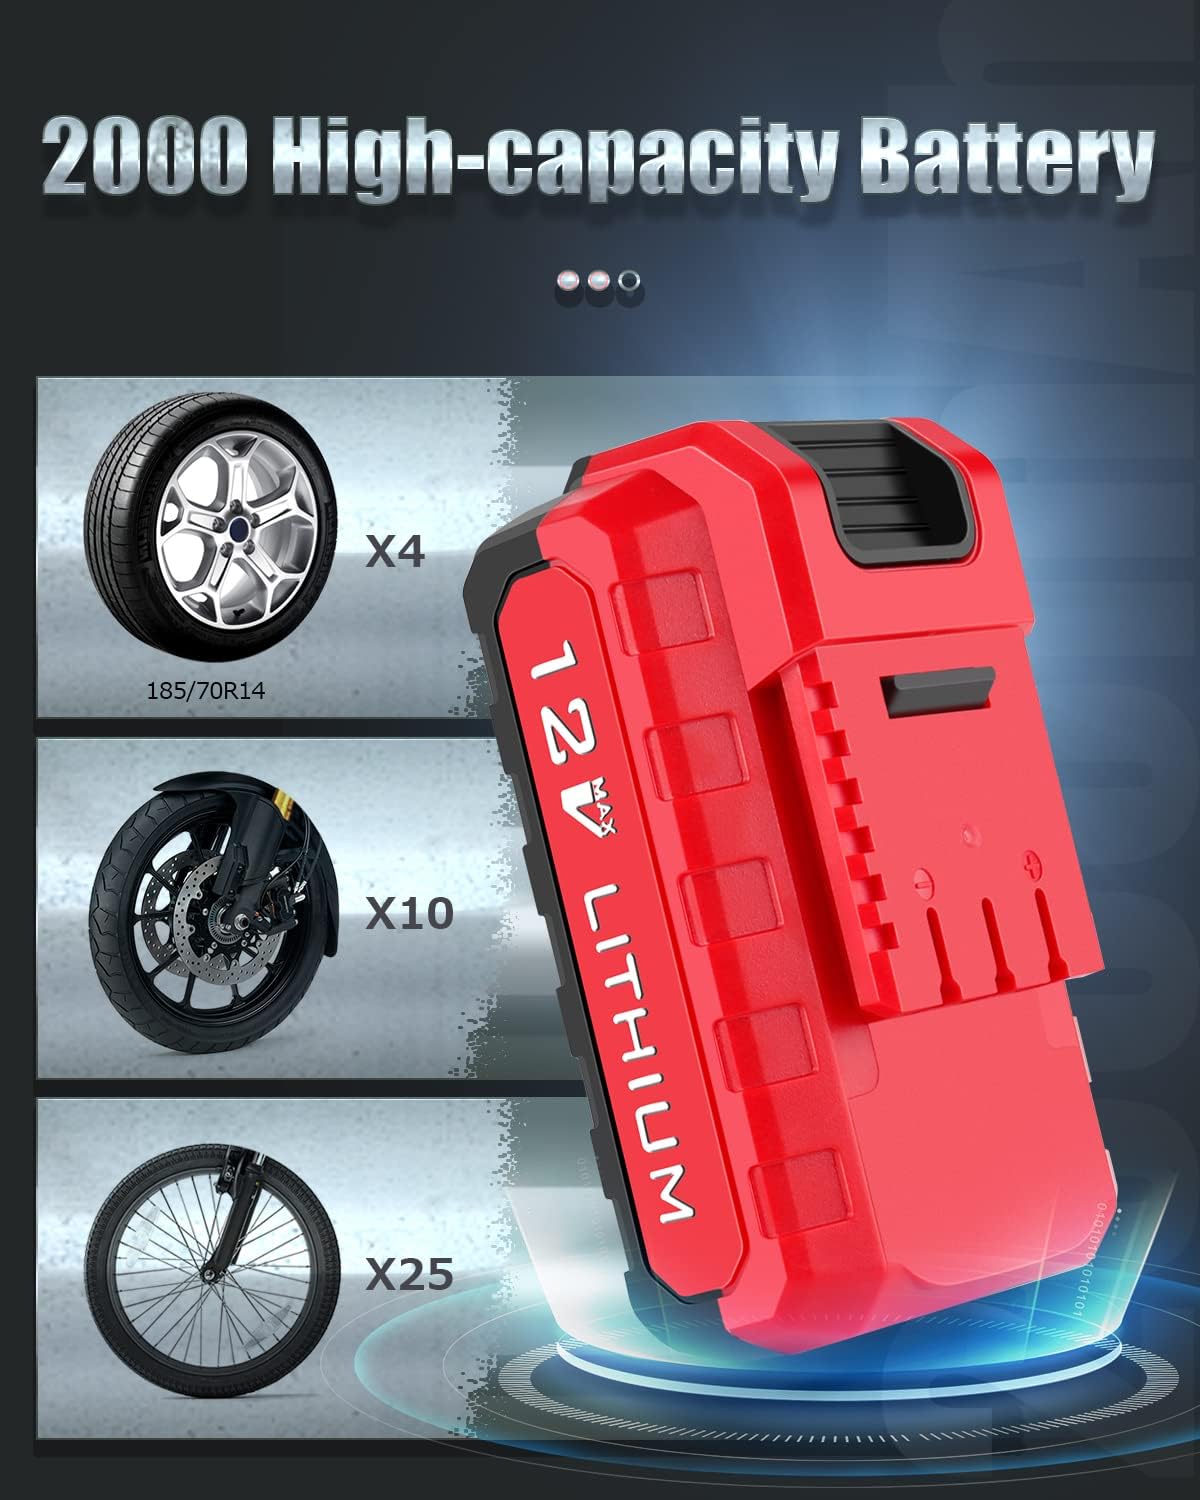
Slika 5.4: Battery capacity and estimated inflation counts for various vehicle types.
5.4 Brza inflacija
The Oasser P2A is equipped with a powerful engine capable of fast inflation. For instance, it can inflate a 165/70 R14 car tyre from 15 PSI to 35 PSI in approximately 3 minutes.

Slika 5.5: The inflator in action, demonstrating its fast inflation capability and key operational features.
6. Održavanje
- čišćenje: Obrišite vanjski dio pumpe za naduvavanje mekom,amp tkanina. Nemojte koristiti jake hemikalije ili abrazivna sredstva za čišćenje.
- Skladištenje: Čuvajte pumpu za naduvavanje i njen pribor u priloženoj torbi za odlaganje na hladnom i suhom mjestu, dalje od direktne sunčeve svjetlosti i ekstremnih temperatura.
- Održavanje baterije: As noted in the operating instructions, charge the battery fully within 3 days after each use to prolong its lifespan. Avoid completely draining the battery before recharging.
- Pregled crijeva i mlaznica: Regularly check the air hoses and nozzle adapters for any signs of wear, cracks, or damage. Replace if necessary to ensure proper function and prevent air leaks.
7. Otkrivanje problema
| Problem | Mogući uzrok | Rješenje |
|---|---|---|
| Inflator se ne uključuje. | Baterija je prazna. | Potpuno napunite pumpu za naduvavanje. |
| Inflator runs but no air comes out or pressure is low. | Air hose or nozzle not securely attached; Air hose or nozzle is blocked or damaged. | Ensure all connections are tight. Check for obstructions or damage in the hose/nozzle. |
| Napuhivač se zaustavlja prije nego što dostigne unaprijed postavljeni pritisak. | Baterija je slaba; Zaštita od pregrijavanja je aktivirana. | Recharge the battery. Allow the unit to cool down before resuming operation. |
| Netačno očitavanje pritiska. | Improper connection to valve; Sensor malfunction. | Ensure the hose is securely connected to the valve. If problem persists, contact customer support. |
8. Specifikacije
| Brand | Oasser |
| Model | TT-Tuk15 (P2A) |
| Kapacitet baterije | 2000mAh litijumska baterija |
| Max Pressure | 120 PSI |
| Ulaz za punjenje | USB (5 V) |
| Težina artikla | 1.03 kg |
| Dimenzije paketa | 26.1 x 16.8 x 8.7 cm |
9. Garancija i podrška
Oasser products are designed for reliability and performance. For warranty information or technical support, please refer to the contact details provided in the original product packaging or visit the official Oasser webMolimo sačuvajte dokaz o kupovini za potrebe reklamacije.
Napomena: Neki kupciviews mention a positive experience with Oasser's support regarding product issues, indicating a willingness to assist with replacements or solutions.


