Uvod
This manual provides detailed instructions for the setup, operation, maintenance, and troubleshooting of your Amcrest 5Series 4K NVR 16-Channel NV5216 Network Video Recorder. Please read this manual thoroughly before using the device to ensure proper functionality and safety.

Image: Amcrest 5Series 4K NVR NV5216, showcasing its 4K UHD resolution, 16 channels, H.265 compression, 20TB HDD capacity, two-way talk, 320Mbps bandwidth, HDMI output, and plug-and-play installation.
1. Podešavanje
1.1 Sadržaj paketa
Provjerite da li su sve komponente prisutne u paketu:
- Amcrest 5Series 4K NVR (NV5216)
- Adapter za napajanje
- USB miš
- Mrežni kabl
- Vodič za brzi početak
- Mounting Screws for Hard Drive (Hard Drive Not Included)
1.2 Hardverski krajview
Familiarize yourself with the ports and indicators on the NVR.
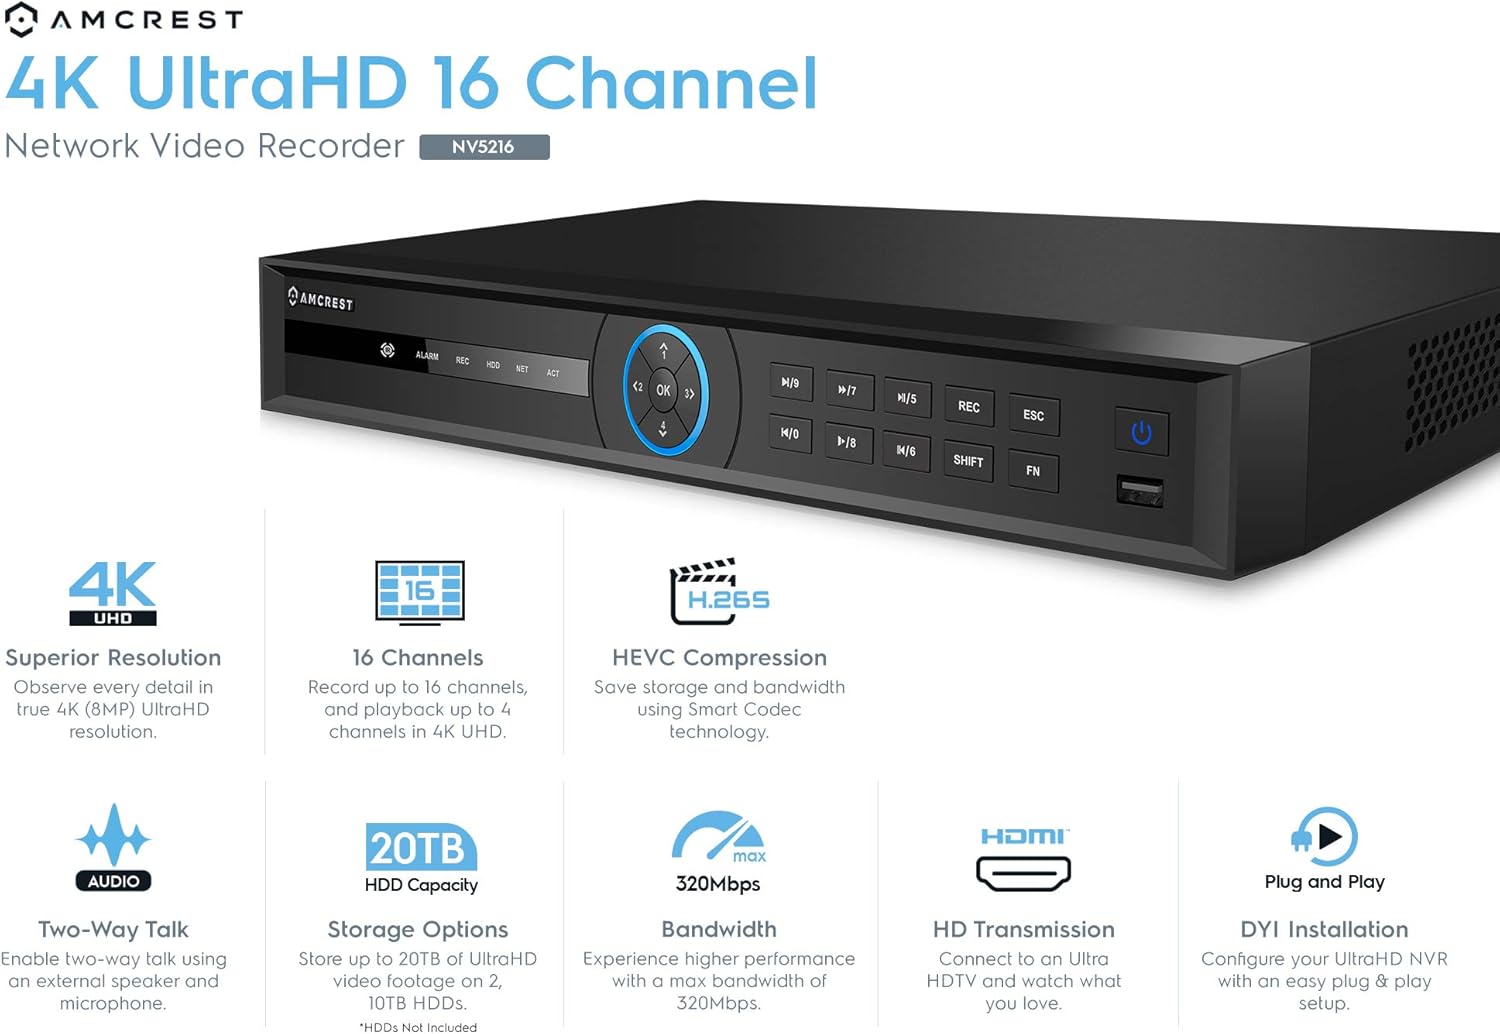
Image: Front panel of the Amcrest NV5216 NVR, showing the LED indicator, control panel buttons (OK, navigation, M/7, M/8, REC, ESC, SHIFT, FN), USB 3.0 port, and On/Off power button.
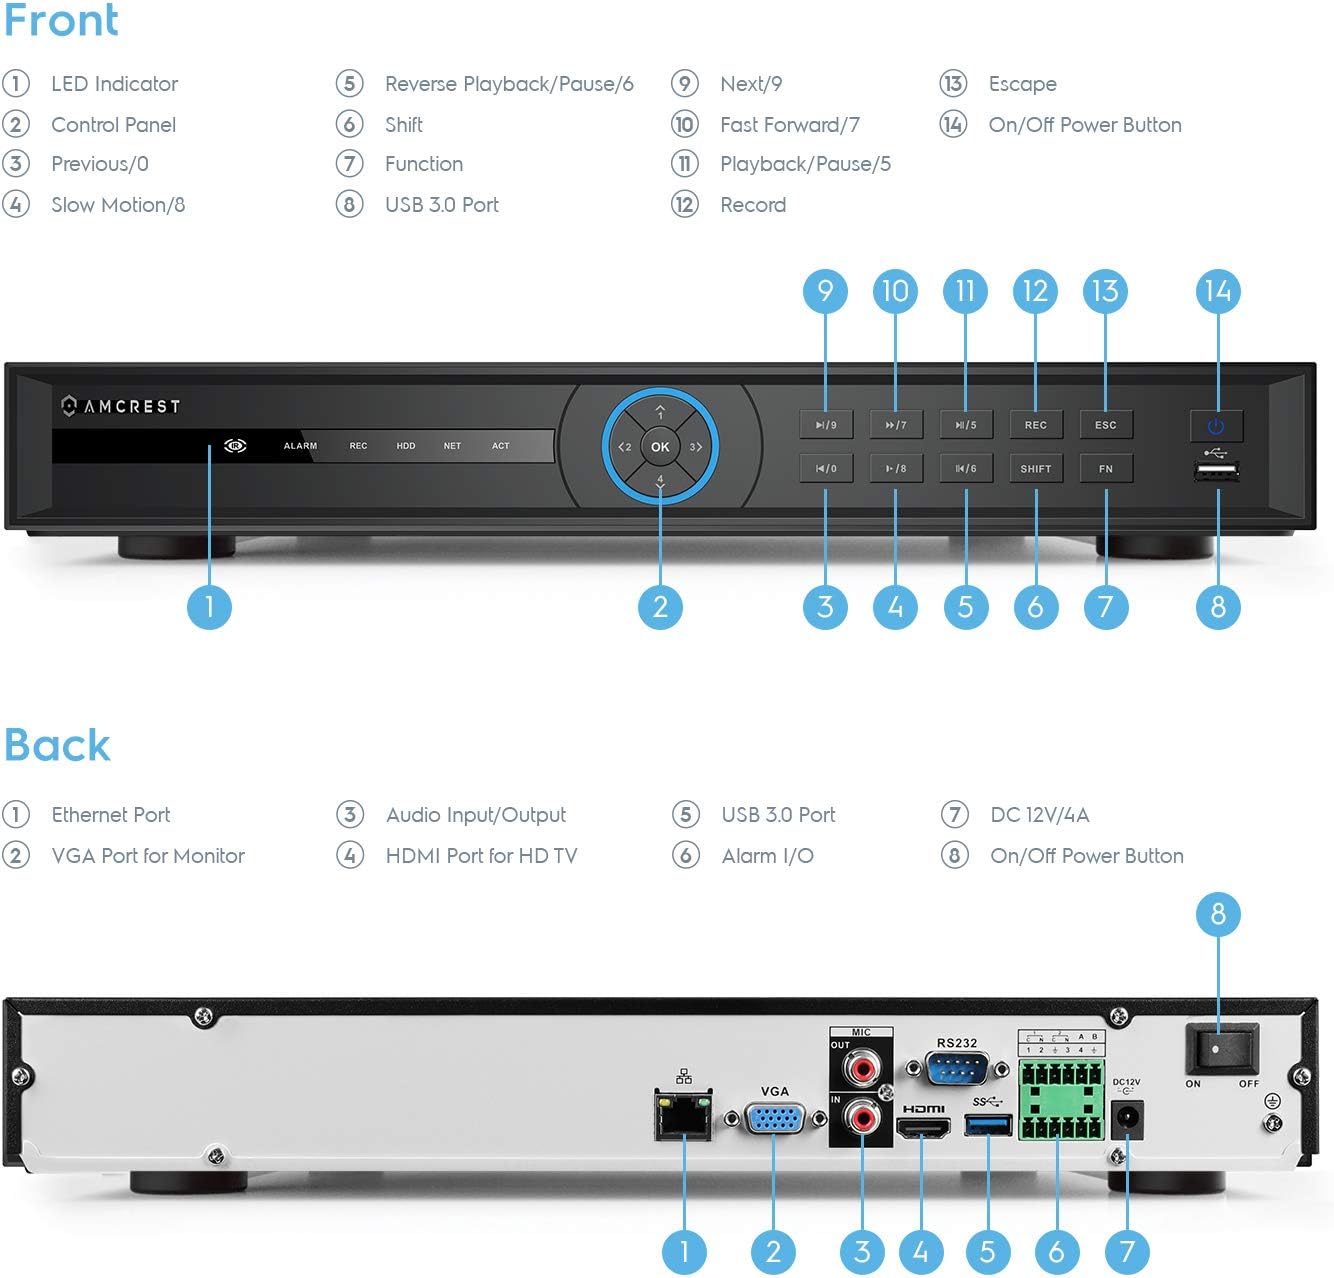
Image: Back panel of the Amcrest NV5216 NVR, illustrating the Ethernet port, VGA port for monitor, Audio Input/Output, HDMI port for HD TV, USB 3.0 port, Alarm I/O, DC 12V/4A power input, and On/Off power button.
1.3 Instalacija tvrdog diska
The NVR supports up to two 10TB hard drives (not included). Follow these steps to install a hard drive:
- Odvrnite i uklonite gornji poklopac NVR-a.
- Spojite SATA podatkovne i napojne kablove s NVR-a na tvrdi disk.
- Pričvrstite tvrdi disk na kućište NVR-a pomoću priloženih vijaka.
- Vratite gornji poklopac i pričvrstite ga vijcima.
1.4 Početno povezivanje
Povežite NVR na vašu mrežu i prikažite:
- Connect the NVR to your router using the provided Ethernet cable. This NVR requires a hard-wired connection directly to your router to operate.
- Spojite monitor na HDMI ili VGA priključak NVR-a.
- Spojite USB miš na USB priključak na NVR-u.
- Connect the power adapter to the NVR and a power outlet.
- Press the power button to turn on the NVR.
1.5 Čarobnjak za početno podešavanje
Upon first boot, the NVR will guide you through an initial setup wizard to configure basic settings such as language, date/time, network, and password. Follow the on-screen prompts.
1.6 Upravljanje kamerom
The NV5216 supports Amcrest WiFi and Wired IP cameras, as well as limited compatibility with third-party IP cameras. To add cameras:
- Ensure your IP cameras are powered on and connected to the same network as the NVR.
- Access the NVR's camera management interface (usually found in the main menu under "Camera" or "Device Search").
- The NVR will scan for available cameras. Select the cameras you wish to add and follow the prompts to configure them.
2. Uputstvo za upotrebu
2.1 Uživo View
After setup, the NVR will display the live feed from connected cameras. You can view up to 4 channels at 4K resolution simultaneously. The NVR will adjust the resolution of remaining channels to 1080P at 30fps if more than 4 channels are viewed istovremeno.
2.2 Konfiguracija snimanja
NVR podržava različite načine snimanja:
- Ručno snimanje: Ručno pokretanje i zaustavljanje snimanja.
- Planirano snimanje: Set specific times for continuous recording.
- Snimanje otkrivanja pokreta: Record only when motion is detected by the camera. Configure motion detection zones and sensitivity in the camera settings.
The NVR utilizes H.265 compression technology, which optimizes storage space without compromising video quality, allowing for longer recording times.
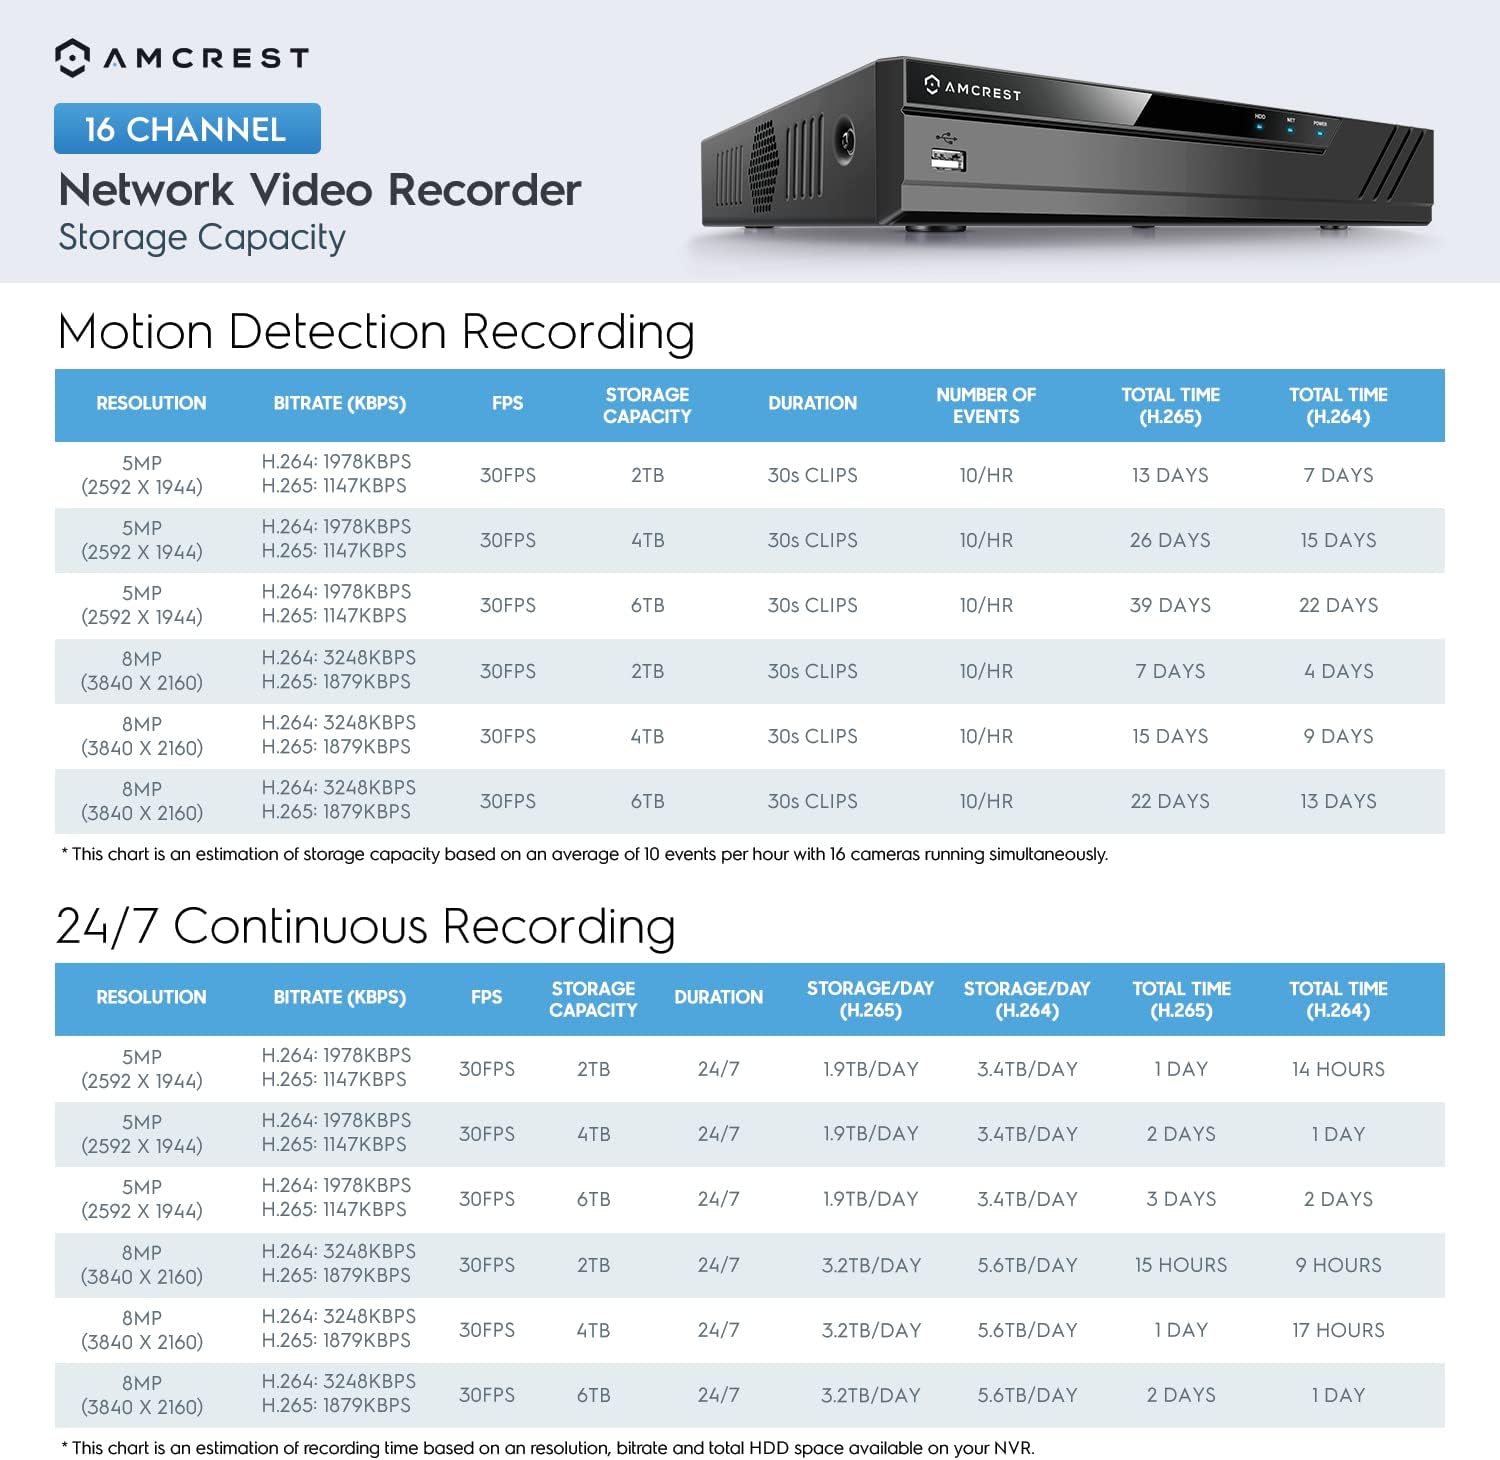
Image: A chart detailing estimated storage capacity for the Amcrest NV5216 NVR under various resolutions (5MP, 8MP) and recording types (Motion Detection, 24/7 Continuous) using H.264 and H.265 compression.
2.3 Reprodukcija
To review snimljeno footage:
- Access the "Playback" function from the NVR's main menu.
- Select the desired date, time, and camera channel.
- Koristite kontrole reprodukcije (reprodukcija, pauza, premotavanje naprijed, premotavanje unazad) za navigaciju kroztage.
2.4 Remote Access (Amcrest View Aplikacija)
Access your NVR remotely using the Amcrest View app on your smartphone or tablet:
- Download the "Amcrest View" app from your device's app store (available for iPhone, iPad, and Android).
- Open the app and register an account if you don't have one.
- Scan the QR code displayed on the NVR's monitor (found in the network settings or device info) to add the NVR to your app.
- Nakon što ga dodate, možete view live feeds, play back recordings, and manage settings from anywhere with an internet connection.
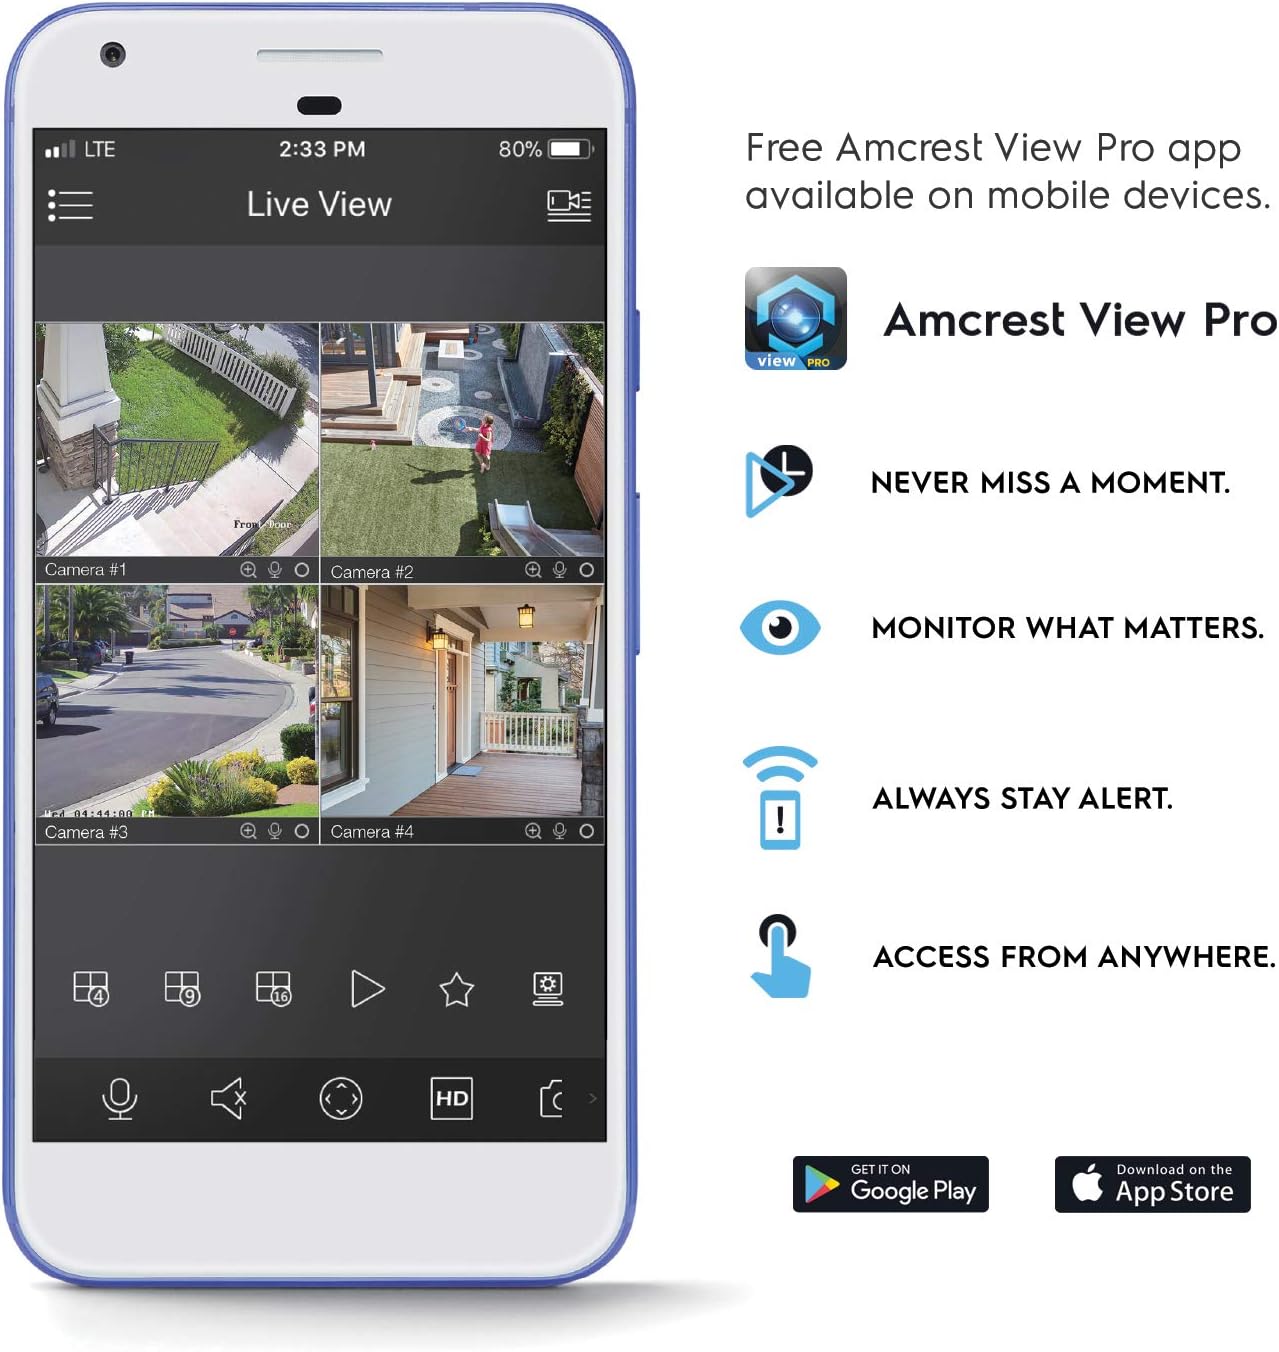
Image: A smartphone screen displaying the Amcrest View Pro app, showing a multi-camera live view interface. The app allows users to monitor, access, and stay alert from anywhere.
Video: An Amcrest overview video titled "Simple. Reliable. Secure." This video provides a general introduction to Amcrest security solutions and their benefits, including remote monitoring of loved ones and property.
3. Održavanje
3.1 Upravljanje tvrdim diskom
Regularly check the status of your hard drives through the NVR's storage settings. Ensure sufficient space is available for continuous recording. You can configure the NVR to overwrite older footage automatically when the hard drive is full.
3.2 Ažuriranja firmvera
Povremeno provjeravajte Amcrest website for firmware updates. Keeping your NVR's firmware up-to-date ensures optimal performance, security, and access to new features. Follow the instructions provided with the firmware update package carefully.
3.3 Čišćenje
To maintain the NVR's longevity, keep it in a clean, dust-free environment. Use a soft, dry cloth to clean the exterior. Do not use liquid cleaners or aerosols.
4. Otkrivanje problema
4.1 Nema video izlaza
- Check all video cable connections (HDMI/VGA) to the monitor and NVR.
- Provjerite je li monitor uključen i postavljen na ispravan ulazni izvor.
- Verify the NVR is powered on and its power indicator light is active.
4.2 Cameras Not Displaying
- Confirm cameras are powered on and connected to the network.
- Ensure the NVR and cameras are on the same local network.
- Check camera IP addresses and network settings within the NVR's camera management interface.
- Verify camera compatibility with the NV5216.
4.3 Problemi s udaljenim pristupom
- Ensure the NVR has an active internet connection.
- Verify that the Amcrest View aplikacija je ažurirana na najnoviju verziju.
- Check network firewall settings on your router; port forwarding may be required for direct access, though the app often uses P2P for easier setup.
4.4 Problemi sa snimanjem
- Check if a hard drive is installed and properly initialized in the NVR's storage settings.
- Verify that recording schedules or motion detection settings are correctly configured.
- Osigurajte da tvrdi disk ima dovoljno slobodnog prostora.
5. Specifikacije
| Broj modela | NV5216 |
| Kanali | 16-kanalni |
| Rezolucija snimanja | 1080p/3MP/4MP/5MP/6MP/8MP (4K)/12MP |
| Uživo View/Reprodukcija | Up to 4CH @ 4K @ 30fps simultaneously (remaining channels 1080P @ 30fps) |
| Podrška za tvrde diskove | Up to 2 x 10TB (20TB total) (Hard Drives Not Included) |
| Video Compression | H.265 |
| Povezivanje | Ethernet (hard-wired connection required), USB 3.0 (rear), USB 2.0 (front) |
| Video izlaz | HDMI, VGA |
| Uslovi rada | +14°F ~ +131°F (-10°C ~ +55°C) |
| Dimenzije | 17.09 x 14.53 x 5.55 inča |
| Težina artikla | 6.41 funte |
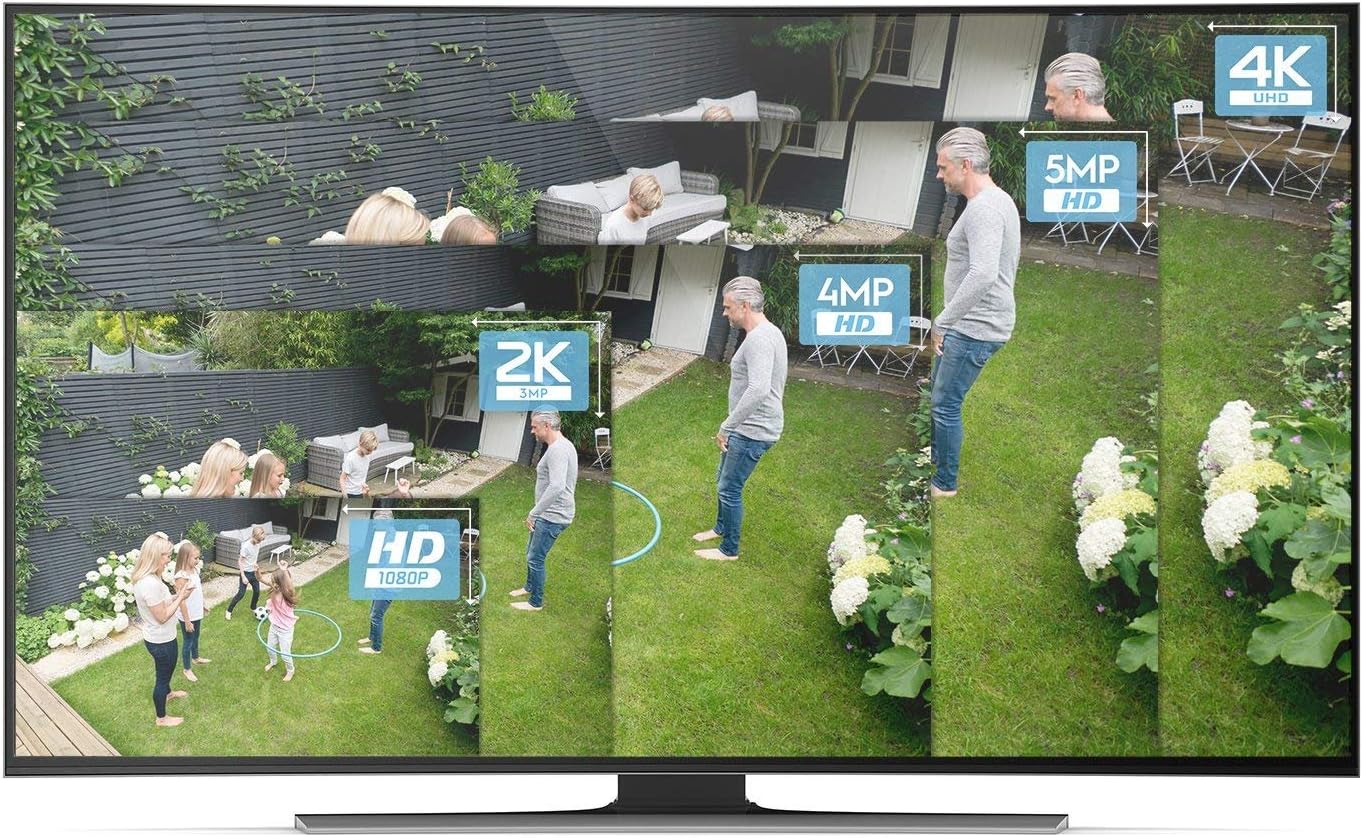
Image: A visual comparison demonstrating the clarity and detail difference between various video resolutions, including HD (1080p), 2K (3MP), 4MP, 5MP, and 4K (8MP).
6. Garancija i podrška
6.1 Jamstvo za proizvod
The Amcrest NV5216 NVR is guaranteed for a full year from the date of purchase. This warranty is offered with US Support and US Warranty exclusively by Amcrest.
6.2 Tehnička podrška
For technical assistance, troubleshooting, or warranty claims, please contact Amcrest Support. Refer to the official Amcrest webstranicu za najnovije kontakt informacije i resurse podrške.


