Uvod
This manual provides comprehensive instructions for the installation, operation, maintenance, and troubleshooting of your Netgear C6900-100NAR Nighthawk AC1900 Cable Modem Router. This device combines a high-speed cable modem with a powerful AC1900 Wi-Fi router, designed to deliver fast internet and reliable wireless connectivity. Please read these instructions carefully before using the device.
Setup
1. Sadržaj paketa
Prije nego što počnete, provjerite da li vaš paket sadrži sljedeće stavke:
- Netgear C6900-100NAR Nighthawk AC1900 Cable Modem Router
- Ethernet kabl
- Adapter za napajanje
- Quick Start Guide (this document serves as a detailed guide)

Image: Retail packaging for the Netgear C6900-100NAR Nighthawk AC1900 Cable Modem Router, showing the device and branding.
2. Fizička veza
- Povežite koaksijalni kabl: Connect a coaxial cable from your cable wall outlet to the Cable In port on the back of the modem router. Ensure the connection is finger-tight.
- Povežite adapter za napajanje: Connect the power adapter to the modem router's power port and then plug it into an electrical outlet. The Power LED on the front of the modem router should light up.
- Čekajte na online LED: Wait for the Online LED (usually a globe or internet icon) on the front of the modem router to light solid white or green. This indicates that the modem is connected to the internet. This process can take several minutes.
- Connect a Computer (Optional): For initial setup or wired connection, connect one end of the Ethernet cable to an Ethernet port on the modem router and the other end to your computer's Ethernet port.

Slika: Stražnja strana view of the Netgear C6900-100NAR, highlighting the coaxial cable input, Ethernet ports, and power input.
3. ISP Activation
After connecting the hardware, you need to activate your modem router with your Internet Service Provider (ISP). You will typically need your account information and the modem's MAC address (found on a label on the device).
- Call your ISP: Contact your ISP's customer support and inform them you are installing a new cable modem. Provide them with the MAC address when requested.
- Online aktivacija: Neki internet provajderi nude online portal za aktivaciju. Otvorite web browser on a connected computer, and you may be redirected to the ISP's activation page. Follow the on-screen instructions.
4. Početno podešavanje Wi-Fi mreže
Once activated, your modem router will broadcast Wi-Fi networks. The default Wi-Fi network name (SSID) and password (network key) are usually printed on a label on the device.
- On your Wi-Fi enabled device (laptop, smartphone, tablet), search for available Wi-Fi networks.
- Select the Netgear C6900-100NAR's default SSID.
- Unesite zadanu lozinku za Wi-Fi kada se to od vas zatraži.
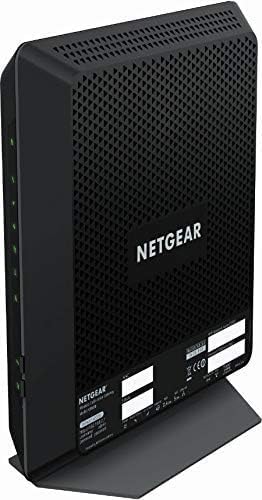
Slika: Prednja i bočna view of the Netgear C6900-100NAR Nighthawk AC1900 Cable Modem Router, showing its vertical design and ventilation.
Operating
1. Razumijevanje LED indikatora
The LEDs on the front panel provide information about the modem router's status:
- LED za napajanje: Solid green indicates power is on. Blinking indicates a startup sequence.
- Nizvodne/Uzvodne LED diode: Solid green indicates a successful connection to the cable network. Blinking indicates scanning for a connection.
- Online LED: Solid green indicates successful internet connection. Blinking indicates connection in progress.
- LED lampica za Wi-Fi od 2.4 GHz: Solid green indicates the 2.4 GHz Wi-Fi radio is on. Blinking indicates activity.
- LED lampica za Wi-Fi od 5 GHz: Solid green indicates the 5 GHz Wi-Fi radio is on. Blinking indicates activity.
- Ethernet LED diode (1-4): Solid green indicates a device is connected to that port. Blinking indicates data activity.
2. Accessing Router Settings
To customize your network settings, access the modem router's web interfejs:
- Otvori a web browser (e.g., Chrome, Firefox, Edge) on a computer or device connected to the modem router (either wired or wirelessly).
- Tip
routerlogin.netor192.168.0.1u adresnu traku i pritisnite Enter. - When prompted, enter the default username (usually
admin) i lozinka (običnopassword). These are also typically found on the device label. - You will now be in the Netgear Genie interface, where you can manage your network settings.
3. Wi-Fi konfiguracija
Within the router settings, you can modify your Wi-Fi network:
- Promjena SSID-a: Navigate to the Wireless section to change your Wi-Fi network names (SSIDs) for both 2.4 GHz and 5 GHz bands.
- Promijeni lozinku: Update your Wi-Fi security key (password) for stronger security. WPA2-PSK [AES] is recommended.
- Mreža gostiju: Enable a separate guest network for visitors, keeping your main network secure.
The C6900-100NAR features a 1.6GHz combined processor speed, enhancing performance for demanding tasks like streaming and gaming across its dual-band AC1900 Wi-Fi.
Održavanje
1. Ažuriranja firmvera
Regularly updating the firmware ensures optimal performance, security, and access to new features. You can usually check for and install updates through the router's web interface under the 'Advanced' or 'Administration' section.
2. Ponovno pokretanje uređaja
If you experience connectivity issues or slow performance, a simple restart can often resolve the problem:
- Unplug the power adapter from the modem router.
- Sačekajte najmanje 10-15 sekundi.
- Ponovo uključite adapter za napajanje.
- Wait for the modem router to fully boot up and reconnect to the internet (Online LED solid).
3. Čišćenje
Keep the modem router in a well-ventilated area. Periodically clean the exterior with a soft, dry cloth. Avoid using liquid cleaners or aerosols directly on the device.
Rješavanje problema
1. Uobičajeni problemi
- Nema internetske veze:
- Provjerite sve kablovske veze (koaksijalni, Ethernet, napajanje).
- Verify LED indicators: Power, Downstream, Upstream, and Online LEDs should be solid. If the Online LED is blinking or off, contact your ISP.
- Restart the modem router (see Maintenance section).
- Confirm ISP activation is complete.
- Spora brzina Wi-Fi mreže ili česti prekidi veze:
- Ensure the modem router is centrally located and not obstructed by large objects or other electronics.
- Try connecting to the 5 GHz Wi-Fi band for faster speeds, if your device supports it and is close to the router.
- Provjerite ima li ažuriranja firmvera.
- Reduce interference by changing Wi-Fi channels in the router settings.
- Nije moguće pristupiti postavkama rutera:
- Ensure your device is connected to the modem router's network.
- Provjerite da li koristite ispravnu IP adresu (
routerlogin.netor192.168.0.1) and credentials. - Obrišite keš memoriju preglednika ili pokušajte s drugim preglednikom.
2. Factory Reset
If issues persist, a factory reset can restore the modem router to its original settings. Warning: This will erase all custom configurations, including Wi-Fi names and passwords.
- With the modem router powered on, locate the Reset button (often a small pinhole) on the back panel.
- Use a paperclip or similar pointed object to press and hold the Reset button for about 7-10 seconds.
- Release the button when the LEDs start to flash.
- Allow the modem router to restart. You will need to reconfigure your settings or use the default Wi-Fi credentials.
Specifikacije
| Feature | Specifikacija |
|---|---|
| Brand | NETGEAR |
| Naziv modela | C6900-100NAR |
| Bežični tip | 802.11ac |
| Klasa frekvencijskog opsega | Dvofrekventni opseg (2.4 GHz i 5 GHz) |
| Tehnologija povezivanja | Wi-Fi, Ethernet, Koaksijalni |
| Kompatibilni uređaji | Personal Computer, Gaming Consoles, Mobile Devices |
| Preporučena upotreba | Gaming, Streaming, General Internet Use |
| Težina artikla | 4.07 funte |
| Dimenzije paketa | 16.06 x 12.52 x 4.76 inča |
| Voltage | 100-240 volti (AC) |
| Antenna Type | Interni |
| Posebna karakteristika | DOCSIS 3.0 Cable Modem, WiFi Cable Modem Router |
Garancija i podrška
For warranty information, please refer to the documentation provided with your product at the time of purchase or visit the official NETGEAR support website. NETGEAR provides technical support and resources for their products.
If you encounter issues that cannot be resolved using this manual, please visit the NETGEAR podrška website or contact their customer service for assistance. Ensure you have your model number (C6900-100NAR) and serial number ready when contacting support.