1. Uvod
Welcome to the user manual for your Modecom Oberon Pro Glass USB 3.0 White PC Case. This manual provides essential information for the proper installation, operation, and maintenance of your computer chassis. Please read this manual thoroughly before beginning assembly to ensure correct setup and to prevent damage to your components or the case itself.
Sigurnosne mjere:
- Uvijek isključite napajanje iz zidne utičnice prije instaliranja ili uklanjanja bilo kakvih komponenti.
- Pažljivo rukujte komponentama kako biste izbjegli elektrostatičko pražnjenje (ESD). Razmislite o upotrebi antistatičke narukvice.
- Držite male dijelove i materijale za pakovanje dalje od djece.
- Osigurajte odgovarajuću ventilaciju oko kućišta kako biste spriječili pregrijavanje.
2. Proizvod je gotovview
The Modecom Oberon Pro Glass is a stylish mid-tower PC case designed to house your computer components. It features a tempered glass side panel for showcasing your build and a clean white finish. The front panel includes convenient USB 3.0 ports for high-speed data transfer.
Slika 2.1: Prednje desno view of the Modecom Oberon Pro Glass PC Case. This image displays the white exterior, the front panel with ventilation, and the top-mounted I/O ports including USB 3.0.
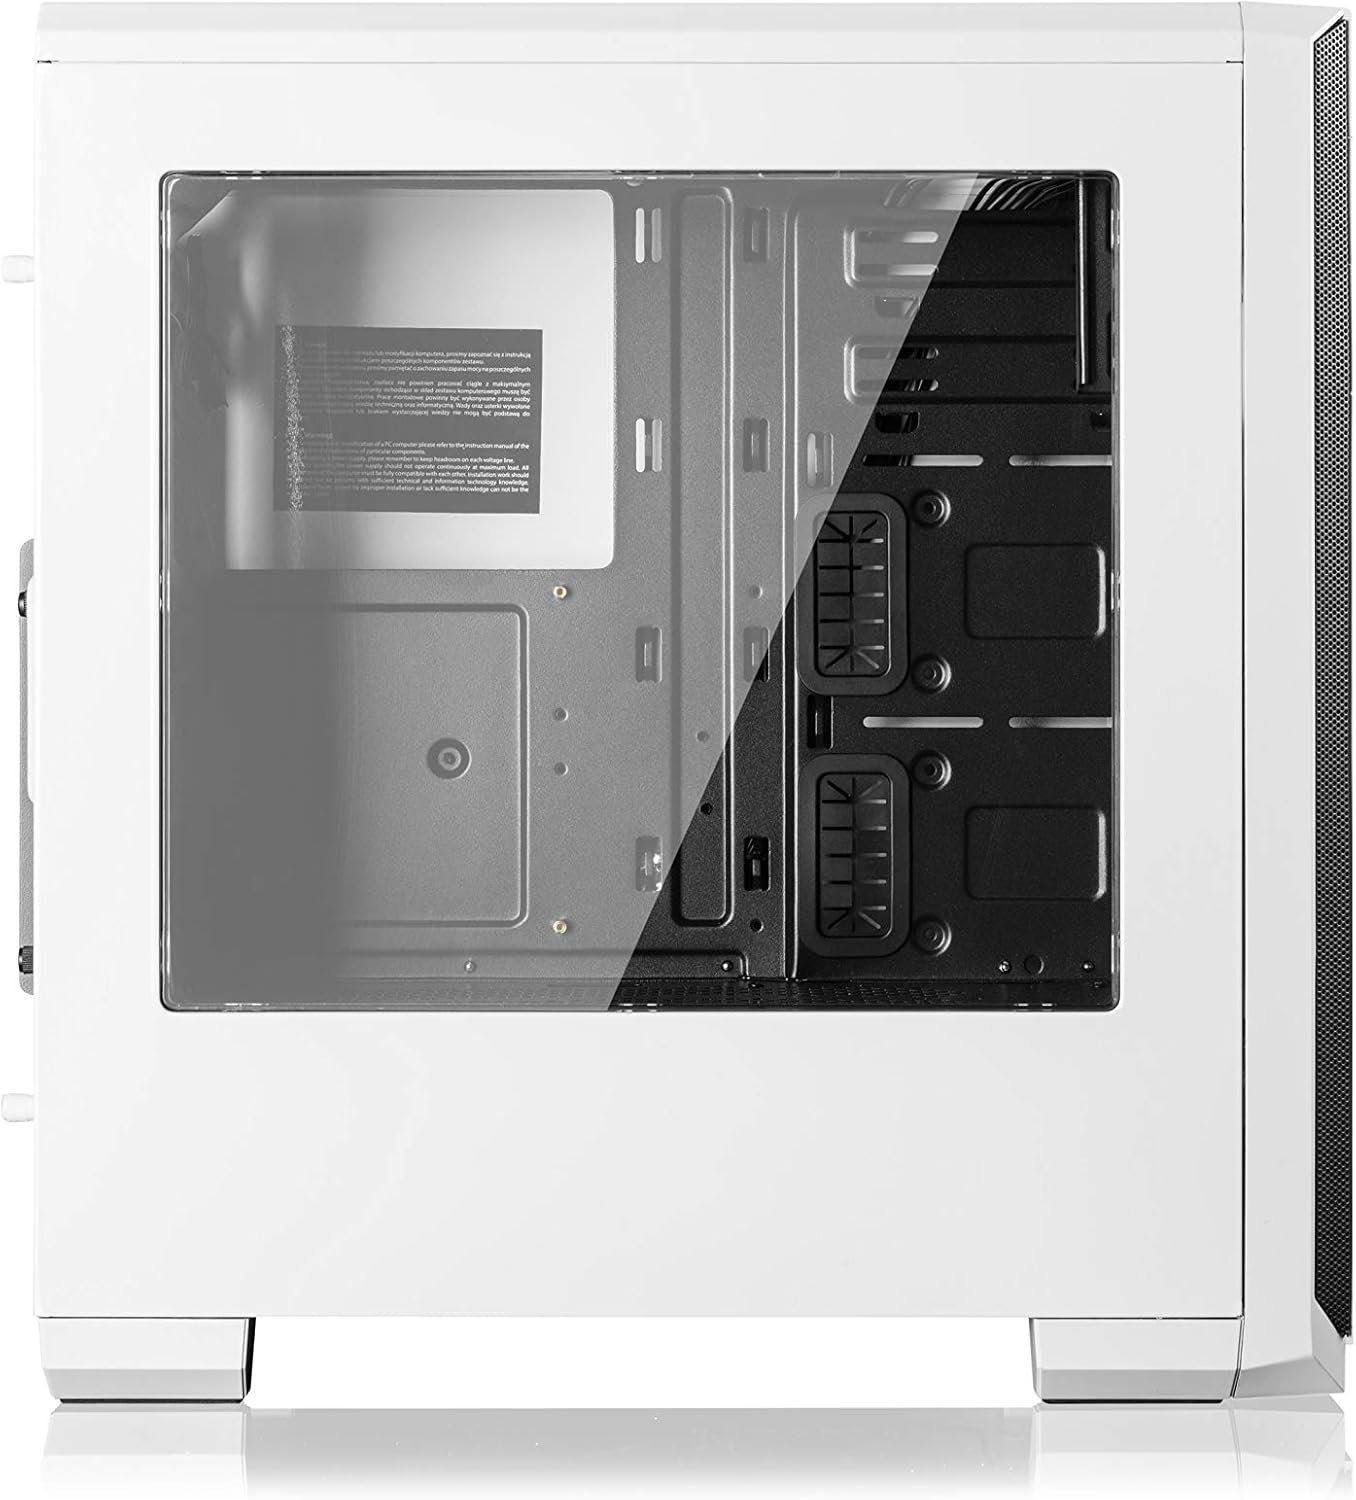
Slika 2.2: Side view of the Modecom Oberon Pro Glass PC Case, highlighting the tempered glass side panel. This panel allows for a clear view of the internal components when installed.
3. Postavljanje i instalacija
Follow these steps to install your computer components into the Modecom Oberon Pro Glass PC Case.
3.1. Raspakivanje i prvi pregled
- Pažljivo izvadite kućište računara iz ambalaže.
- Pregledajte kućište da li ima znakova oštećenja tokom transporta. Odmah se obratite prodavaču ako pronađete oštećenja.
- Remove the tempered glass side panel by unscrewing the thumb screws, typically located at the rear corners of the panel. Set the panel aside on a soft, flat surface to prevent scratches.
3.2. Instalacija matične ploče

Slika 3.1: Enterijer view of the Modecom Oberon Pro Glass PC Case, showing the motherboard tray, drive bays, and cable management cutouts.
- Install the I/O shield that came with your motherboard into the designated opening at the rear of the case.
- Ensure the motherboard standoffs are correctly aligned for your motherboard's form factor (ATX, Micro ATX, or ITX). Install additional standoffs if necessary.
- Pažljivo postavite matičnu ploču na odstojnike, poravnavajući rupe za vijke.
- Pričvrstite matičnu ploču priloženim vijcima. Nemojte previše zategnuti.
3.3. Instalacija jedinice za napajanje (PSU)
- Position your PSU in the dedicated compartment, typically at the bottom rear of the case.
- Align the screw holes on the PSU with those on the case's rear panel.
- Secure the PSU with the provided screws.
3.4. Instalacija diska za pohranu podataka (HDD/SSD)
- Locate the 3.5" HDD bays and 2.5" SSD mounting points within the case.
- For 3.5" HDDs, slide the drive into a bay and secure it with screws or tool-less clips if available.
- For 2.5" SSDs, mount them to the designated trays or screw points, typically behind the motherboard tray or in specific drive cages.
3.5. Expansion Card Installation (GPU, PCIe cards)

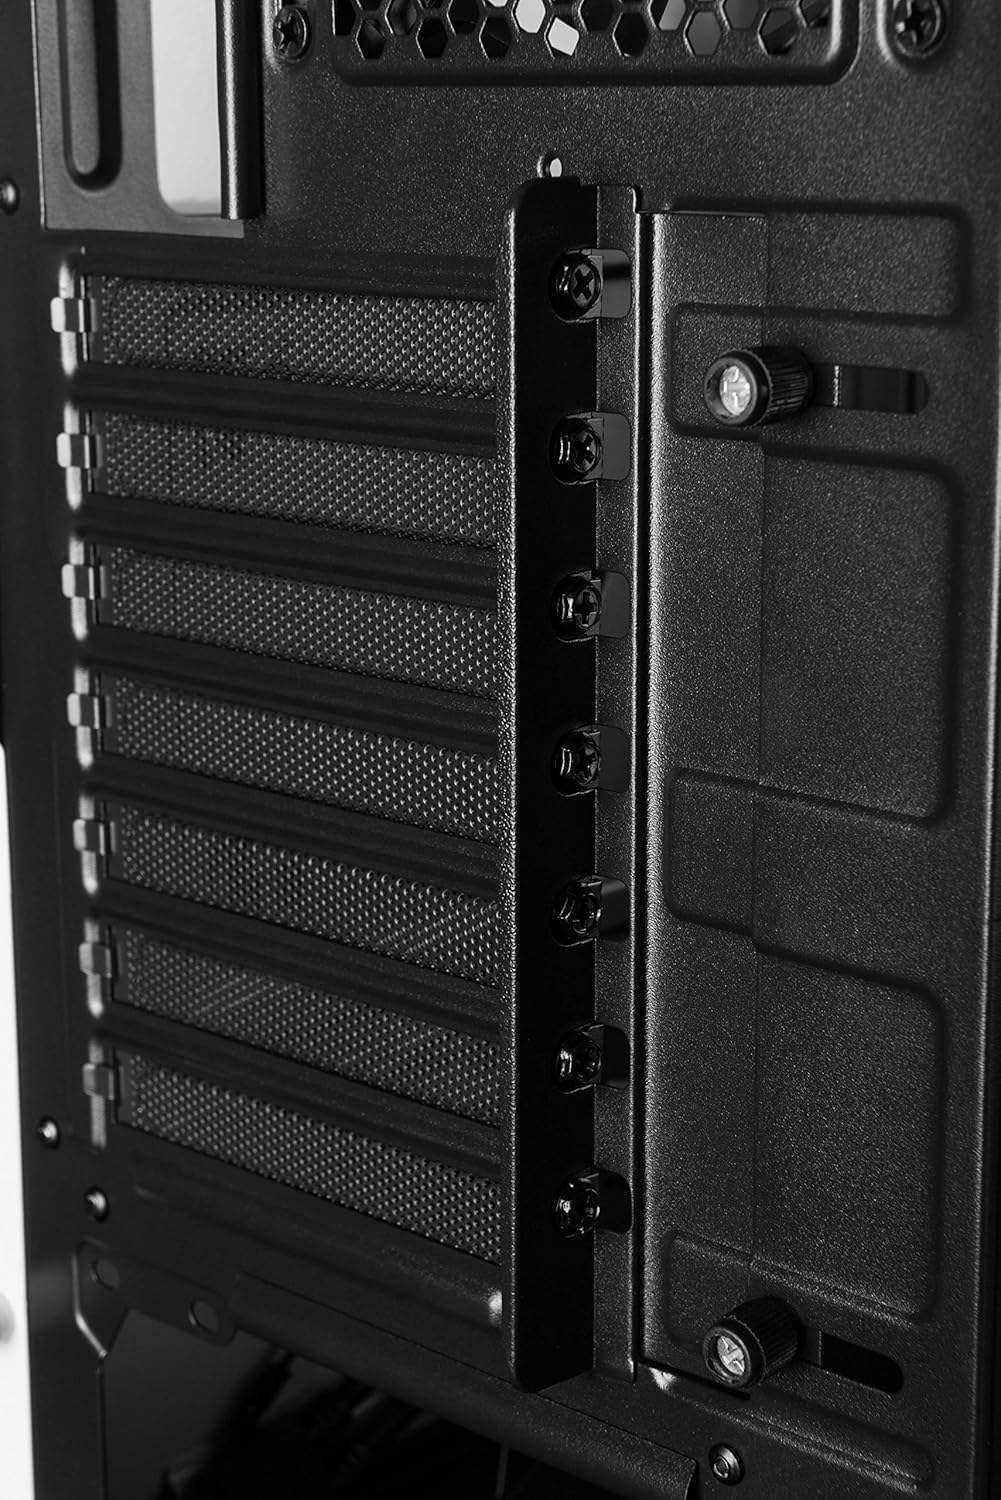
Slika 3.2: Zadnji enterijer view of the Modecom Oberon Pro Glass PC Case, illustrating the expansion slot covers and thumb screws for securing PCIe cards.
- Remove the necessary expansion slot covers from the rear of the case, corresponding to your card's slot on the motherboard.
- Insert your expansion card (e.g., graphics card) firmly into the PCIe slot on the motherboard.
- Secure the card to the case with the provided screws or retention mechanism.
3.6. Front Panel Connector Installation
- Connect the front panel cables (USB 3.0, HD Audio, Power Switch, Reset Switch, Power LED, HDD LED) to their respective headers on your motherboard. Refer to your motherboard manual for exact pin layouts.
3.7. Upravljanje kablovima
- Iskoristite izreze za usmjeravanje kablova i tačke za vezivanje iza ležišta matične ploče da biste organizovali kablove. Ovo poboljšava protok vazduha i estetiku.
- Once all components are installed and cables managed, reattach the tempered glass side panel and secure it with the thumb screws.
4. Operacija
After successful installation, your PC is ready for operation.
- Uključivanje: Pritisnite dugme za napajanje koje se nalazi na gornjoj I/O ploči kućišta.
- Using Front Panel Ports: The front panel includes USB 3.0 ports and audio jacks. Connect your USB devices (e.g., flash drives, external hard drives) to the USB ports for data transfer. Plug your headphones or microphone into the respective audio jacks.
5. Održavanje
Redovno održavanje pomaže u osiguravanju optimalnih performansi i dugotrajnosti komponenti vašeg računara.
- Filteri za prašinu: Periodically remove and clean the dust filters (if present) to maintain good airflow and prevent dust buildup inside the case. Use compressed air or a soft brush.
- Eksterijerno čišćenje: Obrišite vanjske površine kućišta mekom,amp cloth. Avoid abrasive cleaners or solvents that could damage the finish or tempered glass.
- Kaljeno staklo: Clean the tempered glass with a glass cleaner and a microfiber cloth to avoid streaks and scratches.
6. Otkrivanje problema
If you encounter issues, consider the following basic troubleshooting steps:
- Sistem se ne uključuje:
- Provjerite je li napajanje uključeno i pravilno spojeno na zidnu utičnicu.
- Verify that the front panel power switch cable is correctly connected to the motherboard header.
- Provjerite sve priključke za napajanje na matičnoj ploči i komponentama.
- USB portovi ne rade:
- Confirm that the front panel USB 3.0 cable is securely connected to the corresponding header on the motherboard.
- Test with different USB devices.
- Pretjerana buka:
- Identify the source of the noise (e.g., case fans, CPU cooler fan, GPU fan).
- Ensure all fans are free from obstructions and properly secured.
- Clean any dust buildup on fans.
Za složenije probleme, pogledajte priručnike za komponente ili potražite stručnu pomoć.
7. Specifikacije
| Feature | Opis |
|---|---|
| Brand | Modecom |
| Naziv modela | Oberon Pro Glass |
| Broj modela | AT-OBERON-PG-20-000000-0002 |
| Tip slučaja | Mid-Tower |
| Boja | Bijelo |
| Materijal | Polikarbonat (PC) |
| Kompatibilne matične ploče | ATX, Micro ATX, ITX |
| Prednji I / O portovi | USB 3.0, Audio In/Out |
| Napajanje | W/O PSU (Power Supply Unit not included) |
| Težina artikla | 2 kilograma |
| Međunarodni kodeks artikla | 05901885248370 |
8. Garancija i podrška
Informacije o garanciji:
Modecom provides a guarantee of spare parts availability for 2 years from the date of purchase. This ensures that essential components for repair or replacement will be accessible within this period.
Korisnička podrška:
For technical assistance, warranty claims, or further inquiries, please refer to the official Modecom website or contact your local retailer where the product was purchased. Ensure you have your product model number and proof of purchase available when seeking support.


