Uvod
This manual provides detailed instructions for the installation, operation, and maintenance of your Venstar T1900 Residential Slimline Platinum Thermostat. Please read this manual thoroughly before attempting to install or operate the thermostat to ensure proper function and to avoid potential damage.
Važne informacije o sigurnosti
- Always turn off power to the heating/cooling system at the main circuit breaker or fuse box before installing or servicing the thermostat.
- This thermostat operates on 24 Volts AC. Do not connect to line voltage (120V ili 240V).
- Instalaciju treba izvršiti kvalificirani tehničar ako niste upoznati s električnim ožičenjem.
- Do not short circuit the terminals on the gas valve or at the system control to test the thermostat. This will damage the thermostat and void the warranty.
- Ensure all wiring connections are secure and insulated to prevent short circuits.
Sadržaj paketa
Provjerite da li vaš paket sadrži sljedeće stavke:
- Venstar T1900 Termostatska jedinica
- Pribor za montažu (vijci i zidni tiplovi)
- Korisnički priručnik (ovaj dokument)
Product Overview
The Venstar T1900 is a 7-day programmable digital thermostat designed for residential use. It offers precise temperature control and energy-saving scheduling capabilities. This thermostat is compatible with heat/cool, heat pump, and dual-fuel systems, controlling up to three heat stages i dva cool stages.
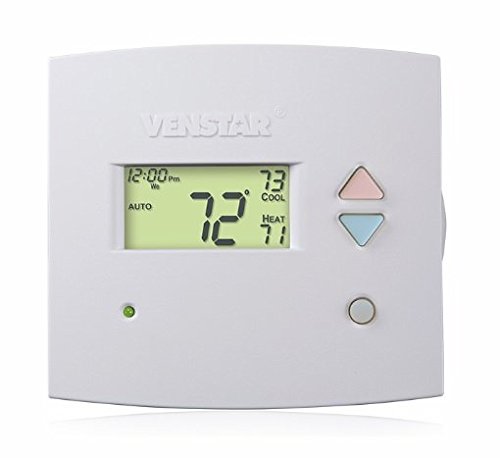
Slika 1: Front view of the Venstar T1900 Thermostat. This image displays the thermostat's LCD screen and control buttons, indicating its slimline design.
Ključne karakteristike:
- 7-dnevna programabilnost: Allows for customized heating and cooling schedules for each day of the week.
- Kompatibilnost sistema: Works with heat/cool, dual-fuel, and heat pump systems.
- Multi-Stage Kontrola: Manages up to three heat stages i dva cool stages.
- Mogućnost daljinskog upravljanja: Controllable by phone using an optional add-on (sold separately).
- Automatic or Manual Operation: Provides flexibility for scheduled or on-demand temperature adjustments.
Vodič za instalaciju
Potreban alat:
- Odvijač (Phillips i/ili ravni)
- Bušite odgovarajućom svrdlom (ako postavljate nove zidne tiple)
- Skidači žice
- Olovka
- Nivo (opcionalno)
1. Isključite napajanje
Locate the circuit breaker or fuse box that controls your heating and cooling system. Turn off the power completely before proceeding with any wiring.
2. Remove Old Thermostat (if applicable)
- Pažljivo uklonite poklopac starog termostata.
- Uslikajte postojeće ožičenje kao referencu.
- Label each wire with the terminal designation it was connected to (e.g., R, G, Y, W).
- Disconnect the wires and remove the old thermostat's mounting plate from the wall.
3. Montirajte novu bazu termostata
- Separate the front cover of the T1900 thermostat from its base plate.
- Position the base plate on the wall where you want to install the thermostat. Ensure it is level.
- Olovkom označite rupe za pričvršćivanje.
- Izbušite pilot rupe ako je potrebno i umetnite zidne tiple.
- Secure the thermostat base plate to the wall using the provided screws.
4. Ožičenje
Connect the wires from your HVAC system to the corresponding terminals on the T1900 thermostat base. Refer to the wiring diagram provided with your specific HVAC system for precise connections. Ensure wires are stripped approximately 3/8 inch and securely fastened under the terminal screws.
Uobičajene oznake terminala:
- R/Rc/Rh: 24V Power (Heating/Cooling)
- C: Common (24V return)
- G: Fan
- G/G1: Kompresor Stage 1 (hlađenje)
- Y2: Kompresor Stage 2 (hlađenje)
- S/S1: Grijanje Stage 1 (grijanje)
- P2: Grijanje Stage 2 (grijanje)
- O / B: Reversing Valve (Heat Pumps)
Note: The T1900 supports various system types. Consult the detailed wiring diagrams in the full installation manual for specific configurations (e.g., heat pump with auxiliary heat, conventional multi-stage systems).
5. Pričvrstite termostat na bazu
Once wiring is complete and verified, carefully align the thermostat front cover with the mounted base plate and snap it into place.
6. Vratite napajanje
Return to your circuit breaker or fuse box and restore power to your heating and cooling system.
Initial Setup
Upon initial power-up, the thermostat may prompt you to configure basic settings. Follow the on-screen instructions to set the current date, time, and system type (e.g., Conventional, Heat Pump).
Konfiguracija tipa sistema:
It is crucial to correctly configure the thermostat for your specific HVAC system. Incorrect settings can lead to improper operation or damage. Access the installer settings menu (refer to the full installation guide for specific button sequences) to select:
- Tip sistema: Heat/Cool, Heat Pump, Dual Fuel
- Broj topline Stages
- Broj Cool Stages
- Reversing Valve Operation: O (Hlađenje) ili B (Grijanje)
Uputstvo za upotrebu
Razumijevanje ekrana:
The LCD screen displays the current temperature, set temperature, system mode, fan mode, time, and programming status. Refer to the icons and indicators on the screen for current operational status.
Setting System Mode:
Pritisnite MODE dugme za kretanje kroz dostupne sistemske režime:
- TOPLOTA: The system will operate to maintain the heating setpoint.
- HLADNO: The system will operate to maintain the cooling setpoint.
- AUTOMATSKI: Termostat automatski prebacuje između grijanja i hlađenja po potrebi kako bi održao postavljeni temperaturni raspon.
- ISKLJUČENO: Sistem grijanja i hlađenja je isključen.
Setting Fan Mode:
Pritisnite FAN dugme za kretanje kroz režime ventilatora:
- AUTOMATSKI: Ventilator radi samo kada je sistem grijanja ili hlađenja aktivno uključen.
- ON: Ventilator radi neprekidno, bez obzira na zahtjeve za grijanje ili hlađenje.
Podešavanje temperature:
Koristite UP i DOLJE arrow buttons to adjust the desired temperature setpoint. In programmable modes, this will temporarily override the schedule until the next scheduled change.
Raspored programa (7 dana):
The T1900 allows for 7-day programming, enabling different schedules for each day of the week. This feature helps save energy by adjusting temperatures when you are away or asleep.
- Pritisnite PROGRAM dugme za ulazak u režim programiranja.
- Koristite DAN button to select the day or group of days you wish to program (e.g., Mon-Fri, Sat-Sun, or individual days).
- Koristite VRIJEME button to cycle through the four available periods: Wake, Leave, Return, Sleep.
- Koristite UP i DOLJE arrow buttons to set the desired temperature for each period.
- Koristite HOLD button to exit programming mode or save changes.
Refer to the detailed programming section in the full user guide for advanced options and specific button sequences.
Remote Control (Optional Add-on):
The Venstar T1900 thermostat can be controlled remotely via a phone using an optional add-on module (sold separately). This module connects to the thermostat and allows for remote access and control through a dedicated application. Installation and setup instructions for the remote control module are provided with the module itself.
Održavanje
Čišćenje termostata:
To maintain the appearance and functionality of your thermostat, periodically wipe the exterior with a soft, damp krpom. Ne koristite abrazivna sredstva za čišćenje, rastvarače ili hemijske sprejeve, jer oni mogu oštetiti plastiku i elektronske komponente.
Zamjena baterije:
The Venstar T1900 thermostat does not require batteries for operation as it is powered by the 24V AC system.
Rješavanje problema
If you experience issues with your Venstar T1900 thermostat, consult the following common problems and solutions:
| Problem | Mogući uzrok | Rješenje |
|---|---|---|
| Displej termostata je prazan | Nema napajanja termostata. | Check the circuit breaker for your HVAC system. Ensure all wiring connections are secure. |
| Sistem grijanja/hlađenja ne reaguje | Odabran pogrešan način rada sistema; problem s ožičenjem; blokiranje sistema. | Verify the system mode (HEAT/COOL/AUTO). Check wiring connections. Wait 5 minutes for system lockout to reset. |
| Očitavanje temperature izgleda netačno | Lokacija termostata; začepljenost senzora. | Ensure the thermostat is not exposed to direct sunlight, drafts, or heat sources. Clean any dust from the thermostat vents. |
| Programming schedule is not working | Program not saved; temporary override active; incorrect time/day setting. | Ensure programs are saved. Check if a temporary override is active and cancel it. Verify current time and day settings. |
| Ventilator radi kontinuirano u AUTO režimu | Fan mode set to ON; wiring issue. | Press the FAN button to ensure it is set to AUTO. Check fan wiring. |
If these solutions do not resolve the issue, please contact customer support or a qualified HVAC technician.
Specifikacije
| Feature | Specifikacija |
|---|---|
| Brand | Venstar |
| Naziv modela | Venstar T1900 |
| Tip kontrolera | Pritisnite dugme |
| Posebna karakteristika | Programabilno |
| Boja | Bijelo |
| Specifične upotrebe za proizvod | Heat Pump, Heater |
| Tip kontrole temperature | Programmable, Smart/Remote (with add-on) |
| Voltage | 24 V AC |
| Display Type | LCD ili LED |
| Kontrolni metod | Remote (with add-on) |
| Pozadinsko osvetljenje | Da |
| Dimenzije proizvoda | 5.3 x 2 x 2 inča |
| Težina artikla | 0.01 unce |
| Baterije su potrebne? | br |
Informacije o garanciji
Venstar products are manufactured to high-quality standards. This product is covered by a limited warranty against defects in materials and workmanship. The specific terms and duration of the warranty may vary. Please refer to the warranty card included with your product or visit the official Venstar webstranicu za detaljne informacije o garanciji i postupcima registracije.
Korisnička podrška
For technical assistance, troubleshooting, or warranty inquiries, please contact Venstar customer support. You can typically find contact information, including phone numbers and email addresses, on the official Venstar webstranica (www.venstar.com) or on the product packaging.
When contacting support, please have your thermostat model number (T1900) and any relevant purchase information ready.


