1. Uvod
Hvala vam što ste odabrali KOLINK Refractor Midi-Tower computer case. This manual provides essential information for the proper installation, operation, and maintenance of your new PC chassis. Please read this manual carefully before beginning the assembly process to ensure a smooth and safe build.
1.1 Sigurnosne informacije
- Uvijek isključite napajanje iz zidne utičnice prije instaliranja ili uklanjanja bilo kakvih komponenti.
- Nosite antistatičku narukvicu kako biste spriječili oštećenje osjetljivih komponenti uzrokovano elektrostatičkim pražnjenjem (ESD).
- Handle components with care. Avoid touching pins or circuit boards directly.
- Držite male dijelove i alat podalje od djece.
- Osigurajte odgovarajuću ventilaciju oko kućišta kako biste spriječili pregrijavanje.
2. Sadržaj paketa
Please verify that all the following items are present in your package:
- KOLINK Refractor Midi-Tower Chassis
- Kutija s priborom (sadrži vijke, odstojnike, vezice za kablove itd.)
- Korisnički priručnik (ovaj dokument)
If any items are missing or damaged, please contact your retailer or KOLINK support.
3. Proizvod je gotovview
Familiarize yourself with the key features and components of your KOLINK Refractor Midi-Tower.
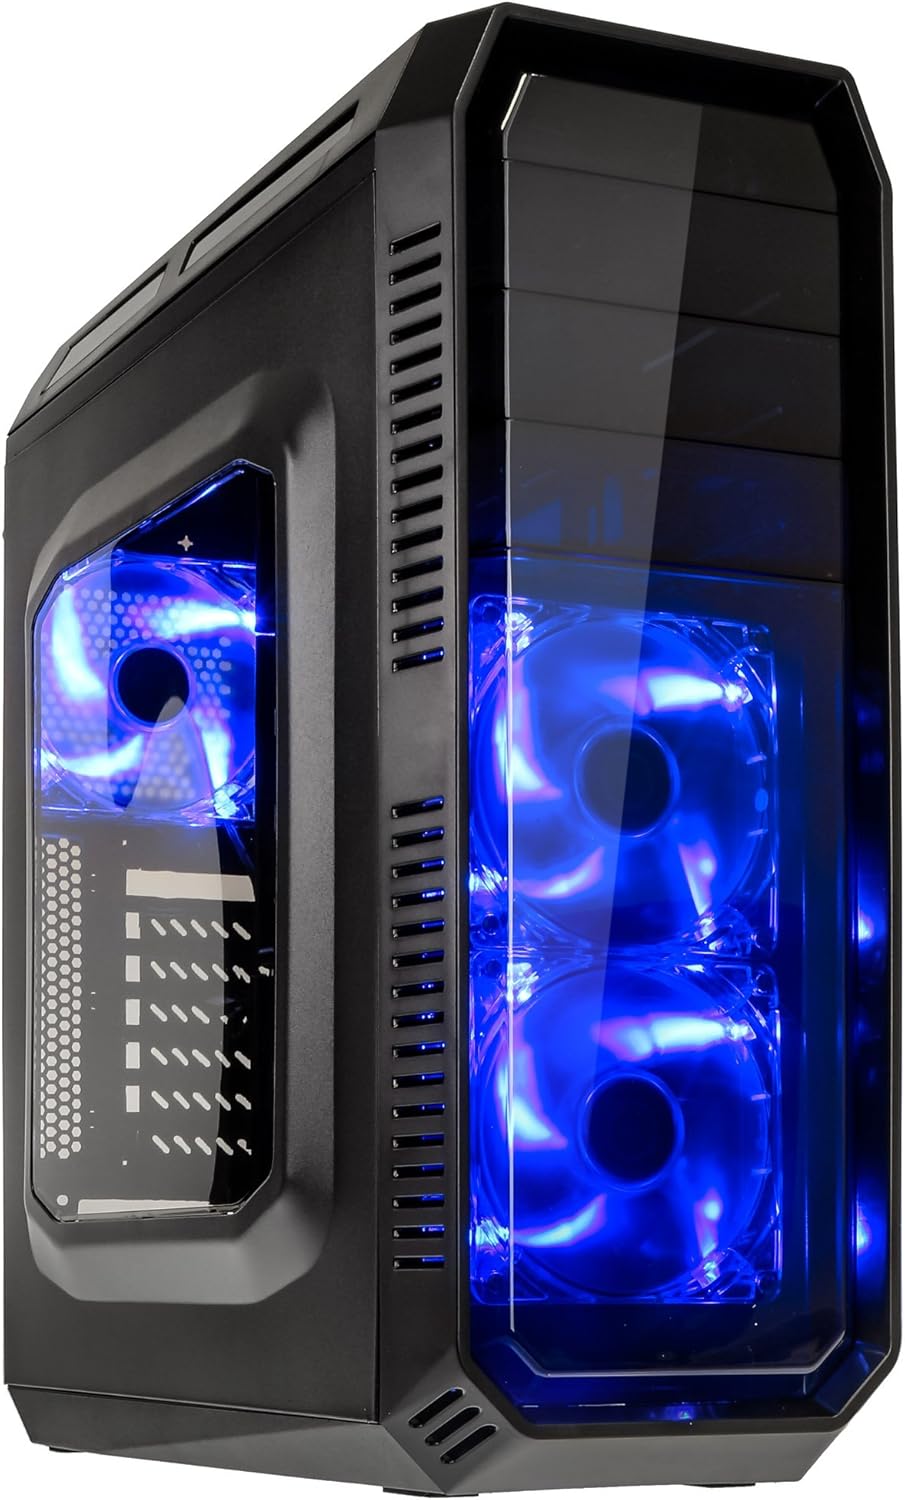
This image displays the KOLINK Refractor Midi-Tower from a front-left perspective, highlighting its sleek black design. The front panel features two pre-installed 120mm blue LED fans, visible through a transparent section, providing both cooling and aesthetic appeal. The left side panel includes a window, allowing visibility of internal components.

Gornji dio view of the case, illustrating the conveniently located I/O panel on the top. This panel includes two USB 3.0 ports, two USB 2.0 ports, and audio input/output jacks. The top surface also features a mesh area for additional ventilation, contributing to optimal airflow.

This image shows the right side panel of the KOLINK Refractor Midi-Tower. It is a solid black panel, designed for cable management behind the motherboard tray, ensuring a clean and organized interior.

This composite image provides three distinct views of the case. The left panel shows the front with its blue LED fans. The middle panel displays the rear of the case, featuring the motherboard I/O cutout, seven expansion slots, and a 120mm fan mount. The right panel offers a close-up of the top I/O ports, including USB 3.0, USB 2.0, and audio jacks.

A detailed close-up of the top I/O panel. It clearly shows the power and reset buttons, two USB 3.0 ports, two USB 2.0 ports, and the microphone and headphone jacks, providing easy access for peripherals.
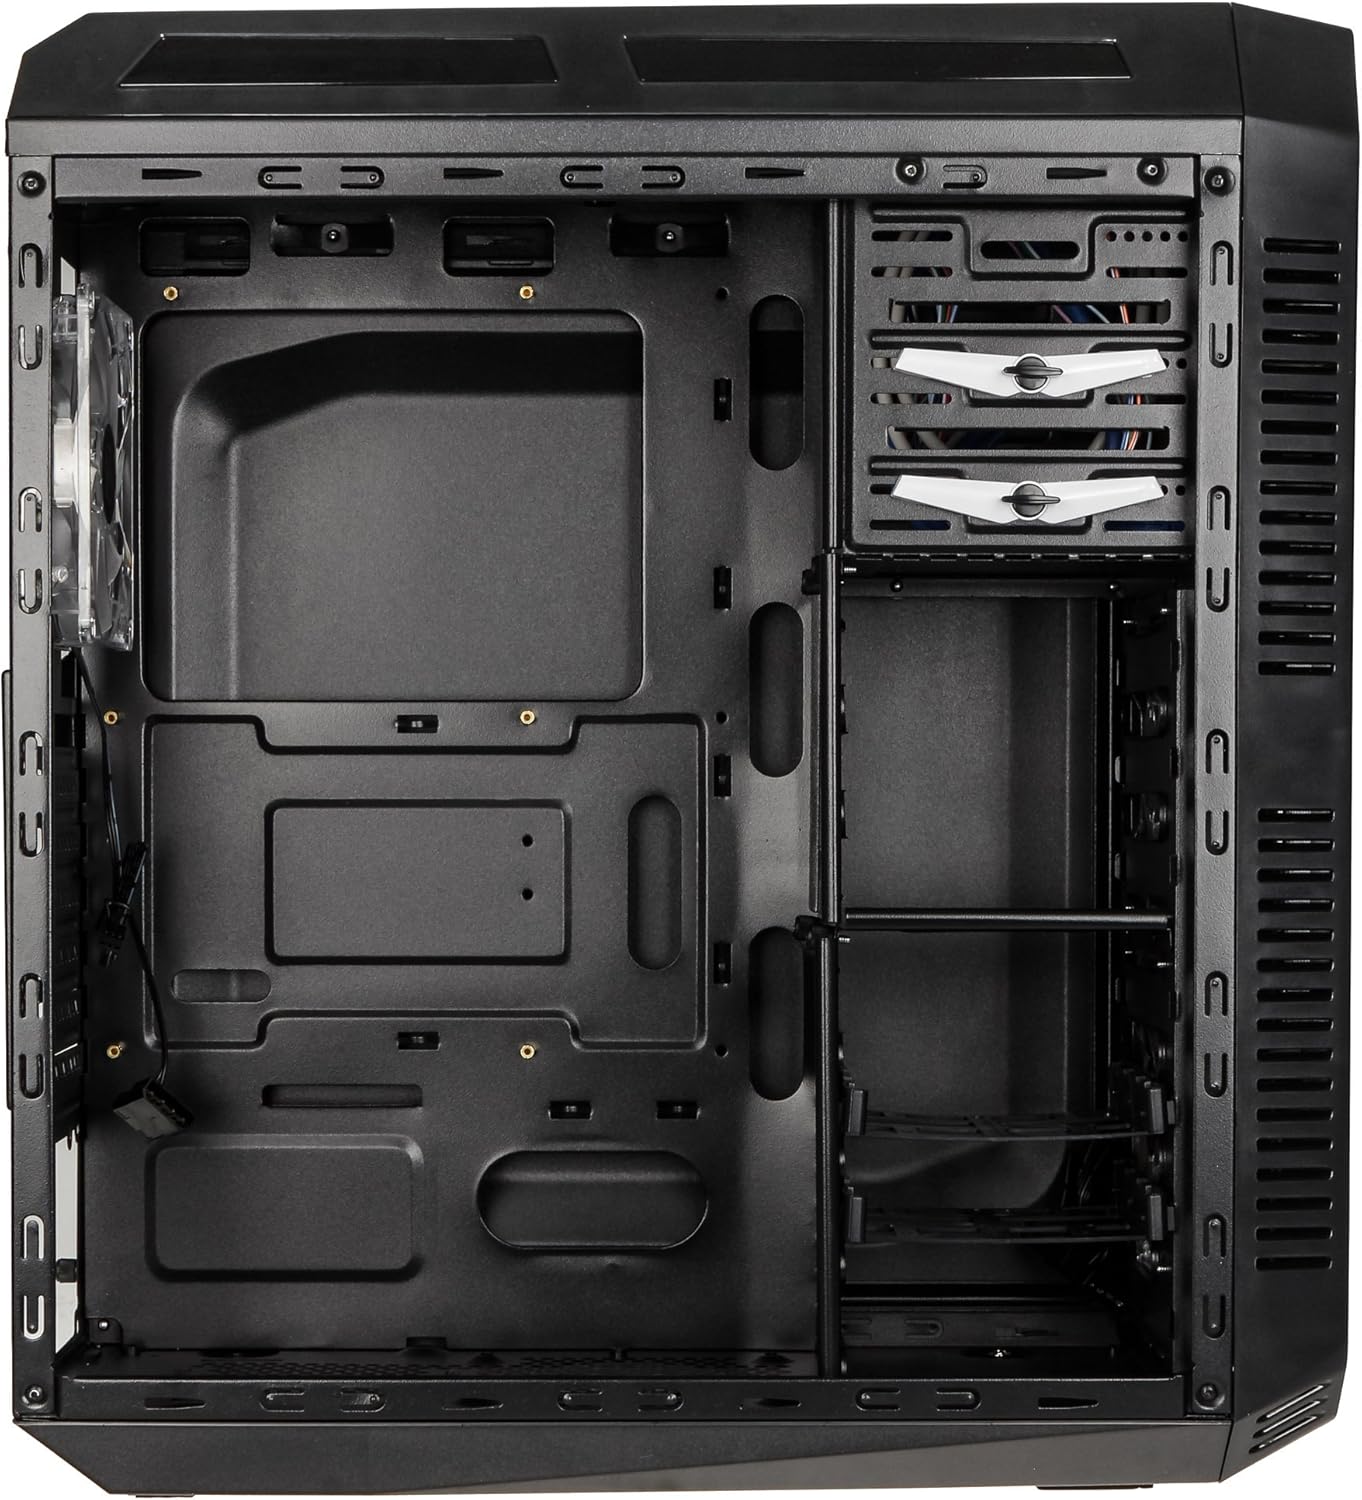
This image presents the interior of the case from the left side, revealing the spacious motherboard tray compatible with ATX motherboards. It features a large cutout behind the CPU area for easy cooler installation and multiple grommeted holes for efficient cable routing.

Interni view from the right side, focusing on the drive bay configuration. The case offers three external 5.25-inch bays and seven internal 2.5/3.5-inch drive bays, providing ample storage expansion options.

A closer look at the internal drive bays, illustrating the design for mounting 2.5-inch or 3.5-inch storage drives. These bays are designed for easy installation and removal of hard drives and SSDs.

Ova slika pruža interni view looking down from the top, showcasing the pre-installed 120mm blue LED fan at the rear for exhaust. The top panel's mesh area for additional fan mounting is also visible, contributing to overall system cooling.
4. Postavljanje i instalacija
Follow these steps to install your computer components into the KOLINK Refractor Midi-Tower.
4.1 Priprema slučaja
- Postavite kućište na ravnu, stabilnu površinu.
- Remove the left and right side panels by unscrewing the thumbscrews at the rear of the case and sliding the panels backward.
4.2 Instalacija matične ploče
- Instalirajte I/O štitnik koji je došao s vašom matičnom pločom u izrez na stražnjoj strani kućišta.
- Ensure the correct motherboard standoffs are installed for your ATX motherboard. Adjust or add standoffs as necessary using the provided accessory kit.
- Pažljivo postavite matičnu ploču na odstojnike, poravnavajući rupe za vijke.
- Pričvrstite matičnu ploču odgovarajućim vijcima iz kompleta dodatne opreme.
4.3 Instalacija napajanja
- Position your ATX power supply unit (PSU) in the designated compartment at the bottom rear of the case.
- Align the PSU with the screw holes at the rear of the case.
- Secure the PSU using the screws provided with your power supply.
4.4 Instalacija pogona
5.25-inch External Drives:
- Remove the desired 5.25-inch bay cover from the front panel.
- Slide your optical drive or other 5.25-inch device into the bay from the front.
- Secure the drive using the tool-less clips or screws.
2.5/3.5-inch Internal Drives:
- Locate the internal drive bays.
- Mount your 2.5-inch SSD or 3.5-inch HDD into the drive trays.
- Slide the populated drive trays back into the drive cage until they click into place.
4.5 Instalacija kartice za proširenje
- Uklonite potrebne poklopce slotova za proširenje na stražnjoj strani kućišta.
- Insert your graphics card or other PCIe expansion card into the corresponding slot on the motherboard.
- Secure the card with the provided screws.
4.6 Upravljanje kablovima
Utilize the cable routing holes and tie-down points behind the motherboard tray to organize cables. This improves airflow and gives your build a cleaner appearance.
4.7 Fan Installation (Optional)
The case comes with two 120mm blue LED fans pre-installed at the front and one 120mm blue LED fan at the rear. Additional fan mounting locations include:
- Top: 1x 120/140mm fan
- Bottom: 1x 120mm fan (under the PSU)
Install additional fans as needed for optimal cooling, ensuring proper airflow direction.
5. Uputstvo za upotrebu
5.1 Početno uključivanje
- Once all components are installed and cables are connected, replace both side panels.
- Connect your monitor, keyboard, mouse, and other peripherals.
- Connect the power cable to the PSU and then to a wall outlet.
- Press the power button on the top I/O panel to start your system.
5.2 Front Panel I/O Usage
Gornja I/O ploča omogućava praktičan pristup:
- USB 3.0 portovi (x2): Za brzi prijenos podataka s kompatibilnim uređajima.
- USB 2.0 portovi (x2): Za povezivanje standardnih USB uređaja.
- Audio Jacks (Headphone/Microphone): For connecting headsets or external audio devices.
- Dugme za napajanje: Za uključivanje/isključivanje sistema.
- Dugme za resetiranje: Za ponovno pokretanje sistema.
5.3 LED rasvjeta
The pre-installed front and rear fans feature blue LED lighting, which illuminates when the system is powered on, adding an aesthetic element to your build.
6. Održavanje
Redovno održavanje pomaže u osiguravanju optimalnih performansi i dugotrajnosti vašeg računarskog sistema.
6.1 Čišćenje
- Filteri za prašinu: The case includes a removable dust filter under the PSU. Regularly remove and clean this filter to prevent dust buildup and maintain airflow.
- Eksterijer: Obrišite vanjske površine mekom krpom, damp tkanina. Izbjegavajte abrazivna sredstva za čišćenje.
- unutrašnjost: Periodically use compressed air to remove dust from internal components and fan blades. Ensure the system is powered off and unplugged before cleaning the interior.
6.2 Optimizacija protoka zraka
Ensure that the case's ventilation areas (front, top, rear, bottom) are not obstructed. Proper cable management also contributes significantly to unrestricted airflow within the case.
7. Otkrivanje problema
Ovaj odjeljak se bavi uobičajenim problemima s kojima se možete susresti.
7.1 Uobičajeni problemi
- Sistem se ne uključuje:
- Check if the power cable is securely connected to both the PSU and the wall outlet.
- Provjerite je li prekidač za napajanje u položaju 'UKLJUČENO'.
- Provjerite je li kabel dugmeta za napajanje na prednjoj ploči ispravno spojen na matičnu ploču.
- Confirm all internal power cables (24-pin ATX, CPU, GPU) are properly seated.
- Ventilatori se ne okreću:
- Check if the fan power cables are correctly connected to the motherboard or fan controller.
- Provjerite da li sistem prima napajanje.
- USB portovi ne rade:
- Verify that the front panel USB 3.0 and USB 2.0 headers are correctly connected to the motherboard.
- Ensure the device you are connecting is functioning correctly.
- Audio Ports Not Working:
- Check that the front panel audio header (HD Audio) is correctly connected to the motherboard.
- Confirm your audio drivers are installed and up to date.
For further assistance, please refer to your motherboard manual or contact KOLINK support.
8. Specifikacije
Detailed technical specifications for the KOLINK Refractor Midi-Tower.
| Feature | Specifikacija |
|---|---|
| Naziv modela | Refractor Midi-Tower |
| Dimenzije (Š x V x D) | 190 x 475 x 445 mm (7.5 x 18.7 x 17.5 inča) |
| Materijal | Steel (body), Plastic (front) |
| Težina | Pribl. 4.8 kg (10.6 lbs) |
| Boja | Crna |
| Form Factor | Midi Tower |
| Kompatibilnost matične ploče | ATX |
| Vanjski odjeli za diskove | 3x 5.25 inča |
| Unutrašnja ležišta pogona | 7x 2.5/3.5-inch |
| Slotovi za proširenje | 7 |
| Unaprijed instalirani ventilatori | 2x 120mm (front, blue LED), 1x 120mm (rear, blue LED) |
| Fan Support (Total Possible) | Front: 2x 120mm, Top: 1x 120/140mm, Bottom: 1x 120mm, Rear: 1x 120mm |
| I/O Panel | 2x USB 3.0, 2x USB 2.0, 1x Audio In/Out |
| Maksimalna dužina grafičke kartice | 360 mm |
| Maksimalna visina CPU hladnjaka | 174 mm |
| PSU Compatibility | Standard ATX (optional) |
| Filteri za prašinu | Floor (under PSU, removable) |
9. Garancija i podrška
KOLINK products are manufactured to high-quality standards. This product is covered by a manufacturer's warranty against defects in materials and workmanship. The specific terms and duration of the warranty may vary by region and retailer.
Please retain your proof of purchase for warranty claims. For technical support, warranty inquiries, or to report missing/damaged parts, please contact your point of purchase or visit the official KOLINK webstranica za resurse podrške.
KOLINK Official Webstranica: www.kolink.eu (Please note: This is a general link and may not lead directly to a support page for this specific model.)


