Uvod
This manual provides detailed instructions for the safe and effective installation, operation, and maintenance of your Premier 1 IntelliShock 10 Fence Energizer. Please read all instructions carefully before use to ensure proper functionality and safety.
Sigurnosne informacije
- Always disconnect the energizer from the power source before handling or performing any maintenance.
- Do not install the energizer in wet conditions or in areas prone to flooding.
- Ensure proper grounding of the energizer as specified in the setup instructions.
- Keep children and unauthorized personnel away from the electric fence.
- Avoid touching the fence wires directly when the energizer is active.
- This energizer is designed for animal control and should not be used for any other purpose.
- The energizer is not waterproof. Protect it from direct rain and moisture.
Sadržaj paketa
Provjerite da li su sve komponente prisutne u vašem paketu:
- IntelliShock 10 Energizer (1.0 Joule output)
- 12V leads and wiring harness
- 3 ft. galvanized ground rod
- Uputstvo za upotrebu (ovaj dokument)
Napomena: A 12V battery is required for operation and is NIJE UKLJUČENO u ovom kompletu.
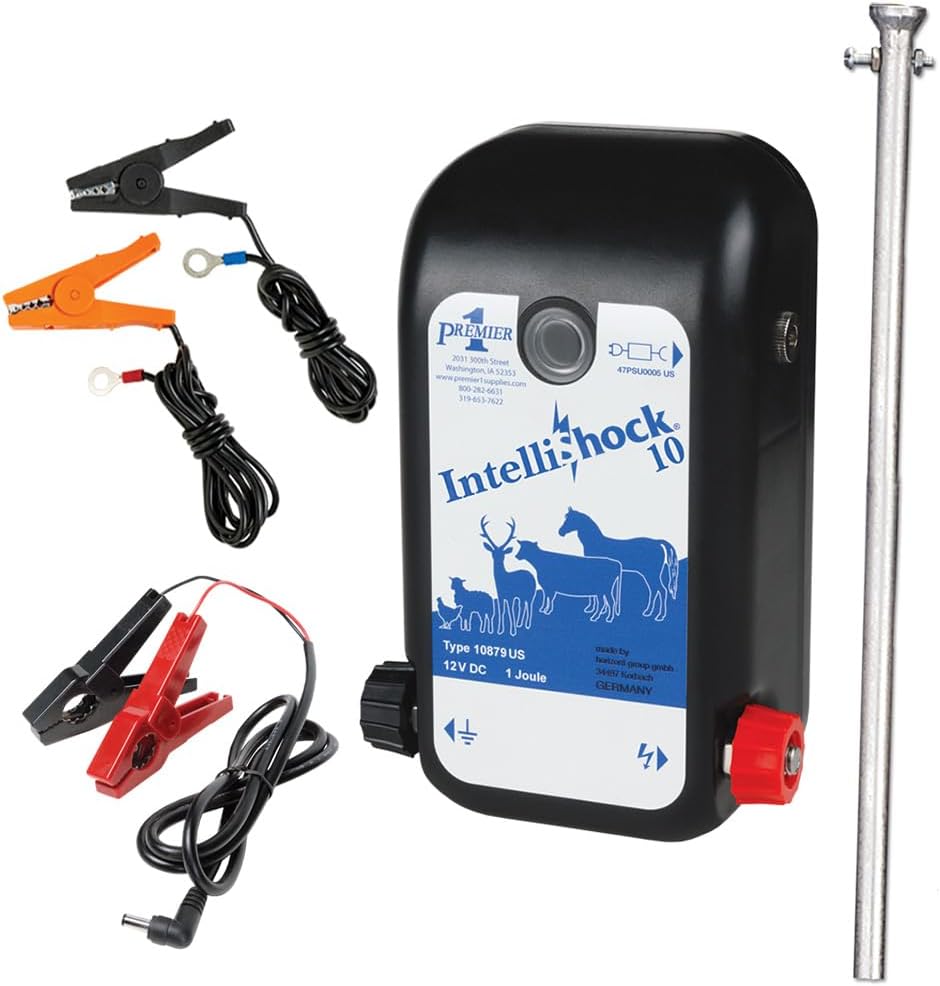
Image: The Premier 1 IntelliShock 10 Fence Energizer shown with its included 12V leads, wiring harness, and a 3-foot galvanized ground rod. The main energizer unit is black with a white label detailing its specifications and animal illustrations.
Setup
1. Grounding the Energizer
- Select a location for the ground rod that is moist and free from debris.
- Drive the 3 ft. galvanized ground rod fully into the earth.
- Connect the green (ground) terminal of the energizer to the ground rod using the provided wiring. Ensure a secure connection.

Image: A close-up of the back of the IntelliShock 10 energizer, showing the ground rod inserted into its mounting bracket, ready for installation. The energizer's label with model information is visible.
2. Connecting to the Fence
- Connect the red (fence) terminal of the energizer to your electric fence line. Use appropriate insulated wire for this connection.
- Ensure all fence connections are tight and free from corrosion.

Image: The IntelliShock 10 energizer mounted on a fence post, with wires connecting it to the electric fence netting and a ground rod. A dog is visible in the background, demonstrating the fence's purpose.
3. Battery Connection (12V DC)
- Connect the 12V leads and wiring harness to a suitable 12V deep cycle battery (not included).
- Ensure correct polarity: red to positive (+), black to negative (-).
- Connect the other end of the wiring harness to the energizer's 12V input port.
- For outdoor installations, house the battery and energizer in a protective enclosure to shield them from weather elements.

Image: A Premier 1 IntelliShock 10 energizer integrated into a solar-powered electric fence system. The energizer is housed within a metal box alongside a battery, with a solar panel mounted above to charge the battery. This setup is shown in a grassy outdoor environment.

Image: A Premier 1 IntelliShock 10 energizer and solar panel setup in a winter landscape with snow on the ground. The energizer and battery are protected within a metal enclosure, demonstrating year-round usability.
Uputstvo za upotrebu
Uključivanje
Once all connections (ground, fence, and battery) are securely made, the IntelliShock 10 energizer will begin to operate. A flashing indicator light on the unit typically confirms operation.
IntelliShock Technology
The IntelliShock 10 features an automatic adjustment system that optimizes battery draw. If the fence is not heavily loaded by weeds or shorts, the unit can reduce battery consumption by up to 67%. This extends the time between battery recharges, especially during periods of low vegetation or dormant grass.
Fence Capacity
The energizer is capable of powering various fence configurations:
- Approximately 2 miles of 3-strand cattle fence.
- Approximately 3/4 mile of 5-7 strand sheep fence.
- Up to 10 of the 164-foot sheep/goat nets.
- Up to 4-5 of the 164-foot poultry nets.
Note: Actual fence distances may vary depending on the amount of grass or weed load on the fence line.
Održavanje
- Održavanje baterije: Regularly check the charge level of your 12V battery. Recharge as needed to ensure continuous operation. The IntelliShock feature helps extend battery life, but periodic recharging is still necessary.
- Suzbijanje korova: Keep the fence line clear of excessive vegetation. Heavy weed growth can reduce fence effectiveness and increase battery drain.
- Provjere veze: Periodically inspect all connections (battery, ground, fence) for corrosion, looseness, or damage. Clean or replace as necessary.
- Zaštita od vremenskih prilika: As the energizer is not waterproof, ensure it remains protected from direct rain, snow, and excessive moisture. A suitable weatherproof enclosure is recommended for outdoor installations.
Rješavanje problema
- No Power/Weak Pulse:
- Check battery charge. Recharge or replace if low.
- Inspect all wiring connections for secure contact and correct polarity.
- Examine the fence line for heavy weed contact or shorts to the ground. Clear any obstructions.
- Verify the ground rod connection is solid and the rod is adequately driven into moist earth.
- Indicator Light Not Flashing:
- Confirm the energizer is receiving power from the battery.
- Check for any visible damage to the energizer unit or its power cord.
- Neočekivani gubitak snage:
- This could indicate a severe short on the fence line or a depleted battery. Address these issues as described above.
- If the power cord or wiring harness shows signs of burning or damage, immediately disconnect the energizer and replace the affected components.
If troubleshooting steps do not resolve the issue, contact Premier 1 Supplies customer support.
Specifikacije
| Model | IntelliShock 10 |
| Izlazna energija | 1.0 Joule |
| Izvor napajanja | 12V DC Battery (not included) |
| Težina artikla | 4.1 funte |
| Proizvođač | Premier 1 Supplies |
| ASIN | B01BE6IIHA |
Informacije o garanciji
The Premier 1 IntelliShock 10 energizer comes with a 3 godine garancije from the date of purchase. This warranty covers defects in materials and workmanship under normal use. For warranty claims or further details, please contact Premier 1 Supplies customer support.
Podrška
For technical assistance, replacement parts, or any questions regarding your IntelliShock 10 Fence Energizer, please contact Premier 1 Supplies directly. Visit their official webweb-mjesto ili pogledajte dokumentaciju o kupovini za kontakt informacije.
Više informacija i resursa za podršku možete pronaći posjetom Premier 1 Supplies Store on Amazon.


