1. Uvod
The Neewer RT-16 Wireless Studio Flash Trigger System provides a reliable and efficient way to wirelessly trigger your studio flash units or speedlites. Designed for ease of use, this system offers 16 selectable channels to minimize interference and ensures synchronous triggering for consistent lighting in your photography setups.
2. Značajke proizvoda
- Bežična kontrola: Enables remote triggering of hot shoe flashguns synchronously.
- Jednostavna instalacija: Simple setup with low power consumption.
- No Camera Damage: Designed to operate without causing any damage to your camera.
- Brza sinhronizacija: Achieves synchronous flash at 1/200 second.
- Prošireni raspon: Maximum working distance of 30 meters (in open areas without interference).
- 16 kanala: Offers 16 selectable channels to avoid signal interference.
- Indikatori prijemnika: Receiver features an on/off switch and an LED to indicate triggering.
- External Channel Selector: New design with channel selector located conveniently outside both the transmitter and receiver.
3. Sadržaj paketa
- 1x RT-16 Transmitter
- 3x RT-16 Receivers
- 1x PC Sync Cable
- 1x adapter sa 3.5 mm na 6.35 mm
4. Podešavanje
4.1. Instalacija baterije
The RT-16 Transmitter requires one 23A 12V battery (included). The RT-16 Receivers each require two AAA batteries (not included).
- Open the battery compartment on the back of each receiver.
- Insert two AAA batteries into each receiver, ensuring correct polarity.
- Čvrsto zatvorite odeljak za baterije.
- The 23A 12V battery for the transmitter is pre-installed. If replacement is needed, carefully open the transmitter casing to access the battery.

Image: RT-16 Receiver battery compartment with AAA batteries.
Video: Demonstration of changing the L1028F battery in an RT-16 Transmitter. This video is provided by a seller and is directly relevant to the RT-16 model.
4.2. Podešavanje kanala
Both the transmitter and all receivers must be set to the same channel to communicate effectively. The RT-16 system offers 16 channels.
- Locate the channel selector switches on both the transmitter and each receiver. These are typically small DIP switches.
- Adjust the switches on the transmitter to select your desired channel (e.g., channel 1).
- Adjust the switches on all receivers to match the channel selected on the transmitter.

Image: Channel selector switches on RT-16 units.
Video: Demonstration of setting channels on a similar flash trigger system (Godox CT-16). The principles of matching channels apply to the Neewer RT-16.
4.3. Connecting to Flash Units
- Insert the receiver's trigger output plug (3.5mm jack) into your studio flash's sync jack. Use the provided 3.5mm to 6.35mm adapter if your flash requires a 6.35mm input.
- For speedlites, the receiver can be mounted directly onto a light stand or hot shoe adapter, and the speedlite can be mounted on top of the receiver's hot shoe.
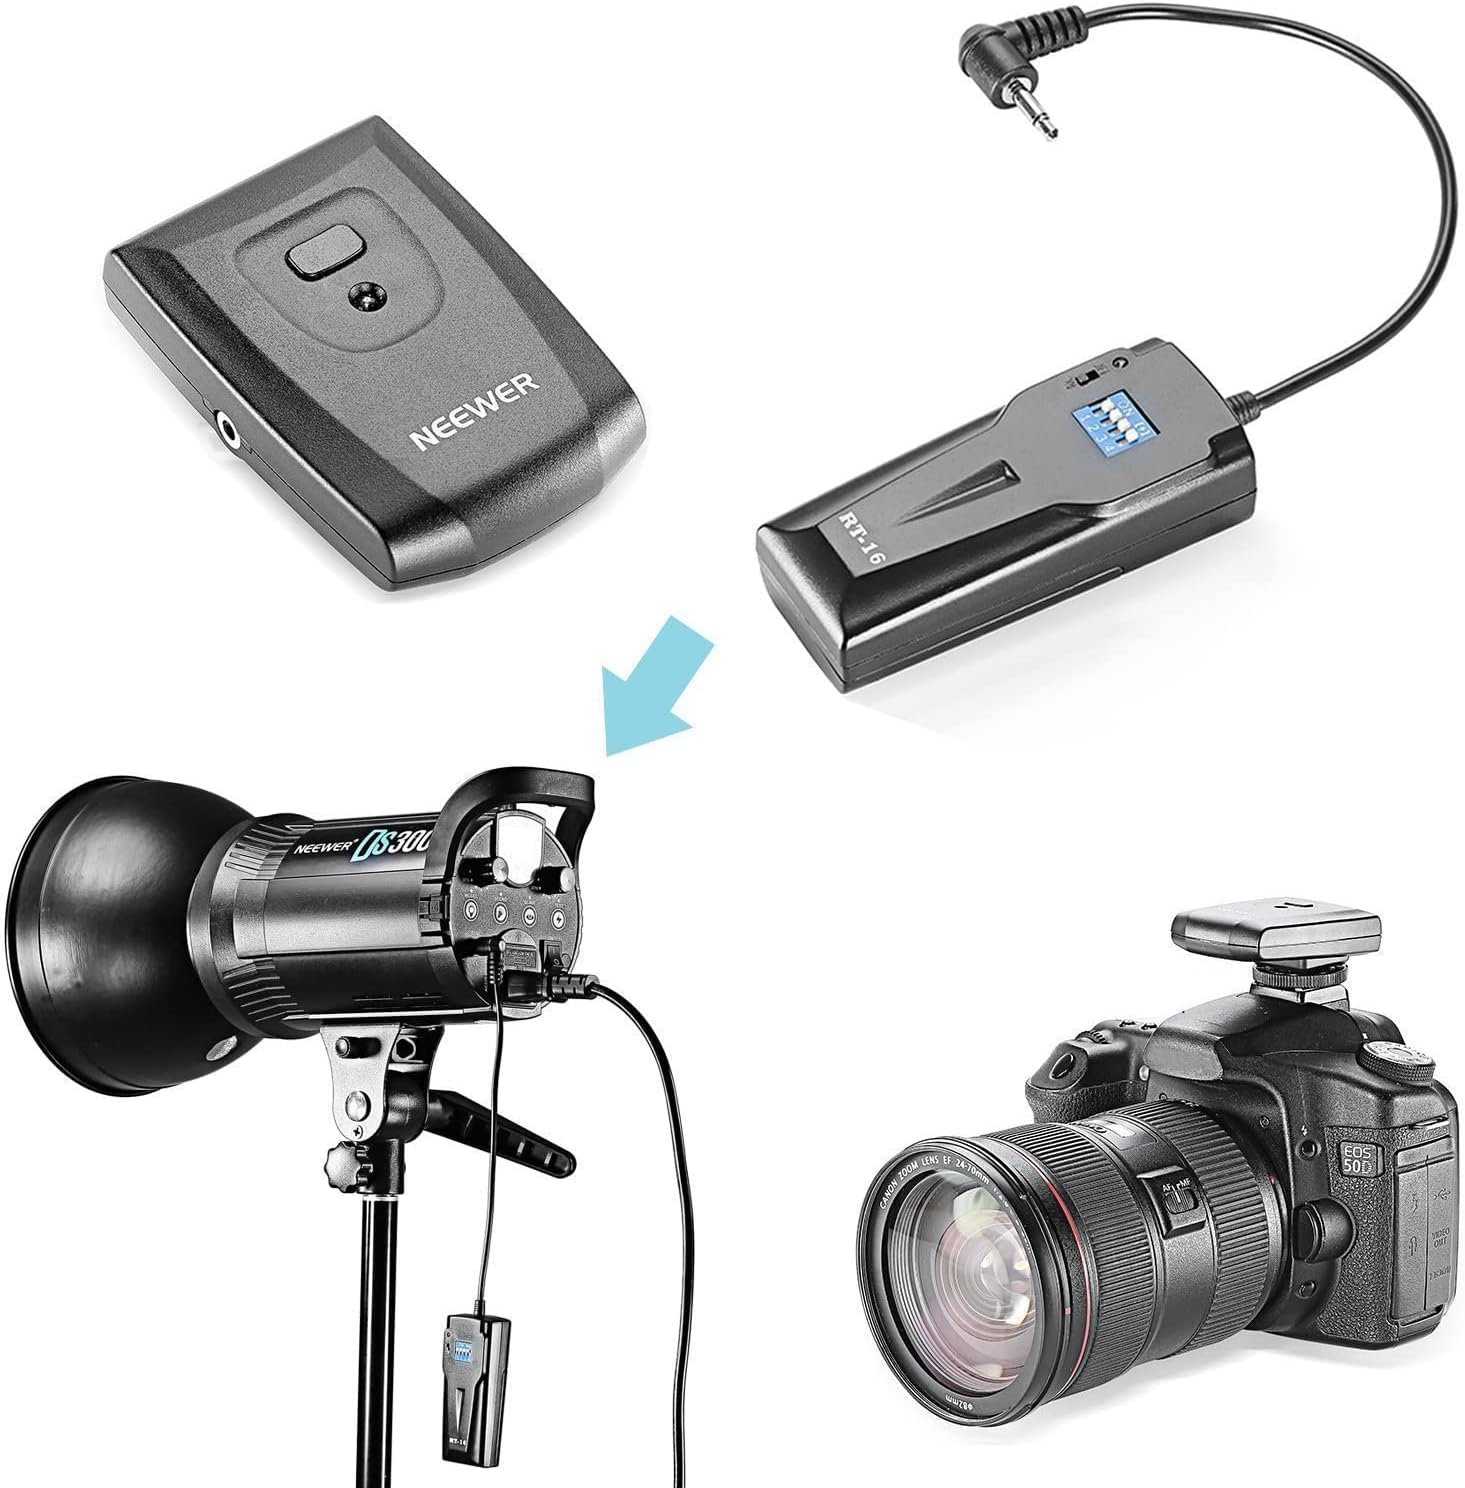
Image: Connecting the RT-16 system to a studio flash and camera.
Video: Demonstration of installing batteries, setting channels, and connecting a similar flash trigger (Godox CT-16) to a studio flash and camera.
4.4. Montaža predajnika
Slide the transmitter's hot shoe socket into your camera's hot shoe mount. If your camera does not have a hot shoe, use the provided PC sync cord and insert it into the camera's PC sync socket and the transmitter's PC sync port.
5. Uputstvo za upotrebu
- Ensure both the transmitter and all receivers are powered on and set to the same channel.
- To test the connection, press the test button on your transmitter. The connected studio light(s) should flash.
- You are now ready to begin shooting. When you press your camera's shutter button, the transmitter will send a signal to the receivers, triggering the flashes synchronously.
- For cameras without a hot shoe or when the hot shoe is engaged, use the 3.5mm sync cable to connect the transmitter to the camera's PC sync port.
6. Održavanje
6.1. Zamjena baterije
- predajnik: Replace the 23A 12V battery when the indicator light dims or the trigger becomes unreliable. Carefully open the casing using a small screwdriver if necessary, as per the video demonstration.
- Prijemnici: Replace the two AAA batteries in each receiver when the LED indicator fails to light up or flashes weakly upon triggering.
6.2. Opća njega
- Uređaje održavajte suhim i čistim. Izbjegavajte izlaganje vlazi ili ekstremnim temperaturama.
- Čuvajte na hladnom i suvom mestu kada se ne koristi.
- Do not attempt to disassemble the units beyond battery replacement, as this may void the warranty.
7. Otkrivanje problema
- Flashes not firing:
- Ensure all units (transmitter and receivers) are powered on.
- Verify that the batteries in all units are fresh and correctly installed. A low or dead battery in the transmitter is a common cause of issues.
- Confirm that the channel selector switches on both the transmitter and all receivers are set to the exact same position.
- Check all cable connections between the receivers and the flash units.
- Ensure the transmitter is securely mounted on the camera's hot shoe or properly connected via the PC sync cable.
- Interference/Misfires:
- Change to a different channel using the channel selector switches. Experiment with different channels to find one with less interference in your environment.
- Ensure the working distance is within the maximum range of 30 meters and there are no significant obstructions.
- Receiver LED not lighting up:
- The receiver's LED typically only illuminates momentarily upon triggering. It does not stay lit when the unit is simply powered on.
- If it never lights up, check batteries and channel settings.
8. Specifikacije
| Feature | Specifikacija |
|---|---|
| Dimenzije proizvoda | 5.71 x 3.54 x 1.89 inča |
| Težina artikla | 8.1 unce |
| Ulaz predajnika | Baterija od 23A 12V (uključena) |
| Ulaz snage prijemnika | 2 AAA baterije (nisu uključene) |
| Radio Working Frequency | 433MHz |
| Channels Selectable | 16 kanala |
| Max. Working Distance | 30M (open area, without interference) |
| Brzina sinhronizacije blica | 1/200 sekunde |
| Kompatibilni nosači | Standard Hotshoe, Universal |
9. Garancija i podrška
This item is 100% new and unused. It comes with a 1-year warranty provided by the seller. For technical support or warranty claims, please contact your retailer or visit the official NEEWER websajt za pomoć.


