1. Uvod
Thank you for choosing the lightmaXX DJ Scan LED. This professional LED scanner is designed to provide dynamic lighting effects for various applications, including DJ sets, clubs, and events. Featuring a powerful LED light source and precise scanning capabilities, it offers vibrant colors and versatile patterns to enhance any performance space.
This manual provides essential information for the safe and efficient operation of your lightmaXX DJ Scan LED. Please read it thoroughly before installation and use, and keep it for future reference.

Slika 1: Gotovoview of the lightmaXX DJ Scan LED unit.
2. Sigurnosna uputstva
Da biste osigurali siguran rad, molimo vas da se pridržavate sljedećih sigurnosnih mjera opreza:
- Uvijek priključite uređaj na uzemljenu utičnicu.
- Ne izlažite jedinicu kiši ili vlazi.
- Osigurajte odgovarajuću ventilaciju oko uređaja kako biste spriječili pregrijavanje.
- Izbjegavajte direktno izlaganje očiju izvoru svjetlosti.
- Isključite uređaj iz struje prije čišćenja ili servisiranja.
- Samo kvalifikovano osoblje treba da obavlja popravke.
- Čuvati dalje od zapaljivih materijala.
3. Sadržaj paketa
Provjerite da li su sve stavke prisutne u paketu:
- lightmaXX DJ Scan LED unit
- Kabl za napajanje
- Korisnički priručnik (ovaj dokument)
- Mounting bracket (if included)
4. Karakteristike
The lightmaXX DJ Scan LED offers a range of features for dynamic lighting:
- Izvor svjetlosti: Powerful LED technology for bright and efficient illumination.
- Miješanje boja: RGBAW (Red, Green, Blue, Amber, White) color mixing for a wide spectrum of colors.
- Vrsta skenera: Designed as a scanner for precise beam movement and pattern projection.
- Kontrola: DMX control for integration into professional lighting setups.
- Prikaz: Digital display for easy navigation and setting adjustments.

Slika 2: Prednja strana view showing the LED lens and light output.
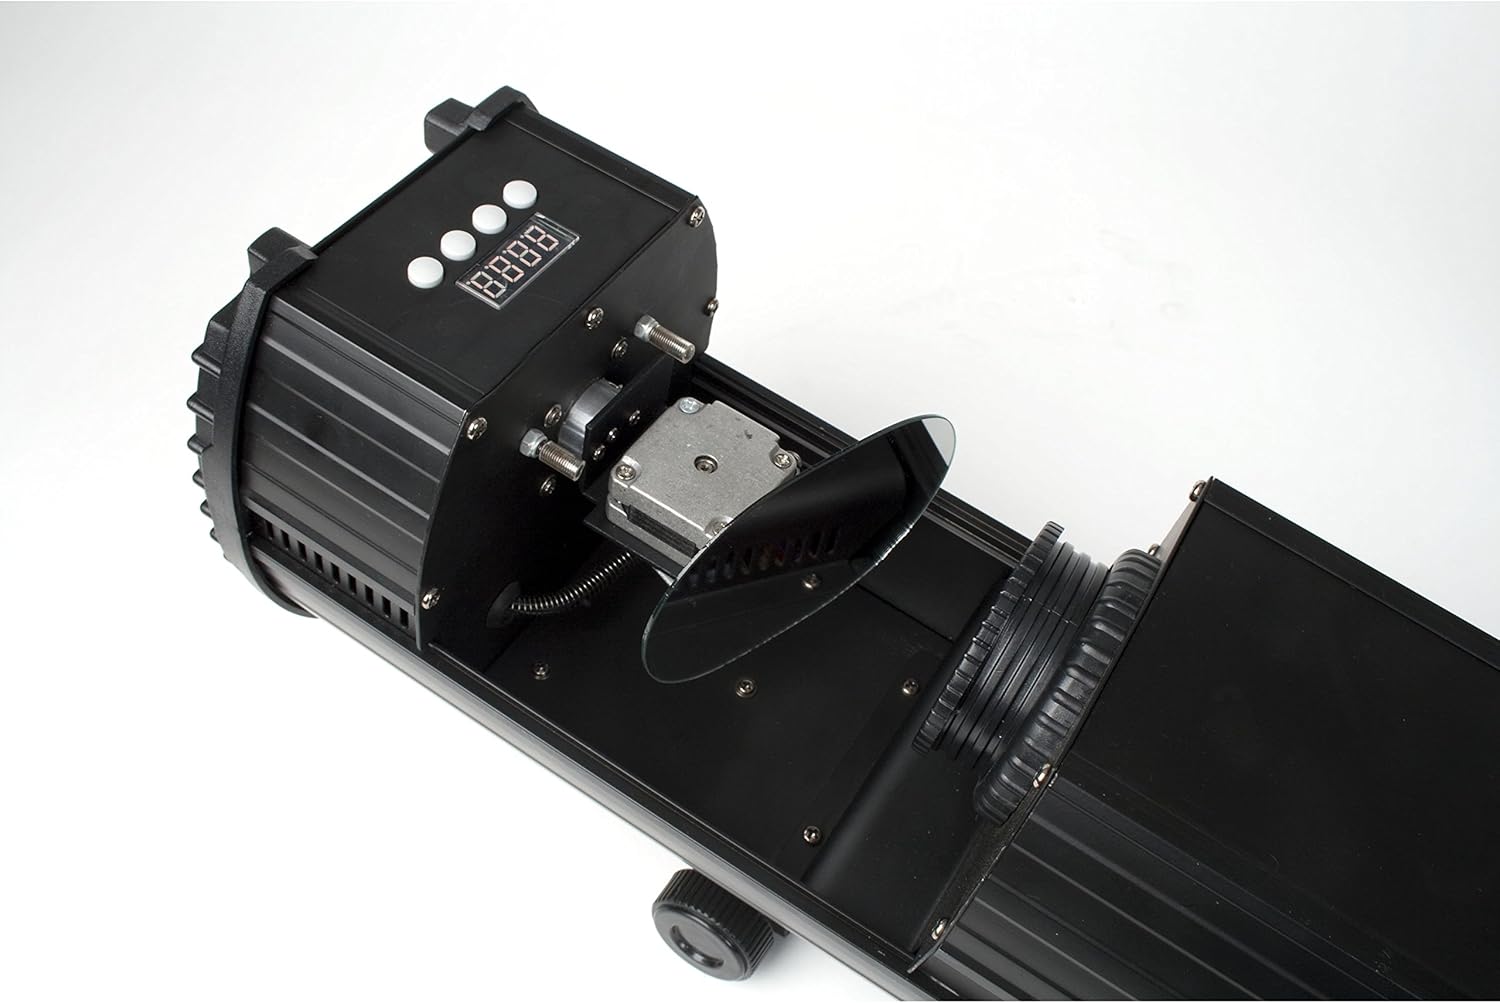
Figure 3: Internal mirror mechanism for dynamic scanning effects.
5. Podešavanje
5.1 Montaža
The lightmaXX DJ Scan LED can be mounted on a truss, stand, or placed on a flat surface. Ensure the mounting surface or structure can support the weight of the unit securely. Use appropriate clampi sigurnosne kablove prilikom montaže iznad glave.
5.2 Priključak za napajanje
Connect the supplied power cable to the power input on the rear of the unit and then to a suitable grounded power outlet (230V AC, 50Hz). Ensure the power switch is in the OFF position before connecting.

Figure 4: Rear panel with power input and cooling fan.
5.3 DMX priključak (opciono)
For DMX control, connect a standard 3-pin DMX cable from your DMX controller's output to the DMX IN port on the lightmaXX DJ Scan LED. If connecting multiple units, daisy-chain them by connecting the DMX OUT of the first unit to the DMX IN of the next.

Figure 5: Control panel and DMX input/output ports.
6. Operativni
6.1 Kontrolna tabla
The control panel features a digital display and several buttons for navigating menus and adjusting settings. Refer to Figure 5 for the location of the control panel.
- MENI: Accesses the main menu or goes back to the previous menu.
- GORE DOLJE: Navigacija kroz opcije menija ili podešavanje vrijednosti.
- ENTER: Confirms a selection or saves a setting.
6.2 Načini rada
The lightmaXX DJ Scan LED typically supports the following operating modes:
- DMX način rada: Allows full control over all functions via a DMX controller. Set the DMX address using the control panel.
- Zvučni aktivni način rada: The unit reacts to sound via a built-in microphone, creating dynamic light shows synchronized with music.
- Automatski režim: Runs pre-programmed light sequences automatically.
- Master/Slave način rada: Connect multiple units where one acts as the master, controlling the others (slaves) for synchronized operation without a DMX controller.

Slika 6: Prample of a green light beam projection.

Slika 7: Prample of a red light beam projection.
7. Održavanje
7.1 Čišćenje
Regular cleaning helps maintain optimal performance. Disconnect the unit from power before cleaning.
- Za brisanje vanjske strane koristite meku krpu koja ne ostavlja dlačice.
- For lenses and mirrors, use a specialized lens cleaning solution and cloth to avoid scratches.
- Periodically clean the cooling fan and vents to ensure proper airflow.
7.2 Skladištenje
When not in use, store the unit in a dry, dust-free environment, preferably in its original packaging or a protective case.
8. Otkrivanje problema
Ako naiđete na probleme, pogledajte donju tabelu za uobičajene probleme i rješenja:
| Problem | Mogući uzrok | Rješenje |
|---|---|---|
| Jedinica se ne uključuje. | No power connection; faulty cable; blown fuse. | Check power cable connection; try another outlet; replace fuse if necessary. |
| Nema izlaza svjetla. | Unit in standby; DMX signal issue; LED failure. | Check operating mode; verify DMX connection and address; contact support if LED is faulty. |
| Nema DMX kontrole. | Incorrect DMX address; faulty DMX cable; DMX controller issue. | Set correct DMX address; test DMX cable; check DMX controller settings. |
| Beam movement is erratic. | Obstruction; internal mechanism issue. | Ensure no physical obstructions; contact support if issue persists. |
9. Specifikacije
| Feature | Detalj |
|---|---|
| Broj modela | LCD-502 |
| Izvor svjetlosti | LED |
| Light Type | Scanner |
| Miješanje boja | RGBAW (Red, Green, Blue, Amber, White) |
| Napajanje | 230V AC, 50Hz (typical) |
| Kontrolni režimi | DMX, Sound Active, Auto, Master/Slave |
| ASIN | B004CTLQXK |

Figure 8: Energy efficiency information for the LED light source.
10. Garancija i podrška
lightmaXX products are designed for reliability and performance. For warranty information and technical support, please refer to the warranty card included with your product or visit the official lightmaXX webSačuvajte dokaz o kupovini za eventualne reklamacije.
For further assistance, please contact lightmaXX customer service.


