Uvod
This manual provides detailed instructions for the safe and effective installation, operation, and maintenance of your Invision Ultra Slim TV Wall Mount Bracket. Designed for most 26-55 inch LED, LCD, Plasma, 4K, 3D, and Curved Screens, this bracket offers an ultra-slim wall profile and an articulating arm for versatile viewing angles. Please read this manual thoroughly before beginning installation.
The Invision TV bracket is engineered for compatibility with VESA mounting holes: 100mm x 100mm (3.9” x 3.9”), 200mm [horizontal] x 100mm [vertical] (7.9” x 3.9”), and 200mm x 200mm (7.9” x 7.9”). It supports M4, M5, M6, or M8 fixing bolts and has a maximum TV load capacity of 88lbs (40kg).
Sadržaj paketa
Before starting, ensure all components are present and undamaged. Refer to the diagram below for identification.

Slika 1: Gotovoview of the Invision TV Wall Mount Bracket and its included hardware. This image displays the main bracket assembly, wall plate, articulating arms, and various screws, washers, and anchors necessary for installation.
- Wall Mount Assembly (Articulating Arm and Wall Plate)
- TV Mounting Plate (detachable)
- Wall Mounting Hardware (e.g., lag bolts, concrete anchors)
- TV Mounting Hardware (various M4, M5, M6, M8 screws, spacers)
- Kopče/poklopci za upravljanje kablovima
- Vodič za instalaciju (ovaj priručnik)
- Ključ (za zatezanje vijaka)
Postavljanje i instalacija
1. Provjere prije instalacije
- TV kompatibilnost: Verify your TV's VESA mounting pattern. This mount supports 100x100mm, 200x100mm, and 200x200mm.
- Težina TV-a: Ensure your TV's weight does not exceed the mount's maximum load capacity of 88lbs (40kg).
- Vrsta zida: Identify your wall type (wood stud, concrete, brick). Different anchors are required for each.
- Potreban alat: Stud finder, drill, level, measuring tape, pencil, Phillips head screwdriver.
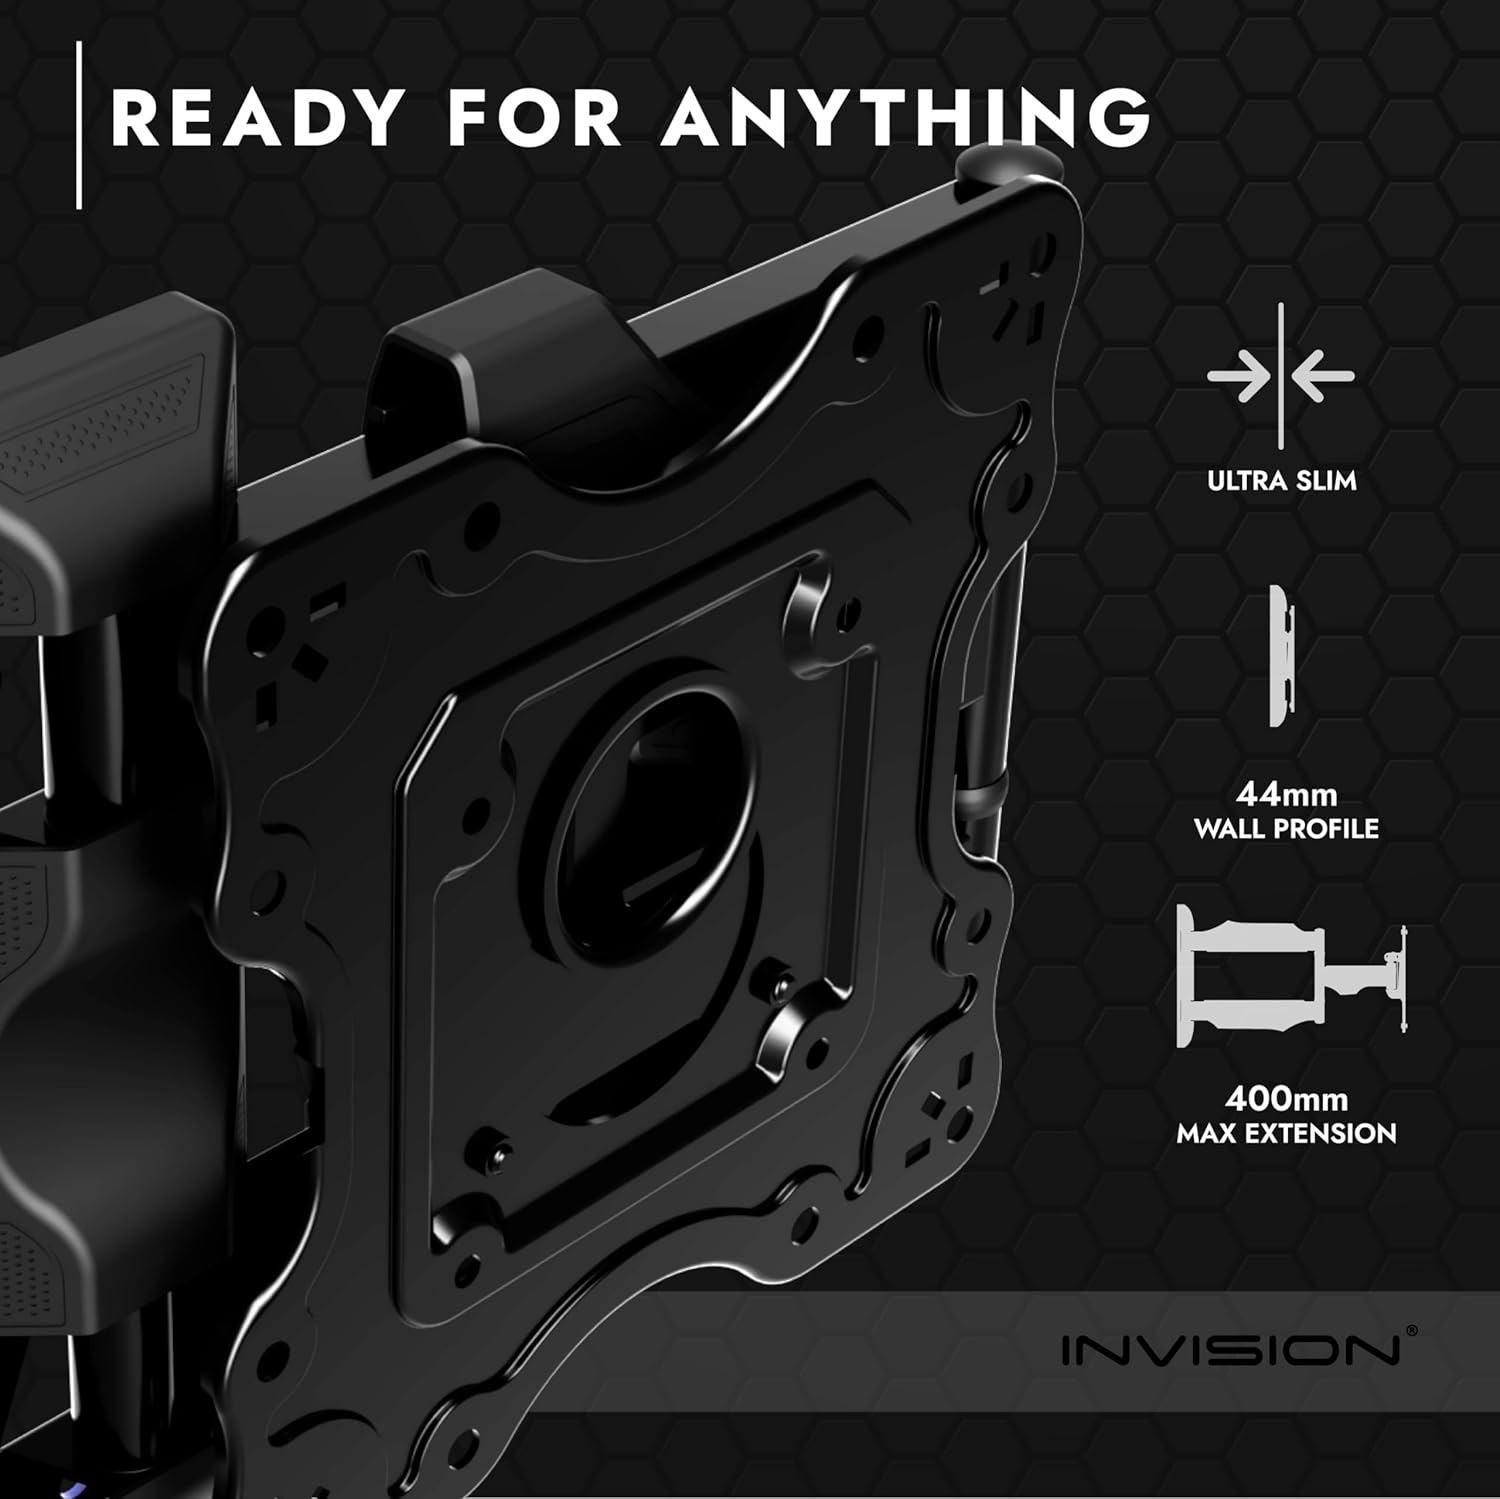
Figure 2: VESA compatibility and measurement guide. This diagram illustrates how to measure your TV's VESA mounting holes (width and height) to ensure compatibility with the bracket. Supported VESA patterns are listed.
2. Attaching the TV Plate to Your TV
- Pažljivo postavite televizor ekranom prema dolje na meku, čistu površinu kako biste spriječili ogrebotine.
- Align the detachable TV mounting plate with the VESA holes on the back of your TV.
- Select the appropriate screws (M4, M5, M6, or M8) and spacers (if needed for recessed holes) from the provided hardware kit.
- Secure the TV plate to the TV using a Phillips head screwdriver. Do not overtighten.
3. Mounting the Wall Plate
- Pronađite potporne grede (za zidove od drvenih greda): Use a stud finder to locate the center of two adjacent wood studs. Mark the drilling locations. For concrete/brick walls, mark desired locations.
- Izbušite pilot rupe: Drill pilot holes at the marked locations. Ensure the drill bit size matches the recommended size for your chosen anchors (e.g., 3/16 inch for lag bolts into studs).
- Pričvrstite zidnu ploču: Align the wall plate with the drilled holes. Secure it to the wall using the provided lag bolts (for wood studs) or concrete anchors (for concrete/brick). Ensure the wall plate is perfectly level using a spirit level.
- Optional: Detach Arm for Easier Installation: For single-person installation, the articulating arm can be temporarily detached from the wall plate by unscrewing the main pivot bolts. Reattach after the wall plate is securely mounted.

Figure 3: Wall mount dimensions and installation considerations. This image provides key measurements of the mount, including its minimum wall profile (44mm) and maximum extension (400mm), aiding in planning the installation location.
4. Hanging the TV
- With the TV plate attached to your TV, carefully lift the TV and hook the TV plate onto the wall mount's arm. The design allows for temporary hanging before final securing.
- Once hooked, secure the TV plate to the arm using the designated screws or locking mechanism. Ensure it is firmly attached and cannot be accidentally dislodged.
Upravljanje nosačem
Your Invision TV wall mount offers flexible adjustments for optimal viewing.
Articulating Arm Movement
The cantilever arm extends up to an impressive 500mm (19.7 inches) from the wall, allowing you to pull your TV out for better viewing or push it back for a slim profile. It can maneuver left and right over 180 degrees, providing wide versatility.

Figure 4: The articulating arm fully extended. This image demonstrates the maximum reach of the mount's arm, allowing the TV to be positioned far from the wall for various viewing angles.
Podešavanje nagiba
The mount features a tool-free tilting action, allowing you to tilt your TV +10 degrees down and -2 degrees up. To adjust the tilt, simply loosen the two bolts on each side of the TV plate, adjust to the desired angle, and then re-tighten the bolts to secure the position. This mechanism is designed for ease of use and stability.

Figure 5: Close-up of the tilt adjustment mechanism. This image highlights the bolts that control the TV's vertical tilt, allowing for easy angle adjustments to reduce glare or optimize viewing.
Cable Management
Integrated cable management clips are provided on the articulating arms. Route your TV and power cables through these clips to maintain a tidy and organized appearance. Ensure enough slack is left in the cables to allow for full range of motion of the arm without strain.

Figure 6: Cable management features on the mount. This image shows how cables can be neatly routed along the articulating arms using integrated clips, contributing to a clean installation.
Održavanje
To ensure the longevity and safe operation of your Invision TV wall mount, periodic maintenance is recommended:
- Redovne provjere: Periodically inspect all mounting bolts and screws to ensure they remain tight. Vibrations or frequent adjustments can sometimes cause minor loosening over time.
- čišćenje: Clean the mount's surface with a soft, dry cloth. Avoid abrasive cleaners or solvents that could damage the finish.
- Zajednički pokret: The articulating joints are designed to be firm for stability. If movement becomes excessively stiff, a small amount of silicone-based lubricant can be applied to the pivot points, though this is rarely necessary. Avoid oil-based lubricants.
- Upravljanje kablovima: Ensure cables are not pinched or strained during movement. Re-route if necessary.
Rješavanje problema
Ovaj odjeljak se bavi uobičajenim problemima s kojima se možete susresti.
- Issue: TV appears unlevel after installation.
- Rješenje: The TV mounting plate often has a slight rotational adjustment feature. Loosen the securing bolts on the TV plate, adjust the TV to be level, and then re-tighten the bolts firmly. Ensure the wall plate itself was installed level initially.
- Issue: Articulating arm is too stiff or too loose.
- Rješenje: The arm joints are factory-set for optimal tension. If too stiff, ensure no cables are impeding movement. If too loose, check the main pivot bolts connecting the arm sections and the wall plate; they may require slight tightening with the provided wrench. Avoid overtightening, which can restrict movement.
- Issue: Cables are not staying within the cable management clips.
- Rješenje: Ensure you have left sufficient slack in the cables to accommodate the full range of motion of the articulating arm. If too many cables are routed through one clip, distribute them or use additional cable ties if necessary.
- Issue: Difficulty drilling into wall studs or concrete.
- Rješenje: Ensure you are using the correct drill bit size and type for your wall material. For wood studs, a standard wood drill bit is sufficient. For concrete or brick, a masonry drill bit and hammer drill are required. Always pre-drill pilot holes to the recommended depth.
Specifikacije
| Feature | Detalj |
|---|---|
| Brand | Invision |
| Broj modela | A1 |
| Kompatibilne veličine TV-a | 26 - 55 inča |
| Maksimalni kapacitet opterećenja | 88 lbs (40 kg) |
| VESA kompatibilnost | 100x100mm, 200x100mm, 200x200mm |
| Wall Profile (zatvoreno) | 46 mm (1.8 inča) |
| Maksimalno istezanje ruke | 500 mm (19.7 inča) |
| Podešavanje nagiba | +10° (down) / -2° (up) |
| Podesivo okretanje | 180° (lijevo/desno) |
| Materijal | Metal |
| Težina artikla | 7.3 funte |
| Dimenzije proizvoda | 15.35 x 12.2 x 2.05 inča |
| Certifikacija | CE Certified |
Garancija
The Invision Ultra Slim TV Wall Mount Bracket is covered by a 25 godine garancije on all parts. This warranty guarantees against defects in materials and workmanship under normal use. Please retain your proof of purchase for warranty claims.
Podrška
For further assistance, technical support, or warranty inquiries, please contact Invision customer service. Refer to the product packaging or the official Invision webstranicu za najnovije kontakt informacije.
Thank you for choosing Invision.


