1. Uvod
This manual provides detailed instructions for installing the Metra 95-2009 Double DIN Installation Multi-Kit. This kit is designed to facilitate the installation of a double-DIN radio or two single-DIN radios in select 1990 to 2012 GM, Honda, Isuzu, and Suzuki vehicle models. It features Metra's patented quick-release snap-in ISO mount system with a custom trim ring, ensuring a secure and integrated fit for your aftermarket stereo system.
2. Sigurnosne informacije
- Uvijek isključite negativni pol akumulatora vozila prije početka bilo kakvih električnih radova kako biste spriječili kratki spoj i strujni udar.
- Wear appropriate safety gear, including eye protection, during installation.
- Osigurajte da su svi priključci sigurni i pravilno izolirani kako biste spriječili električne opasnosti.
- Refer to your vehicle's service manual for specific instructions on removing dash components and accessing wiring.
3. Sadržaj paketa
Provjerite da li su sve dolje navedene komponente uključene u vaš komplet:
- Double DIN Dash Kit Components (Plastic Brackets and Trim Ring)
- Vijci i pričvršćivači za montažu
- Uputstvo za instalaciju

Figure 3.1: Main components of the Metra 95-2009 Double DIN Installation Multi-Kit, including plastic brackets and trim ring.
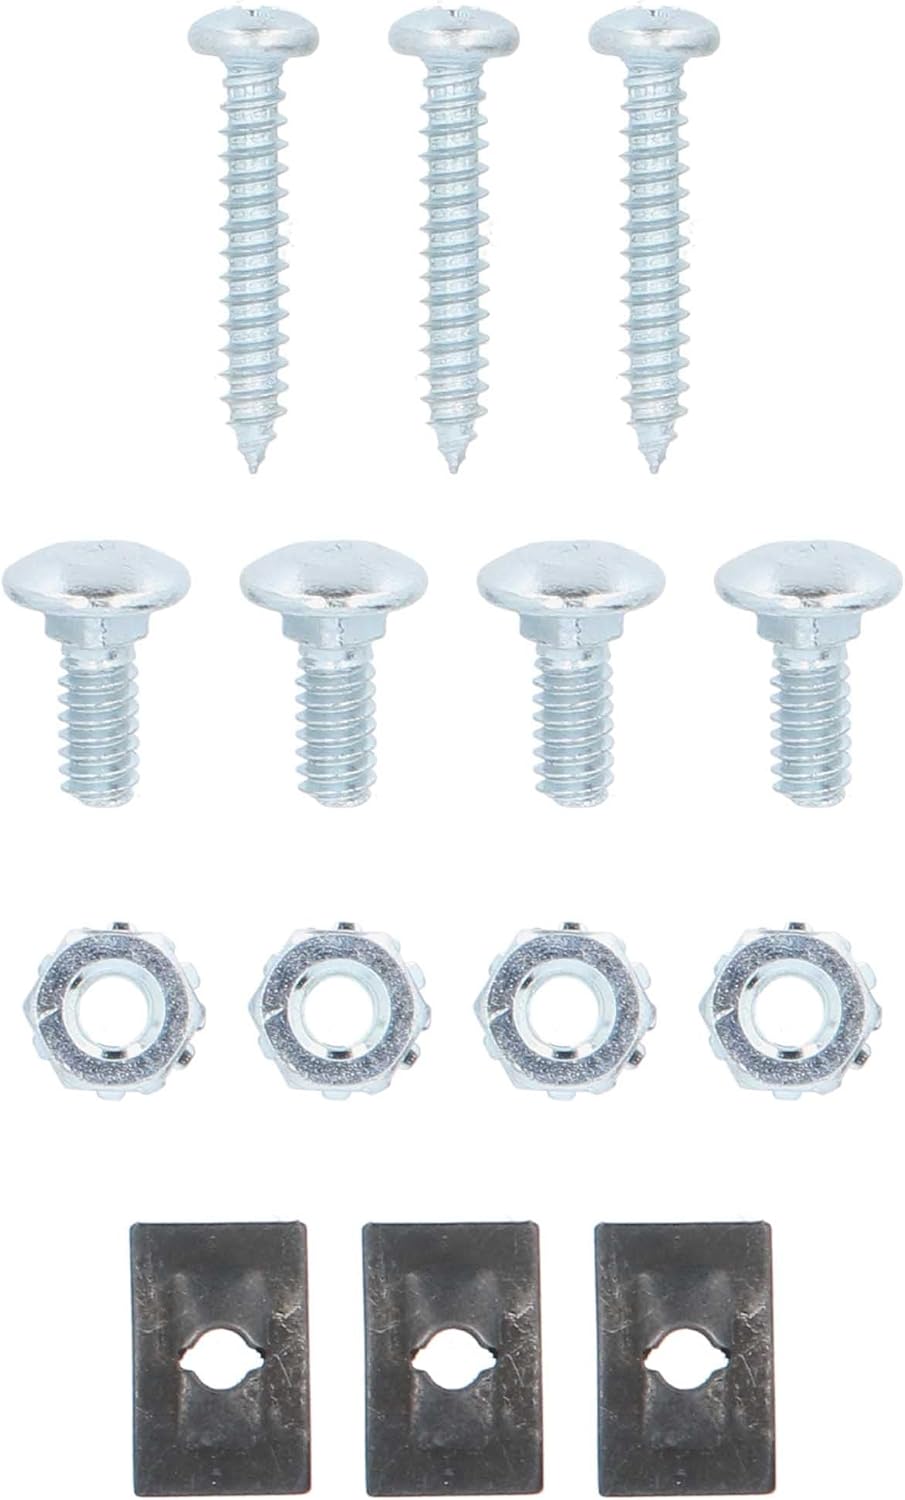
Figure 3.2: Included mounting screws and fasteners for securing the radio and dash kit.
4. Podešavanje
4.1 Potreban alat
- Alat za uklanjanje panela
- Set odvijača (Phillips i ravni)
- Klešta za skidanje izolacije/krimpovanje žica
- Multimeter (for verifying wiring)
- Električna traka ili termoskupljajuća cijev
- Veze
4.2 Provjere prije instalacije
- Confirm vehicle compatibility with the Metra 95-2009 kit.
- Read through the entire instruction manual before starting.
- Prikupite sve potrebne alate i komponente.
5. Upute za instalaciju
5.1 Removing the Factory Radio
Carefully remove the factory radio and any surrounding trim panels using a panel removal tool. Refer to your vehicle's specific service manual for precise instructions on trim removal and screw locations. Disconnect all wiring harnesses and the antenna cable from the back of the factory radio.
Video 5.1.1: General guide on removing a factory stereo and trim panels. Note: This video is from Scosche Industries and may not show your exact vehicle model, but the general principles apply.
5.2 Assembling the Dash Kit
The Metra 95-2009 kit includes plastic brackets and a custom trim ring. Follow the kit's specific instructions to break off any unnecessary tabs from the brackets that are not required for your vehicle's application. Secure the new aftermarket radio to the dash kit brackets using the screws provided with your new radio.
Video 5.2.1: Krajview of a dash kit and its components. This video is from an influencer and shows a similar kit, providing a general idea of the parts involved.
5.3 Ožičenje
Connect the wiring harness from your new radio to the vehicle's wiring harness. Match wire colors carefully (e.g., yellow to yellow for constant 12V, red to red for ignition 12V, black to black for ground). Use wire strippers/crimpers and splice connectors or solder for secure connections. Insulate all connections with electrical tape or heat shrink tubing. If your vehicle has steering wheel controls, consult the radio's manual for specific connections, or tape off unused wires.
Video 5.3.1: Detailed guide on full stereo harness installation. Note: This video is from Scosche Industries and provides general wiring principles.
5.4 Installing the New Radio
Once the radio is secured to the dash kit and all wiring connections are made, carefully slide the assembled unit into the vehicle's dash opening. Secure the radio and dash kit to the vehicle's mounting points using the original screws or those provided with the kit. Reinstall any removed trim panels, ensuring they snap securely into place.
Video 5.4.1: Općenito, krajview of installing a new radio with a dash kit. This video is from an influencer and shows a similar kit, providing a general idea of the installation process.
5.5 Reconnecting the Battery and Testing
Reconnect the vehicle's negative battery terminal. Turn on the vehicle and test the functionality of your new radio, including audio, display, and any connected accessories like a backup camera. Ensure all features are working correctly before finalizing the installation.
6. Operating the New Radio
Refer to the instruction manual provided with your specific aftermarket radio for detailed operating instructions, including setting up stations, adjusting audio settings, and utilizing advanced features.
7. Održavanje
The Metra 95-2009 dash kit requires minimal maintenance. Periodically inspect the mounting screws for tightness and ensure the trim ring remains securely in place. Clean the plastic components with a soft, damp tkanina. Izbjegavajte korištenje jakih kemikalija ili abrazivnih sredstava za čišćenje.
8. Otkrivanje problema
- Radio se ne uključuje: Check the vehicle's fuse box and the radio's inline fuse. Verify all power and ground connections are secure.
- Nema zvuka: Ensure all speaker wires are correctly connected and not shorted. Check the radio's audio settings.
- Poor Fit of Dash Kit: Double-check that all necessary tabs were removed from the kit components and that the radio is properly aligned within the brackets.
- Labave veze: Re-examine all wiring connections for tightness and proper insulation.
9. Specifikacije
- Brand: Metra
- Broj modela: 95-2009
- Materijal: Plastika
- Dimenzije artikla (D x Š x V): 14 x 7 x 3.5 inča
- Težina artikla: 6.4 unce
- Kompatibilnost: Select 1990-2012 GM, Honda, Isuzu, Suzuki vehicles
- Vrsta montaže: Double DIN / Stacked ISO DIN
10. Garancija i podrška
This product is covered by a double DIN dash kit warranty. For specific warranty details, claims, or technical support, please refer to the documentation included with your purchase or contact Metra Electronics Corp directly. You can also visit the official Metra webstranica za dodatne resurse i kontakt informacije.

Figure 10.1: Metra - The Installer's Choice


