1. Uvod
This manual provides comprehensive instructions for the installation, operation, and maintenance of the EARU Electric 3-Phase Voltage and Overcurrent Protector, Model EARU-1008. This device is designed to safeguard 3-phase electrical systems by continuously monitoring voltage and current, offering protection against over-voltage, pod-voltage, overcurrent, and phase failure. It is suitable for industrial and commercial applications requiring reliable electrical monitoring and protection.
2. Sigurnosne informacije
UPOZORENJE: Opasnost od električnog udara. Instalaciju i održavanje treba obavljati samo kvalificirano osoblje.
- Uvijek isključite napajanje prije instaliranja ili servisiranja uređaja.
- Osigurajte ispravno uzemljenje kako biste spriječili strujni udar.
- Provjerite jesu li svi spojevi ožičenja sigurni i ispravni prema dijagramu ožičenja.
- Ne koristite uređaj ako izgleda oštećeno.
- Pridržavajte se svih lokalnih i nacionalnih električnih propisa.
3. Proizvod je gotovview
3.1. Ključne karakteristike
- Real-time 3-Phase Monitoring: Displays live voltage (L1, L2, L3) and current (L1, L2, L3) values.
- Sveobuhvatna zaštita: Safeguards against over-voltage, pod-voltage, overcurrent, and phase failure.
- Podesivi parametri: User-configurable settings for protection thresholds and recovery delays.
- Automatic Phase Failure Reset: Detects and automatically resets after phase anomalies.
- High-Visibility LED Display: Bright red LED for clear readings in various lighting conditions.
- Montaža na DIN šinu: Easy integration into standard electrical panels.
- Clear Terminal Labeling: Simplified installation with clearly marked input and output terminals.
3.2. Komponente i ekran
The device features a clear LED display and intuitive control buttons for configuration. The display shows real-time voltage and current for each phase, along with indicators for protection status.
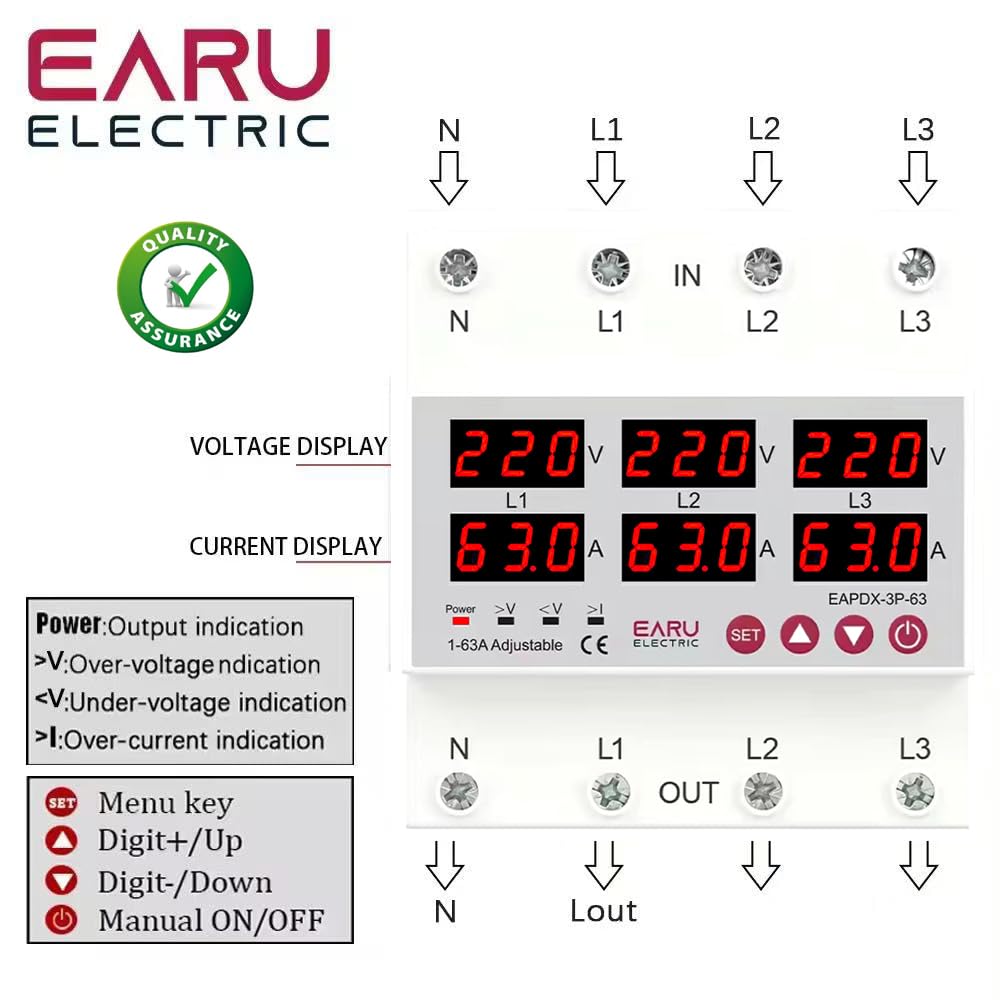
Slika 3.2.1: Front view of the EARU Electric Voltage Protector, showing the LED display for L1, L2, L3 voltage and current, along with control buttons (SET, Up, Down, Power) and protection indicators. Terminal labels for N, L1, L2, L3 (IN and OUT) are also visible.

Slika 3.2.2: Perspektiva view highlighting the product features and the input/output terminals (N, L1, L2, L3) at the top and bottom of the device. This image emphasizes the physical layout and connection points.
4. Postavljanje i instalacija
4.1. Montaža
The EARU-1008 is designed for DIN rail mounting. Securely attach the device to a standard 35mm DIN rail within an electrical enclosure.
4.2. Ožičenje
Refer to the wiring diagram below for correct connections. Ensure all connections are tight and properly insulated.
- Connect the incoming neutral (N) and phase lines (L1, L2, L3) to the 'IN' terminals.
- Connect the outgoing neutral (N) and phase lines (L1, L2, L3) to the 'OUT' terminals.
- Još jednom provjerite sve veze prije uključivanja napajanja.

Slika 4.2.1: Detailed wiring diagram for the EARU Electric Voltage Protector, showing connections for N, L1, L2, L3 for both input and output. The diagram illustrates how to integrate the protector into a 3-phase electrical system.
5. Uputstvo za upotrebu
5.1. Početno uključivanje
Once wired, apply power to the device. The LED display will illuminate, showing the real-time voltage and current for each phase.
5.2. Prikaz indikatora
- V: Voltage displej.
- A: Trenutni prikaz.
- Snaga: Indikacija izlaza.
- >V: Over-voltage indikacija.
- <V: Under-voltage indikacija.
- >ja: Over-current indication.
5.3. Postavljanje parametara
Use the 'SET' button to enter the configuration menu and the 'Up' and 'Down' keys to adjust values. Press 'SET' again to confirm and move to the next parameter. Hold 'SET' for 3 seconds to enter settings mode.

Slika 5.3.1: A detailed guide to setting various protection parameters on the EARU Electric Voltage Protector. This includes overvoltage, undervoltage, overcurrent, and recovery delay settings, with default values and adjustment ranges.
Key adjustable parameters include:
- Overvoltage Postavka zaštite: Range 230-300V (Default 270V).
- Overvoltage Protection Recover Setting: Range 225-295V (Default 265V).
- Overvoltage Recovery Delay: Range 1-500s (Default 30s).
- Overvoltage Trip Delay: Range 0.1-30s (Default 1.0s).
- Undervoltage Postavka zaštite: Range 140-210V (Default 170V).
- Undervoltage Protection Recover Setting: Range 145-215V (Default 175V).
- Undervoltage Trip Delay: Range 0.1-30s (Default 1.0s).
- Postavka zaštite od prekomjerne struje: Range 1-63A (Default 30A).
- Overcurrent Trip Delay: Range 0.1-30s (Default 1.0s).
- Voltage & Current Manual Error Calibration: Adjust for accuracy, range -9.5% to +9.5% (Default 0%).
- Power-on Delay Setting: Adjustable Range: 1-500S (Default: 10s).
5.4. Manual ON/OFF
The power button allows for manual switching of the device output.
6. Održavanje
The EARU-1008 is designed for minimal maintenance. However, periodic checks are recommended:
- Održavajte uređaj čistim i bez prašine i ostataka.
- Periodically inspect wiring connections for tightness and signs of wear.
- Osigurajte odgovarajuću ventilaciju oko uređaja kako biste spriječili pregrijavanje.
7. Otkrivanje problema
Ako uređaj ne funkcioniše kako se očekuje, razmotrite sljedeće:
- Nema prikaza/Nema napajanja: Check the main power supply and all wiring connections.
- Protection Trip: Identify the active protection indicator (>V, <V, >I). Check the corresponding voltage or current levels. The device will automatically reset once conditions return to normal, based on configured recovery delays.
- Phase Failure: The device automatically detects and responds to phase failures, initiating a cut-off and auto-reset once the phase is restored.
- Netačna očitanja: If readings appear inaccurate, consider performing a manual error calibration as described in Section 5.3.
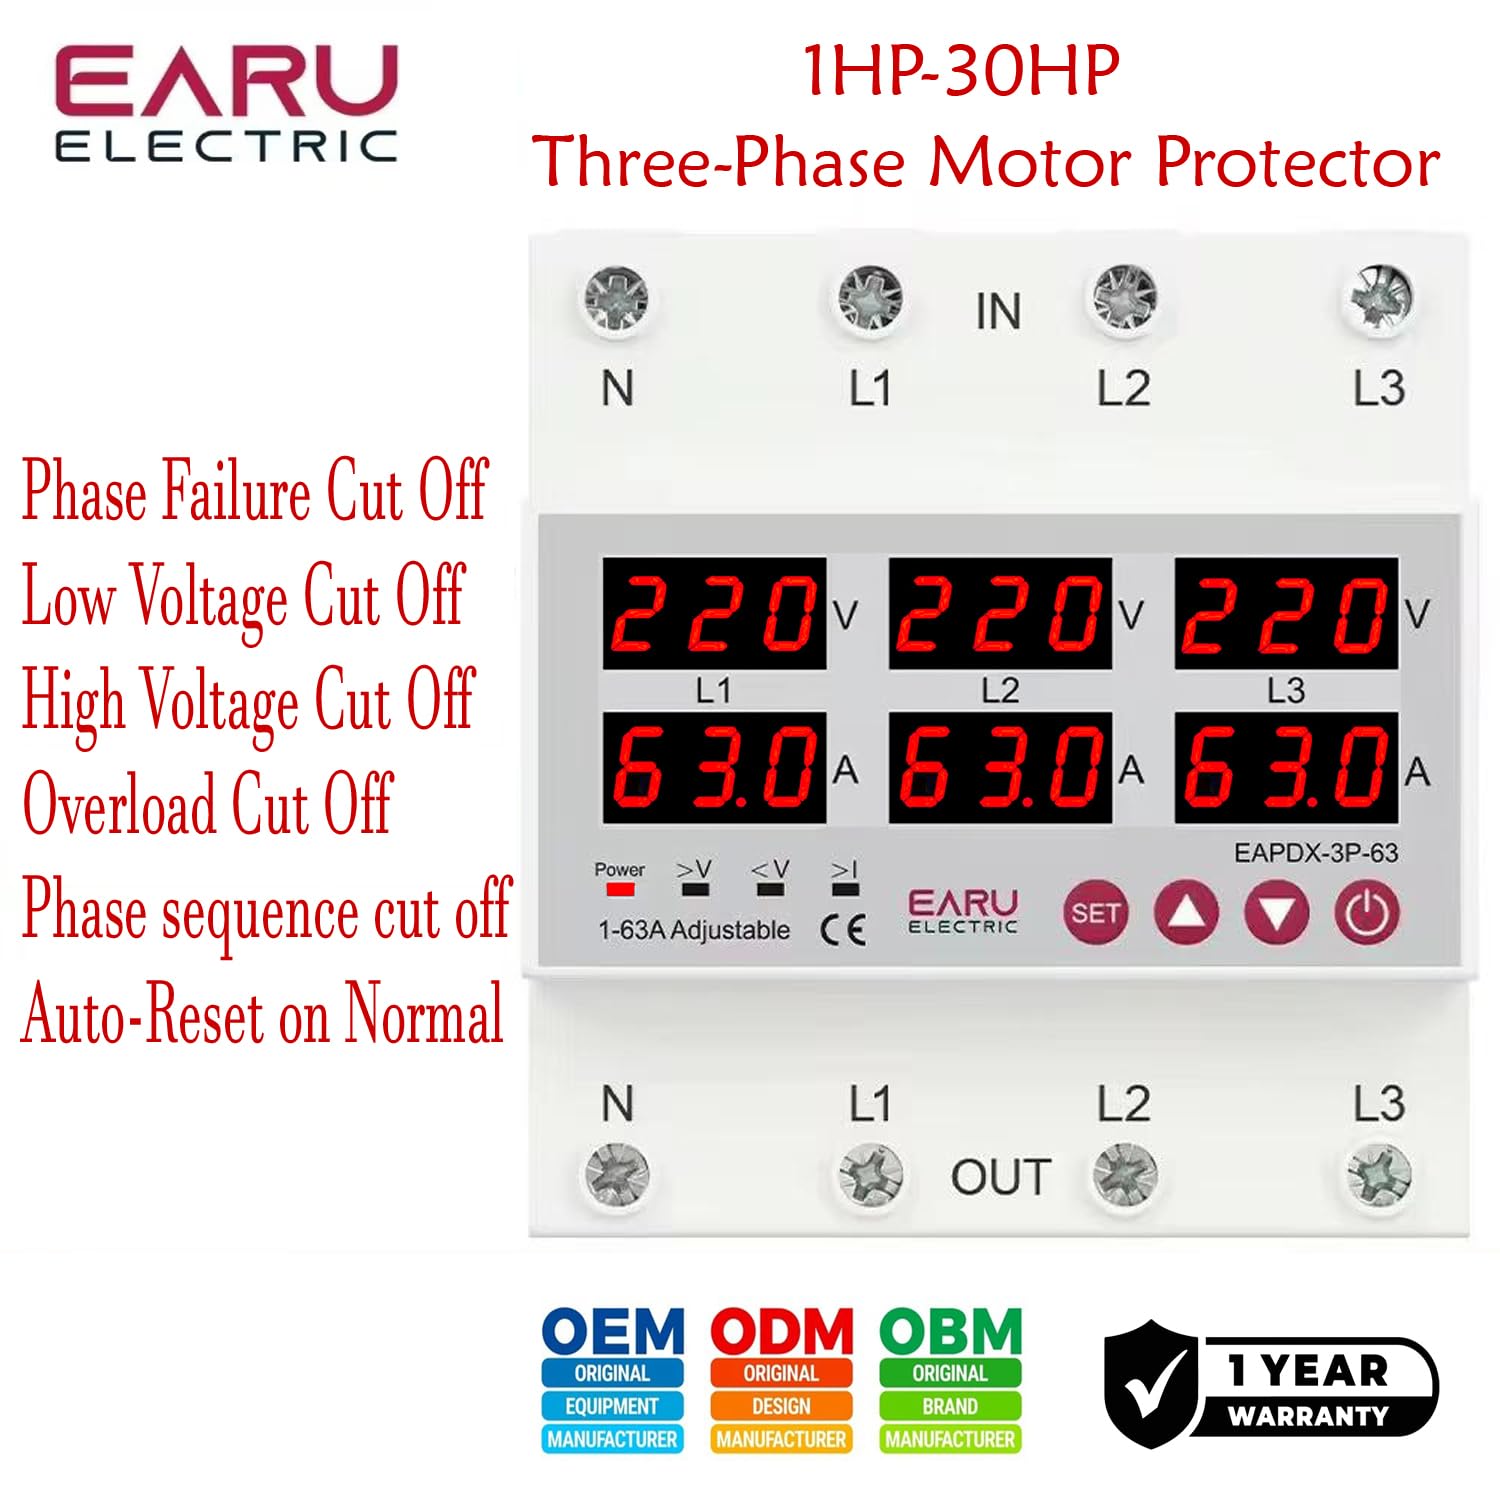
Slika 7.1: This image highlights the various protection features of the EARU Electric Voltage Protector, including phase failure cut-off, low voltage cut-off, high voltage cut-off, overload cut-off, phase sequence cut-off, and auto-reset on normal conditions. These are key aspects for troubleshooting protection trips.
8. Specifikacije
| Parametar | Vrijednost |
|---|---|
| Brand | EARU |
| Model | EARU-1008 |
| Rated Supply Voltage | AC 3*220V (N-L1/L2/L3) / 440V |
| Nazivna frekvencija | 50/60Hz |
| Over Current Protection Setting Range | 1-63A (Standardno 30A) |
| Over Voltage Protection Setting Range | 230-300 V (standardno 270 V) |
| Under Voltage Protection Setting Range | 140-210 V (standardno 170 V) |
| Dimenzije proizvoda | 20 x 10 x 20 cm |
| Težina artikla | 450 g |
| Vrsta montaže | DIN šina |

Slika 8.1: This image provides a visual representation of the EARU Electric Voltage Protector's dimensions and a table of key technical specifications, including voltage, frequency, and protection ranges.
9. Garancija i podrška
9.1. Garancija
The EARU Electric Voltage Protector (Model EARU-1008) comes with a 1-godišnja garancija proizvođača od datuma kupovine, pokrivajući nedostatke u materijalu i izradi pri normalnoj upotrebi. Molimo sačuvajte dokaz o kupovini za reklamacije u slučaju reklamacije.
9.2. Korisnička podrška
For technical assistance, troubleshooting, or warranty inquiries, please contact EARU customer support through your retailer or the official EARU website. Provide your model number (EARU-1008) and a detailed description of the issue for efficient service.