
1. Uvod
This instruction manual provides essential information for the safe and efficient operation, maintenance, and troubleshooting of your 3i P10 Ultra Robot Vacuum and Mop Combo. Please read this manual thoroughly before using the product and retain it for future reference.
2. Sigurnosne informacije
Uvijek se pridržavajte osnovnih sigurnosnih mjera opreza prilikom korištenja električnih uređaja kako biste smanjili rizik od požara, strujnog udara ili ozljeda. Ovaj uređaj je namijenjen samo za kućnu upotrebu.
- Ne dozvolite djeci da upravljaju robotom. Nadzirite djecu i kućne ljubimce dok robot radi.
- Osigurajte voltage odgovara naljepnici s oznakama na punjaču.
- Ne koristite robota na mokrim površinama ili u područjima sa stajaćom vodom.
- Remove loose cables, small objects, and fragile items from the cleaning path before operation.
- Do not use the robot to pick up large or sharp objects, flammable materials, or liquids.
- Only use manufacturer-specified accessories and replacement parts.
- Ako je kabel za napajanje oštećen, mora ga zamijeniti proizvođač ili kvalificirani serviser kako bi se izbjegle opasnosti.
3. Proizvod je gotovview
3.1 Uključene komponente
Paket uključuje sljedeće artikle:
- 1 x Robot usisivač
- 1 x bazna stanica
- 2 x krpe za brisanje
- 2 x bočne četke
- 1 x 800ml Cleaning Solution
- 1 x odvojiva baza
- 1 x kabel napajanja
- 1 x Uputstvo za upotrebu
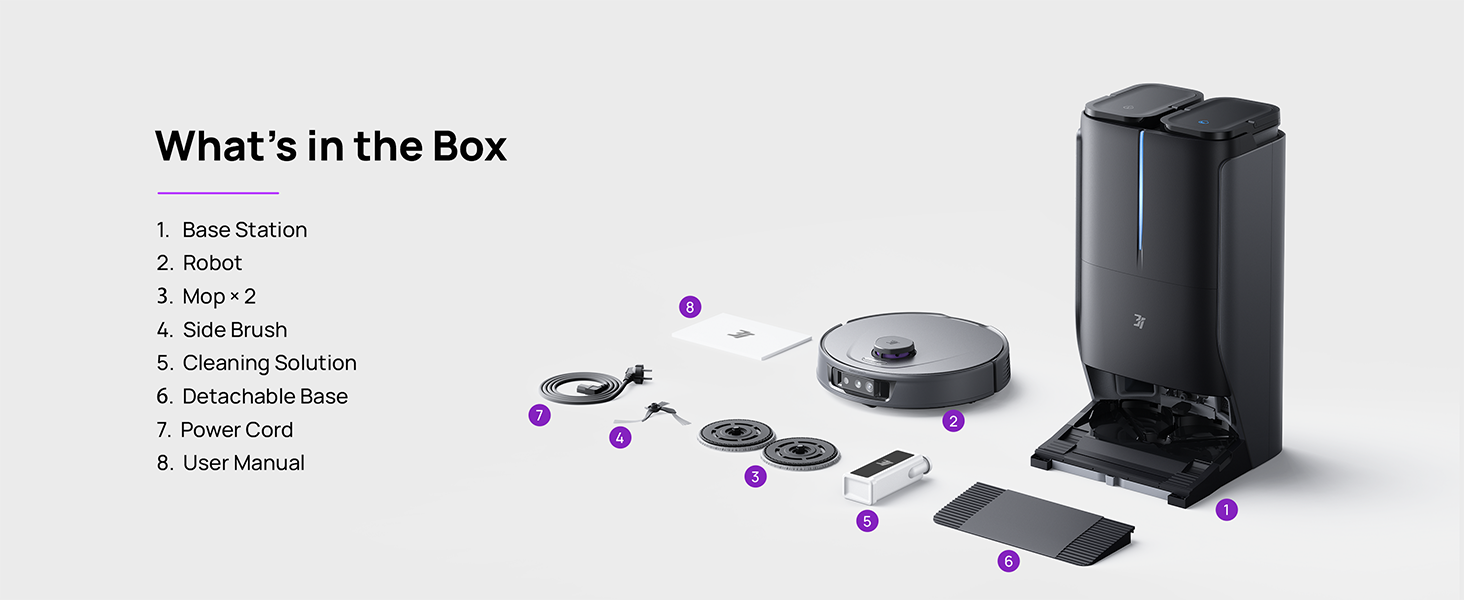
Figure 3.1: Contents of the 3i P10 Ultra package.
3.2 Robot Vacuum Features
- UltraReach Mop: The auto-extending mop system cleans edges and corners thoroughly. Dual mops spin at 220 RPM for effective stain removal.
- 18,000 Pa Suction: Provides powerful suction for deep cleaning on various floor types, including carpets and hard floors. Features smart carpet detection to boost suction and lift mops.
- All-in-One Automated Station: Offers automatic hot-water mop washing, hot air drying, solution adding, and hands-free dust collection for up to 70 days.
- Napredna navigacija: Utilizes LiDAR for 3D mapping, dual 3D structured light, and an AI camera for obstacle avoidance, threshold crossing, and collision resistance.
- AI-Powered DirtScan: Identifies over 100 household objects and messes, adapting cleaning methods for optimal results, even in low light conditions.
- Upravljanje kosom: Equipped with anti-tangle brushes and a TangleCut blade to prevent hair from wrapping around components.
- Smart Route Planning: Learns home layouts for efficient cleaning routes. Supports scheduled cleaning, no-go zones, and app control. Compatible with Alexa and Google Assistant.
- Wi-Fi povezivanje: Supports both 2.4G and 5G Wi-Fi networks.

Slika 3.2: Vrh view of the 3i P10 Ultra Robot Vacuum.

Figure 3.3: The 3i P10 Ultra Base Station.
4. Podešavanje
4.1 Raspakivanje i postavljanje
- Pažljivo izvadite sve komponente iz pakovanja.
- Choose a suitable location for the base station. Ensure it is placed against a wall, on a hard, level surface, with at least 0.5 meters (1.6 feet) of clear space on both sides and 1.5 meters (4.9 feet) in front. Avoid areas with direct sunlight or strong Wi-Fi interference.
- Spojite kabel za napajanje na baznu stanicu i uključite ga u utičnicu.
4.2 Priprema robota
- Install the side brushes by pressing them into their slots until they click.
- Attach the mop pads to the mop holders on the robot.
- Place the robot onto the base station to charge. Ensure the charging contacts align. The robot will announce its charging status.
4.3 Instalacija i povezivanje aplikacije
- Download the 3i app from your mobile device's app store (iOS or Android).
- Open the app and follow the on-screen instructions to create an account and add your 3i P10 Ultra robot.
- Ensure your phone is connected to a 2.4GHz or 5GHz Wi-Fi network during the pairing process.
5. Uputstvo za upotrebu
5.1 Početno čišćenje i mapiranje
For the first use, allow the robot to complete a full cleaning cycle to create a map of your home. This map is crucial for advanced features.

Figure 5.1: Precision 3D Mapping in the 3i App.
5.2 Pokretanje ciklusa čišćenja
- Preko robota: Pritisnite dugme za napajanje na robotu jednom da biste pokrenuli ili pauzirali čišćenje.
- Preko aplikacije: Open the 3i app, select the desired cleaning mode (Vacuum, Mop, Vac & Mop, AI Auto, Custom), and tap 'Start'.
- Putem glasovne kontrole: Use compatible voice assistants (Alexa, Google Assistant) with commands like "Hey Google, start vacuuming."

Figure 5.2: Using voice control to operate the 3i P10 Ultra.
5.3 Karakteristike aplikacije
The 3i app provides extensive control and customization options:
- Postavke čišćenja: Schedule cleaning, select rooms, set no-go zones, customize carpet cleaning.
- Postavke karte: View 3D maps, quick mapping, multi-floor maps, edit rooms and furniture.
- Station Settings: Customize dust collection, mop washing, auto-drying, and TangleCut.
- Ostale postavke: Do Not Disturb mode, Smart Route Planning, Pet Recognition, Child Lock.
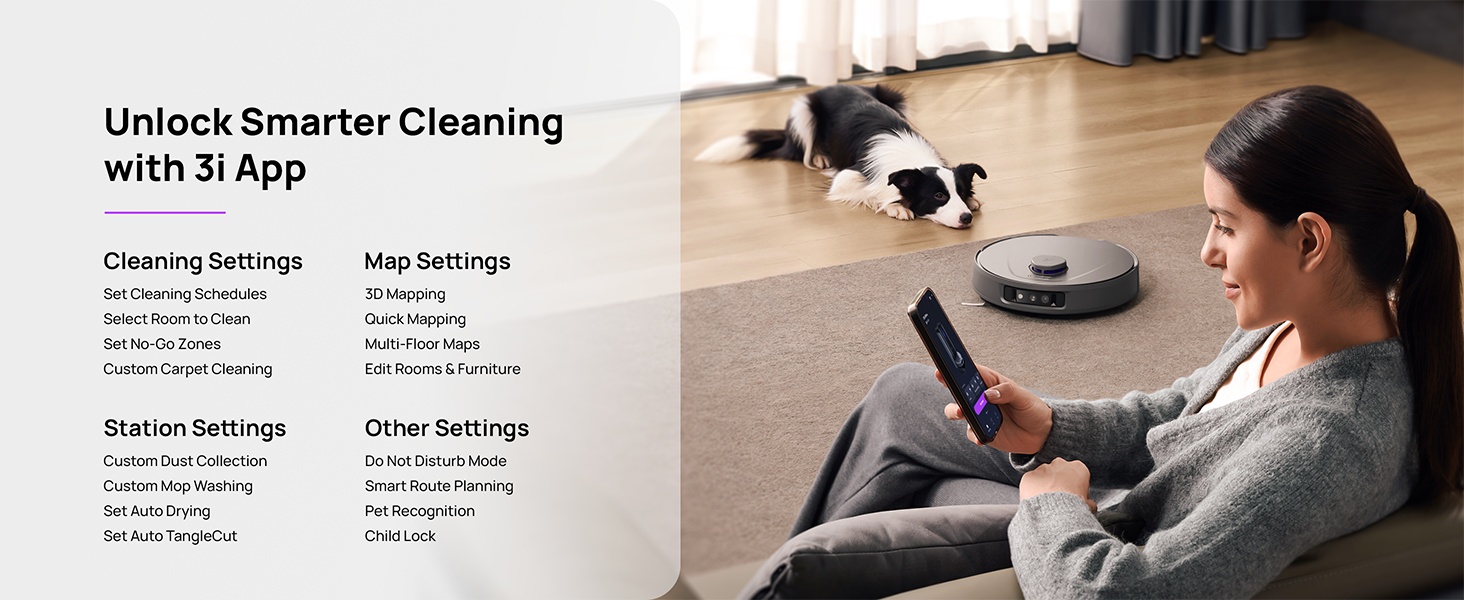
Figure 5.3: The 3i App interface for smart cleaning.
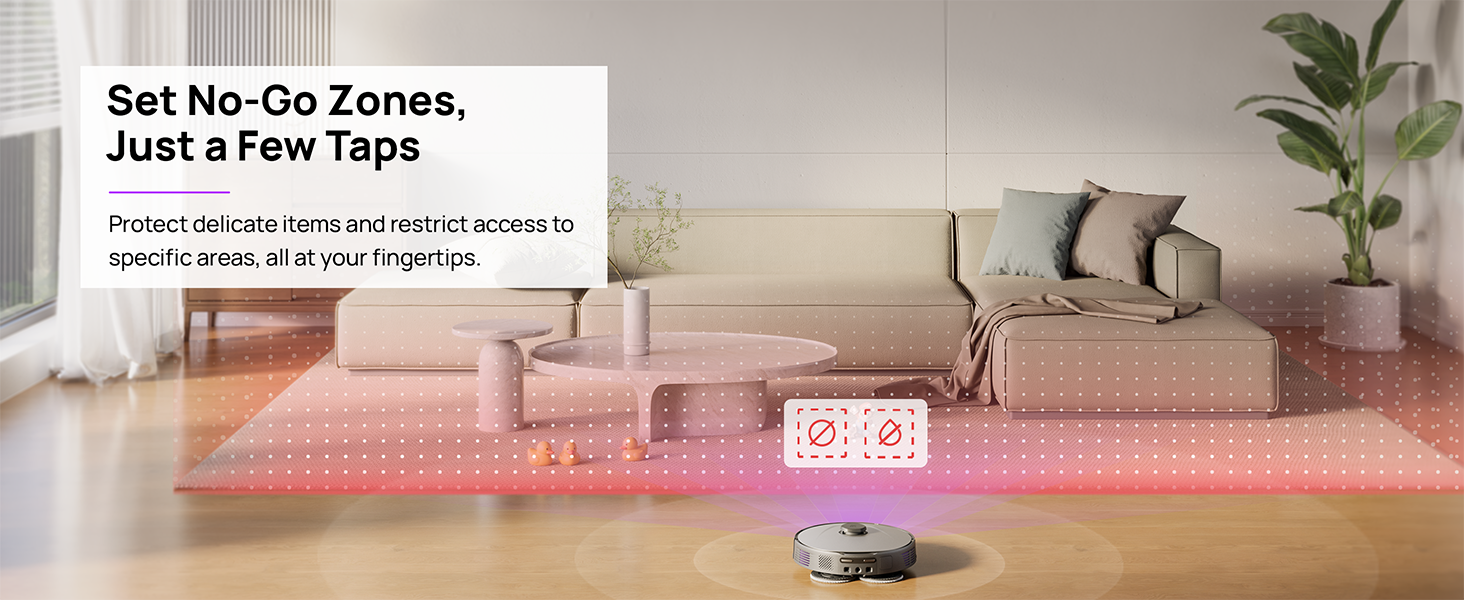
Figure 5.4: Setting No-Go Zones in the 3i App.
6. Održavanje
Regular maintenance ensures optimal performance and extends the lifespan of your 3i P10 Ultra.
6.1 Održavanje bazne stanice
- Dustbin Emptying: The base station automatically empties the robot's dustbin into a 3L bag. Replace the dust bag approximately every 70 days, or as indicated by the app.
- Mop Washing and Drying: The base station automatically washes mop pads with 140°F / 60°C hot water and dries them with hot air (131°F / 55°C) after each cleaning cycle. Ensure the clean and dirty water tanks are properly installed.
- Punjenje rezervoara za vodu: The extra-large 4L clean water tank automatically refills the robot. Refill the clean water tank as needed. The base station also collects dirty water into a separate wastewater tank. Empty the wastewater tank regularly.
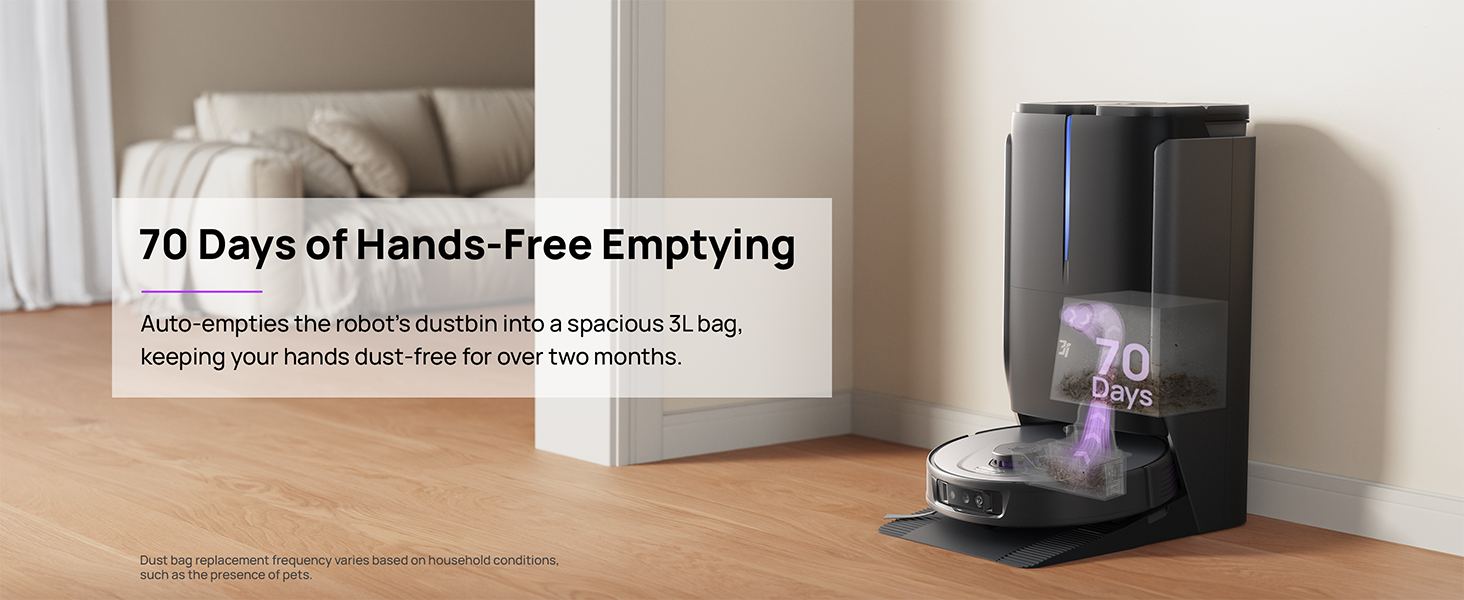
Figure 6.1: Automatic dustbin emptying at the base station.
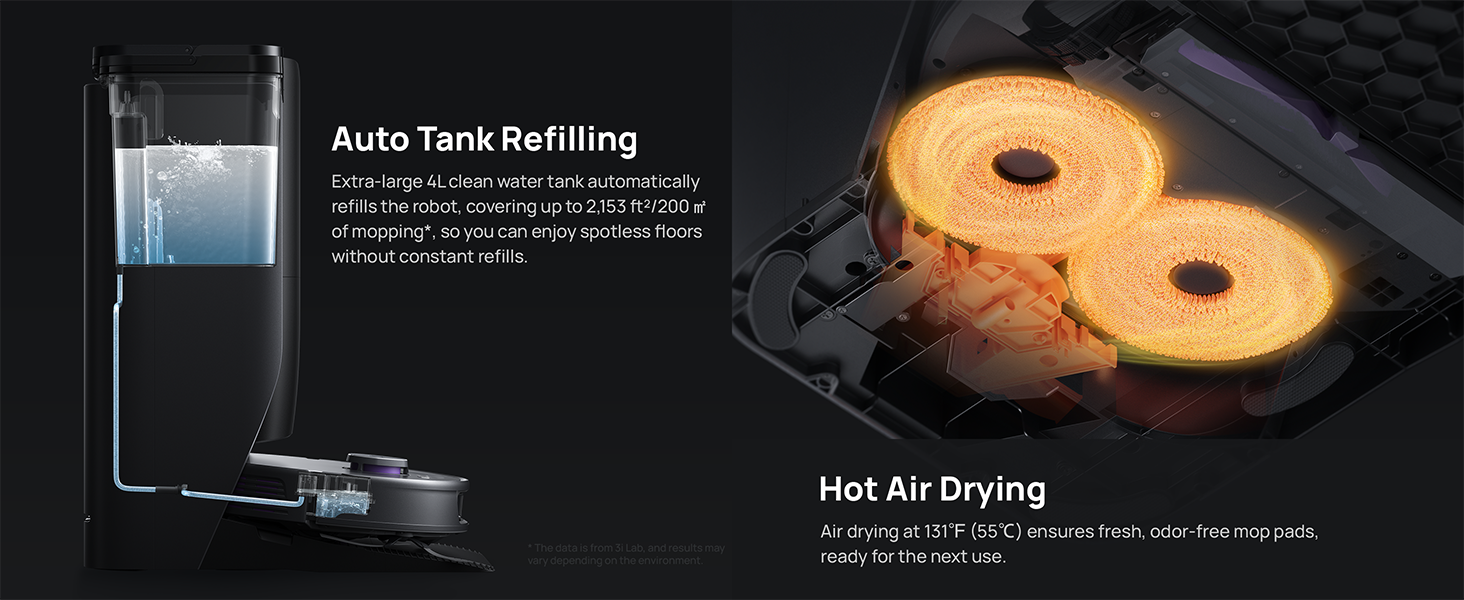
Figure 6.2: Auto tank refilling and hot air drying process.
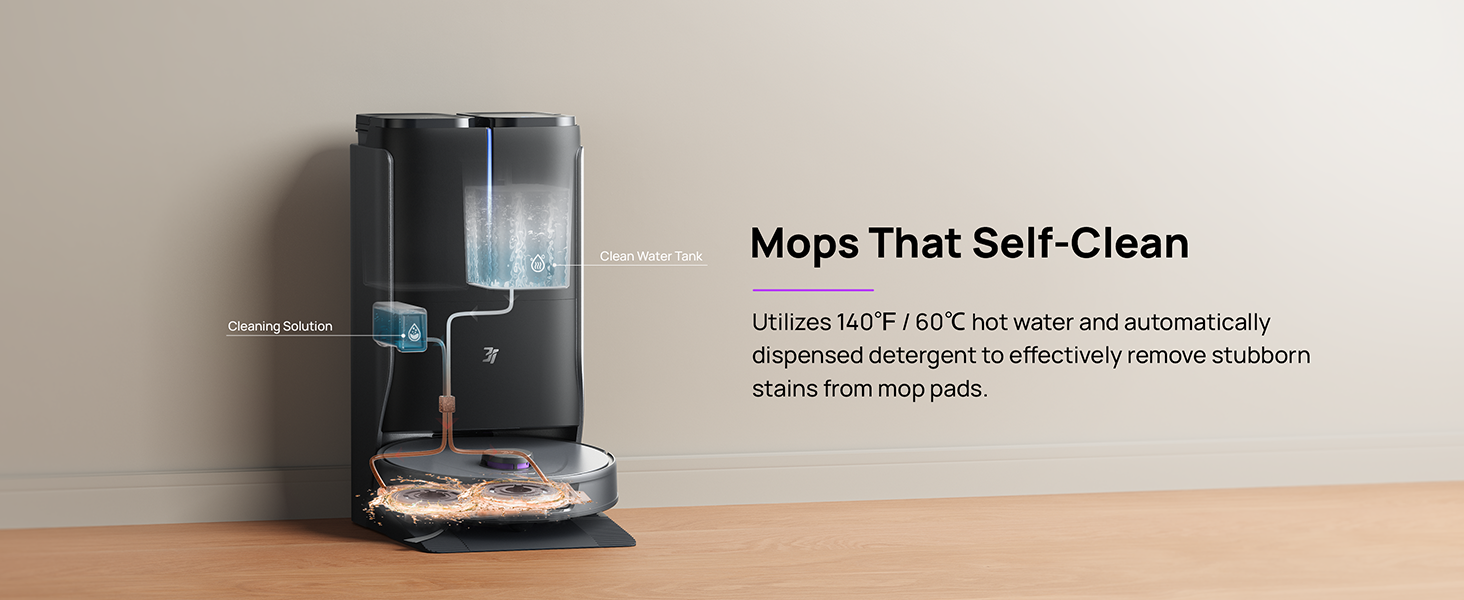
Figure 6.3: Mop self-cleaning function.
6.2 Održavanje komponenti robota
- Glavna četka: Regularly check the main brush for tangled hair or debris. Use the cleaning tool provided to remove any obstructions. The TangleCut blade helps prevent excessive tangling.
- Bočne četke: Inspect side brushes for wear or damage. Clean them periodically and replace if necessary.
- Krpe za brisanje: Although self-cleaned, inspect mop pads for excessive wear or stubborn stains. Replace them when their cleaning effectiveness diminishes.
- filter: The filter is washable. Remove and rinse it under running water. Allow it to air dry completely before reinstalling.
- Senzori: Wipe all sensors (LDS, anti-drop, wall-following, charging contacts) with a clean, dry cloth to ensure proper function.
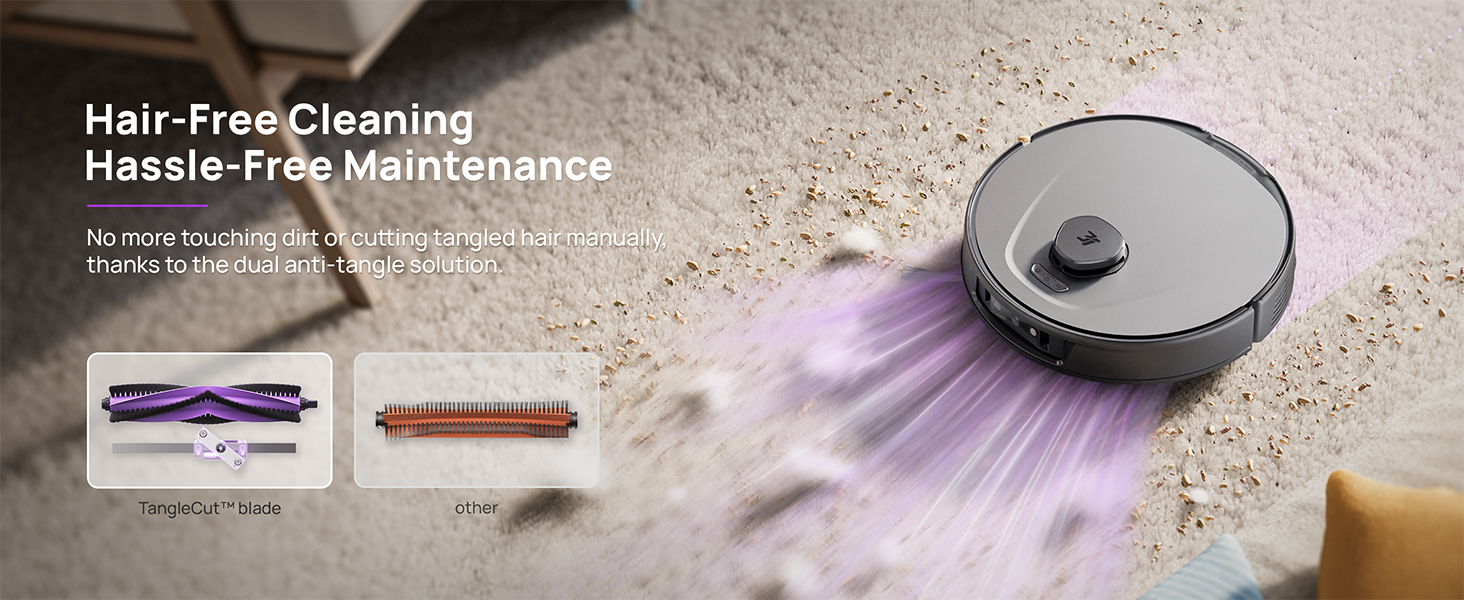
Figure 6.4: Hair-free cleaning with anti-tangle design.
7. Otkrivanje problema
If you encounter issues with your 3i P10 Ultra, refer to the following common problems and solutions:
| Problem | Mogući uzrok | Rješenje |
|---|---|---|
| Robot se ne uključuje. | Slaba baterija; Dugme za napajanje nije pravilno pritisnuto. | Postavite robota na punjač; Pritisnite i držite dugme za napajanje 3 sekunde. |
| Robot ne može pronaći stanicu za punjenje. | Dock is obstructed or too far; Poor Wi-Fi signal. | Ensure dock is in an open area; Check Wi-Fi connection. |
| Performanse čišćenja su loše. | Kanta za prašinu puna; Četke zapetljane; Filter začepljen; Prljave krpe za brisanje. | Empty dustbin; Clean brushes; Clean/replace filter; Clean/replace mop pads. |
| Robot se često zaglavi. | Prepreke na podu; Prljavi senzori. | Očistite pod od prepreka; Očistite sve senzore. |
| Problemi s povezivanjem aplikacije. | Netačna lozinka za Wi-Fi; Problemi s ruterom; Robot nije povezan na mrežu. | Verify Wi-Fi password; Restart router; Restart robot; Re-pair device in app. |
For further assistance, please refer to the 3i app's help section or contact customer support.
8. Specifikacije
| Feature | Detalj |
|---|---|
| Brand | 3i |
| Naziv modela | 3i P10 Ultra robotski usisivač |
| Dimenzije proizvoda (robot) | 13.78 cm D x 13.78 cm Š x 3.94 cm V |
| Dimenzije proizvoda (stanica) | 12.2 cm D x 18.43 cm Š x 23.39 cm V |
| Težina artikla | 37.3 funte |
| Trajanje baterije | 180 minuta |
| Filter Type | Može se prati |
| Surface Recommendation | Carpet, Marble, Wood, Tile |
| Snaga usisavanja | 18,000 Pa |
| Navigacijski sistem | LDS LiDAR, Dual 3D Structured Light, AI Camera |
| Wi-Fi podrška | 2.4G i 5G |

Figure 8.1: Dimensions of the 3i P10 Ultra Robot and Base Station.
9. Garancija i podrška
For warranty information, please refer to the warranty card included with your product or visit the official 3i website. For technical support, troubleshooting beyond this manual, or to inquire about replacement parts, please contact 3i customer service through the contact information provided on their official website or within the 3i app.