
Ninkear MBOX 11 Mini PC
Ninkear Mini PC W-11 (MBOX 11) User Manual
Model: MBOX 11 Mini PC
Uvod
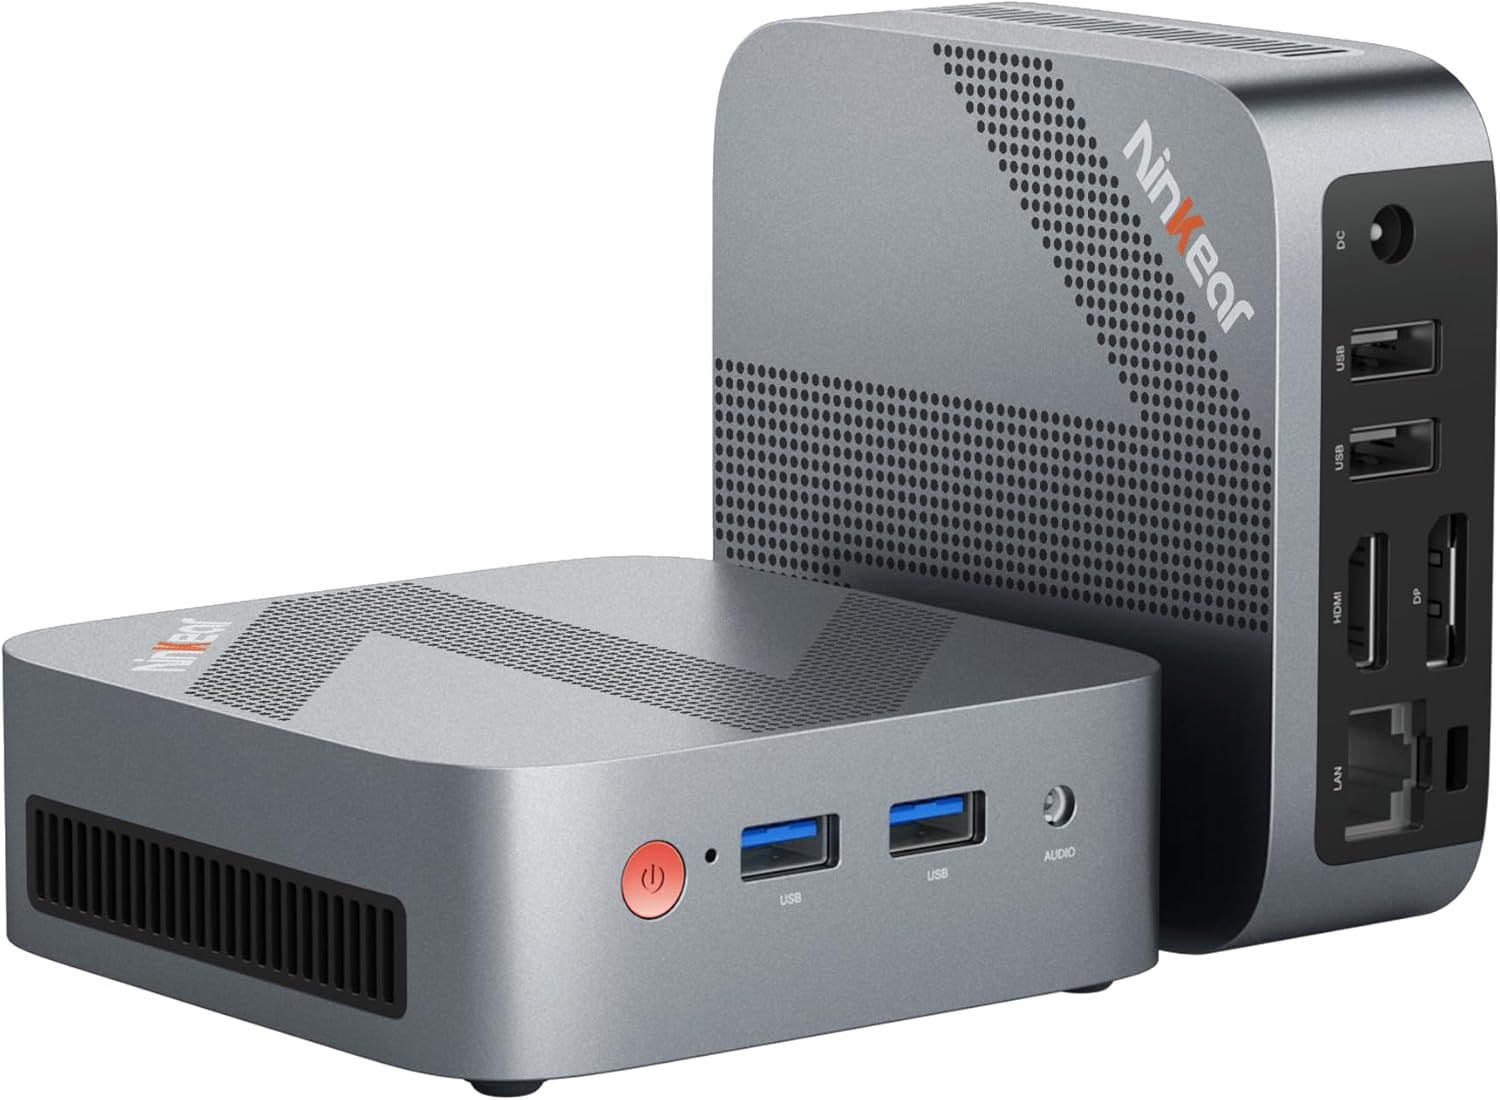
Figure 0.1: Ninkear Mini PC W-11. This compact and powerful mini PC is designed for various computing needs, from office work to multimedia entertainment.
This comprehensive user manual provides detailed instructions for the Ninkear Mini PC W-11 (MBOX 11 Mini PC). It covers initial setup, daily operation, maintenance, troubleshooting common issues, and full technical specifications. Please read this manual carefully to ensure proper use and to maximize the performance and longevity of your Ninkear Mini PC for office, home, and multimedia applications.
1. Podešavanje
1.1 Raspakivanje i sadržaj paketa
Carefully unpack all components from the box. Ensure all items listed below are present. If any item is missing or damaged, please contact customer support.

Figure 1.1: Package Contents. The box includes the Ninkear Mini PC, a user manual, a charging cable, an HDMI cable, and a fixed bracket for mounting.
- Ninkear Mini PC (MBOX 11)
- Uputstvo za upotrebu
- Adapter za napajanje/kabel za punjenje
- HDMI kabl
- Fixed Bracket (for VESA mounting)
1.2 Fizičke veze
Before powering on, connect all necessary peripherals to the Mini PC. Refer to the diagrams below for port identification.

Figure 1.2: Front and Rear Ports of the Ninkear Mini PC. The front features USB 3.0 ports and an audio jack, while the rear includes LAN, HDMI, DisplayPort, USB 2.0, and DC power input.

Figure 1.3: Multi-purpose Port Diagram. This diagram illustrates the layout and function of each port on the Ninkear Mini PC, including power, USB 3.0, headphone/MIC jack on the front, and RJ45, DP, HDMI, USB 2.0, and DC on the back.
- Poveži se sa ekranom: Use the provided HDMI cable to connect the Mini PC's HDMI port to your monitor or TV. The device also supports DisplayPort (DP) for alternative display connections.
- Povežite periferne uređaje:
- tastatura i miš: Connect your USB keyboard and mouse to the available USB 3.0 ports on the front or USB 2.0 ports on the rear.
- audio: Spojite slušalice ili zvučnike na 3.5 mm audio priključak na prednjoj strani.
- mreža: For a wired connection, connect an Ethernet cable to the RJ45 LAN port on the rear.
- Priključak za napajanje: Spojite adapter za napajanje na DC ulazni priključak na stražnjoj strani Mini PC-a, a zatim uključite adapter u utičnicu.
1.3 First Boot and Initial Configuration
Once all connections are secure, press the power button on the front of the Mini PC. The device comes with Windows 11 pre-installed and ready for immediate use. Follow the on-screen prompts to complete the initial Windows setup, including language, region, network connection, and user account creation.
2. Operativni
2.1 Osnovni rad
- Uključeno: Pritisnite dugme za napajanje na prednjoj strani uređaja.
- Iskljuciti: From the Windows operating system, click the Start button, then select Power > Shut down. Alternatively, you can press and hold the power button for a few seconds to force a shutdown (not recommended for regular use).
- Ponovno pokretanje: From the Windows operating system, click the Start button, then select Power > Restart.
2.2 Postavljanje dvostrukog ekrana
The Ninkear Mini PC supports dual 4K@60Hz display output via its HDMI 2.0 and DisplayPort (DP) interfaces, allowing for enhanced multitasking and productivity.

Figure 2.1: 4K Dual Display Setup. The Mini PC can connect to two monitors simultaneously via HDMI and DisplayPort, supporting 4K resolution at 60Hz for an extended desktop experience.
- Spojite svoj primarni monitor na HDMI priključak.
- Connect your secondary monitor to the DisplayPort (DP).
- Once both monitors are connected and powered on, Windows should automatically detect them.
- To configure display settings (extend, duplicate, or show only on one screen), right-click on the desktop, select "Display settings," and adjust as needed.
2.3 Connectivity (Wi-Fi, Bluetooth, Ethernet)
The Mini PC offers versatile connectivity options for your network and wireless devices.

Figure 2.2: Multiple Connection Options. The Mini PC supports high-speed Ethernet (RJ45-1000M), WiFi 2.4/5.0 GHz, and Bluetooth 5.0 for comprehensive connectivity.
- Wi-Fi: The Mini PC supports Wi-Fi 5 (802.11ac) for fast wireless internet access. To connect, click the Wi-Fi icon in the system tray, select your network, enter the password, and click Connect.
- Bluetooth: With Bluetooth 5.0, you can connect wireless peripherals suchs as keyboards, mice, headphones, and speakers. Go to Windows Settings > Bluetooth & devices to pair new devices.
- Ethernet: For a stable and high-speed wired network connection, plug an Ethernet cable into the RJ45 port. The Mini PC supports Gigabit Ethernet (1000M).
2.4 Proširenje skladišnog prostora
The Ninkear Mini PC comes with a 512 GB M.2 SSD. For additional storage, you can upgrade the M.2 NVMe PCIe3.0 SSD or M.2 SATA SSD up to 2 TB.

Figure 2.3: Efficient and High-Capacity Storage. The Mini PC features 16GB DDR4 RAM and a 512GB M.2 SSD, with the SSD being upgradeable up to 2TB.
Consult a qualified technician or refer to detailed upgrade guides if you plan to expand the internal storage to avoid damaging the device.
3. Održavanje
3.1 Čišćenje
To maintain optimal performance and extend the lifespan of your Mini PC, regular cleaning is recommended.
- Eksterijer: Use a soft, dry, lint-free cloth to wipe the exterior surfaces. For stubborn smudges, slightly dampi krpu vodom ili blagim neabrazivnim sredstvom za čišćenje.
- luke: Use compressed air to gently clear dust from the USB, HDMI, DP, and other ports. Avoid inserting any objects into the ports.
- ventilacija: Ensure the ventilation holes are clear of dust and obstructions to allow for proper airflow and cooling.
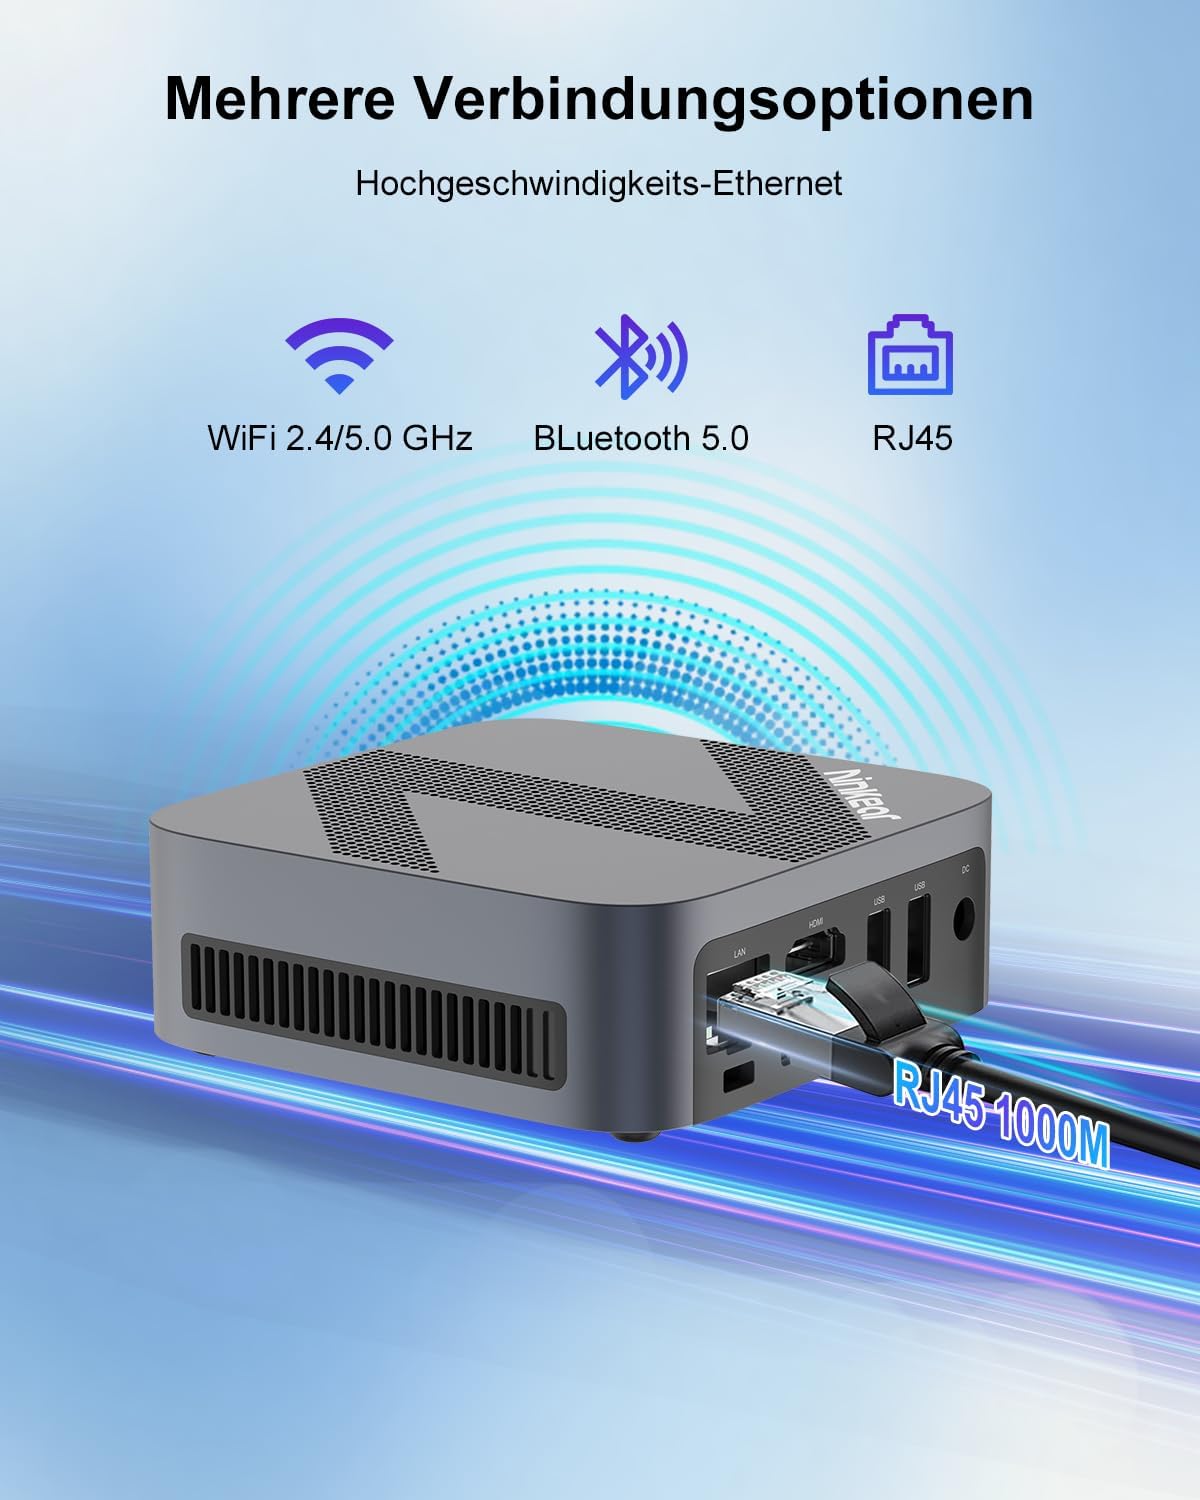
Figure 3.1: Powerful Cooling System. The Mini PC utilizes a copper pipe and aluminum heatsink design for efficient heat dissipation, ensuring quiet operation and low power consumption.
3.2 Ažuriranja softvera
Regularly update your operating system and drivers to ensure system stability, security, and optimal performance.
- Ažuriranja za Windows: Go to Windows Settings > Windows Update and check for available updates.
- Ažuriranja drajvera: While Windows Update often handles driver updates, you may occasionally need to check the Ninkear official website for the latest drivers for specific components if you encounter issues.
3.3 Upravljanje skladištem
To maintain the health and performance of your SSD, avoid filling it to full capacity. Periodically clean up unnecessary files i aplikacije.
- Čišćenje diska: Use the built-in Windows Disk Cleanup tool to remove temporary files and other non-essential data.
- Uninstall Programs: Remove programs you no longer use from Windows Settings > Apps > Installed apps.
4. Otkrivanje problema
This section addresses common issues you might encounter with your Ninkear Mini PC. If the problem persists, please refer to the Warranty and Support section.
4.1 Nema napajanja
- Provjerite priključak za napajanje: Provjerite je li adapter za napajanje sigurno priključen i na Mini PC i na ispravnu utičnicu.
- Test Outlet: Pokušajte uključiti drugi uređaj u istu utičnicu kako biste potvrdili da je funkcionalan.
- Dugme za napajanje: Ensure you are pressing the power button firmly.
4.2 Nema izlaza za prikaz
- Kablovska veza: Verify that the HDMI or DisplayPort cable is securely connected to both the Mini PC and the monitor.
- Ulaz monitora: Ensure your monitor is set to the correct input source (e.g., HDMI 1, DP).
- Testirajte s drugim ekranom/kablom: If possible, try connecting the Mini PC to a different monitor or using a different HDMI/DP cable to rule out display or cable issues.
- Ponovno pokretanje: Power cycle the Mini PC and the monitor.
4.3 Wi-Fi or Bluetooth Connectivity Issues
- Enable Wi-Fi/Bluetooth: Provjerite jesu li Wi-Fi i Bluetooth omogućeni u postavkama Windowsa.
- Provjera vozača: Verify that the Wi-Fi and Bluetooth drivers are installed and up to date in Device Manager.
- Router/Device Proximity: Move closer to your Wi-Fi router or Bluetooth device.
- Restart Router/Mini PC: Restart your Wi-Fi router and the Mini PC.
4.4 System Performance Issues (Slowdown, Lag)
- Zatvorite nekorištene aplikacije: Close any applications running in the background that are not in use.
- Provjerite Upravitelj zadataka: Open Task Manager (Ctrl+Shift+Esc) to identify processes consuming high CPU, RAM, or disk resources.
- Prostor na disku: Provjerite da li ima dovoljno slobodnog prostora na SSD-u.
- Skeniranje zlonamjernog softvera: Run a full system scan with antivirus software.
- hlađenje: Osigurajte da Mini PC ima odgovarajuću ventilaciju i da se ne pregrijava.
5. Specifikacije
Below are the detailed technical specifications for the Ninkear Mini PC W-11 (MBOX 11 Mini PC).
| Feature | Specifikacija |
|---|---|
| Brand | Ninkear |
| Model/Serija | MBOX 11 |
| Broj modela | MBOX 11 Mini PC |
| Boja | Grey |
| Dimenzije proizvoda | 9.9 x 9.9 x 3.3 cm |
| Težina artikla | 240 g |
| Marka procesora | Intel |
| Tip procesora | Celeron N150 (4 Cores, 4 Threads) |
| Brzina procesora | Do 3.6 GHz |
| Veličina RAM-a | 16 GB |
| Tehnologija memorije | DDR4, SO-DIMM |
| Max Supported Storage | 2 TB (M.2 NVMe PCIe3.0 SSD or M.2 SATA SSD) |
| Hard Drive Size (Included) | 512 GB |
| Tehnologija tvrdog diska | SSD |
| Grafički koprocesor | Intel UHD grafika |
| Grafičko sučelje | Integrisano |
| Vrsta povezanosti | Bluetooth 5.0, Wi-Fi 5 (WLAN) |
| HDMI interfejsi | 1 (HDMI 2.0) |
| DisplayPort Interfaces | 1 |
| USB portovi | 2x USB 3.0 (prednji), 2x USB 2.0 (stražnji) |
| Ethernet | RJ45 (Gigabit) |
| Audio Jack | 1x 3.5mm Headphone/MIC Jack |
| Operativni sistem | Windows 11 (W11 OS) |
| Batteries (Internal) | 1 C Battery required (included) |
| Kapacitet litijumske baterije | 6 vat-sati |
| Težina litijumske baterije | 10 grama |
| Number of Lithium-Ion Cells | 1 |
Napomena: Specifikacije su podložne promjenama bez prethodne najave.
6. Garancija i podrška
Ninkear is committed to providing high-quality products and excellent customer service.
6.1 Informacije o garanciji
If you purchase the product and experience a failure due to product defects within 1 year, please contact Ninkear customer support. You will need to provide your order number, a video or photo of the defect, and a detailed description of the issue.
6.2 Korisnička podrška
For any questions, technical assistance, or warranty claims, please contact the Ninkear Official Store or the designated customer service center. They will guide you through the repair process or provide further assistance.
Za više informacija posjetite Ninkear Store on Amazon.
Ask a question about this manual
Ask about setup, troubleshooting, compatibility, parts, safety, or missing instructions. Manuals+ will review the question and use this page’s manual context to help answer it.