
1. Uvod
This manual provides comprehensive instructions for the Mycket portable DAB/DAB+/FM radio, Model D009. It covers setup, operation, maintenance, and troubleshooting to ensure optimal performance and longevity of your device. Please read this manual carefully before using the product.
The Mycket D009 radio features advanced signal reception technology for clear audio, Bluetooth 5.0 for wireless streaming, USB playback, AUX-in connectivity, a dual alarm clock, and a sleep timer. Its integrated rechargeable battery offers portability for use in various environments.
2. Sigurnosna uputstva
- Ne izlažite uređaj kiši, vlazi ili ekstremnim temperaturama.
- Izbjegavajte ispuštanje ili izlaganje uređaja jakim udarima.
- Ne rastavljajte niti pokušavajte sami popraviti uređaj. Sve servisne radove prepustite kvalifikovanom osoblju.
- Držite uređaj dalje od izvora toplote kao što su radijatori, grijalice, peći ili drugi uređaji (uključujući ampLifiers) koji proizvode toplotu.
- Use only the specified charging cable and power adapter (5V via USB) to charge the device.
- Ensure proper ventilation around the device during operation and charging.
- Odgovorno odložite baterije i elektroničke komponente u skladu s lokalnim propisima.
3. Proizvod je gotovview
3.1 Sadržaj paketa
- 1 x Mycket Portable DAB Radio (Model D009)
- 1 x USB kabl za punjenje
- 1 x Uputstvo za upotrebu
3.2 Raspored i kontrole uređaja
Familiarize yourself with the main components and controls of your Mycket radio.

Slika 1: Front view of the Mycket D009 portable DAB radio, showing the speaker grille, LCD display, control buttons (MODE, OK, O/M, FAV, 1-4), and the telescopic antenna extended. The right side shows the DC 5V USB-C port, reset button, and headphone jack.
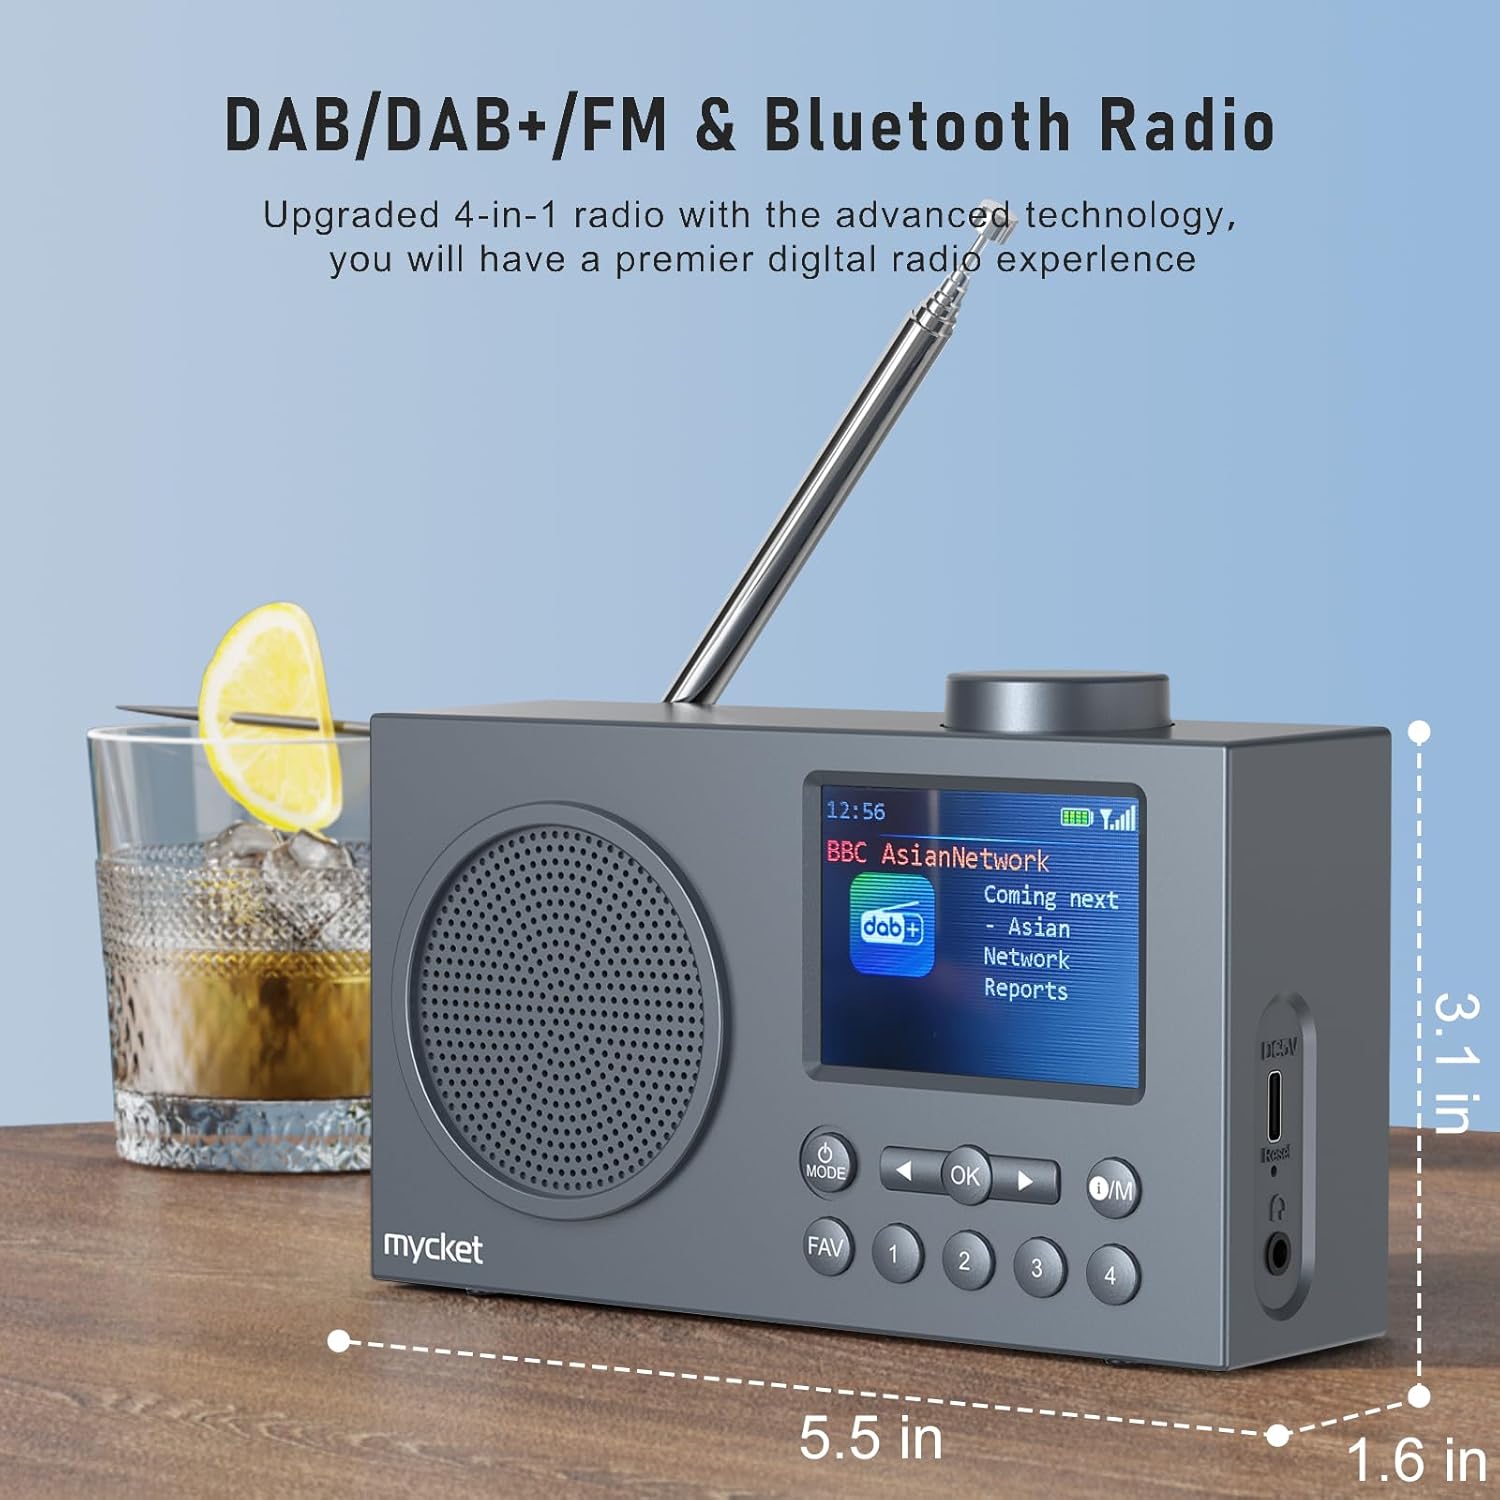
Slika 2: Side view of the Mycket D009 radio illustrating its compact dimensions: approximately 5.5 inches (length), 1.6 inches (width), and 3.1 inches (height). The image also highlights its DAB/DAB+/FM and Bluetooth capabilities.
- Prikaz: 2.4-inch TFT color display for station information, time, and settings.
- govornik: Integrated Hi-Fi speaker for audio output.
- Teleskopska antena: Za optimalan prijem radio signala.
- Dugme MODE: Prebacuje se između DAB, FM, Bluetooth, USB i AUX načina rada.
- Dugme OK: Potvrđuje odabire ili ulazi u menije.
- O/M Button: Power On/Off and Menu access.
- FAV dugme: Accesses favorite presets.
- Brojčani gumbi (1-4): Direct access to stored presets.
- Navigation Buttons (Left/Right): Navigates menus or tunes stations.
- Gumb za jačinu zvuka: Podešava jačinu zvuka.
- DC 5V USB-C Port: Za punjenje interne baterije.
- Dugme za resetiranje: Resets the device (use a thin object to press).
- 3.5 mm priključak za slušalice: Za privatno slušanje.
4. Podešavanje
4.1 Punjenje baterije
The radio is equipped with a built-in 2200mAh lithium battery. Before first use, fully charge the device.
- Connect the provided USB charging cable to the DC 5V USB-C port on the side of the radio.
- Drugi kraj USB kabla priključite na kompatibilni USB adapter za napajanje (nije uključen) ili USB port računara.
- The charging indicator on the display will show the charging status. A full charge typically takes approximately 2.5 hours and provides up to 12 hours of playback time at 70% volume.

Slika 3: The Mycket D009 radio display showing a full battery indicator, emphasizing its long playback time on a single charge.
4.2 Podešavanje antene
Za optimalan radio prijem, potpuno izvucite teleskopsku antenu. Podesite njen položaj za najbolji kvalitet signala.
4.3 Početno uključivanje
Pritisnite i držite O/M button to power on the radio. The display will light up, and the device will typically start in the last used mode or initiate a DAB scan if it's the first use.
5. Uputstvo za upotrebu
5.1 Prebacivanje režima
Pritisnite MODE button repeatedly to cycle through available modes: DAB, FM, Bluetooth, USB, and AUX.
5.2 Rad DAB/DAB+ radija
- Switch to DAB mode using the MODE dugme.
- The radio will automatically perform a full scan for available DAB/DAB+ stations upon first use or if no stations are found. To initiate a manual scan, press and hold the OK button, then select "Full Scan" from the menu.
- Once the scan is complete, use the navigation buttons (Left/Right) to browse through the list of available stations.
- Pritisnite OK da odaberete i slušate stanicu.

Slika 4: The Mycket D009 radio display showing a DAB station and highlighting the auto-scan and 40 preset features (20 DAB & 20 FM).
5.2.1 Storing DAB Presets
The radio supports up to 20 DAB presets.
- Tune to the desired DAB station.
- Press and hold one of the number buttons (1-4) ili FAV button to save the current station to a preset slot. Follow the on-screen prompts to select a slot if using the FAV button.
- To recall a preset, briefly press the corresponding number button or the FAV button and select from the list.
5.3 Rad FM radija
- Prebacite se na FM način rada pomoću MODE dugme.
- Za automatsko skeniranje FM stanica, pritisnite i držite OK button. The radio will scan and store available stations.
- To manually tune, use the navigation buttons (Left/Right) to adjust the frequency.
- Pritisnite OK to confirm the station.
5.3.1 Čuvanje FM predefinisanih stanica
The radio supports up to 20 FM presets, similar to DAB presets.
- Podesite željenu FM stanicu.
- Press and hold one of the number buttons (1-4) ili FAV button to save the current station.
- To recall a preset, briefly press the corresponding number button or the FAV button and select from the list.
5.4 Bluetooth 5.0 Pairing
Connect your smartphone or tablet to the radio via Bluetooth for wireless audio streaming.
- Prebacite se u Bluetooth način rada pomoću MODE button. The radio display will show "Bluetooth Pairing" or similar.
- Na svom mobilnom uređaju omogućite Bluetooth i potražite dostupne uređaje.
- Select "Mycket D009" from the list of devices.
- Once paired, the radio will confirm the connection, and you can play audio from your device through the radio.

Slika 5: The Mycket D009 radio displaying "Playing" in Bluetooth mode, next to a smartphone showing "Mycket D009" as a connected Bluetooth device.
5.5 Reprodukcija s USB-a
Pustite MP3 audio files direktno sa USB drajva.
- Umetnite USB disk koji sadrži MP3 files u USB port.
- Prebacite se u USB način rada pomoću MODE dugme.
- The radio will automatically detect and begin playing MP3 files. Use the navigation buttons to skip tracks.
5.6 Priključak AUX-ulaza
Povežite eksterne audio uređaje pomoću 3.5 mm audio kabla (nije uključen).
- Connect one end of a 3.5mm audio cable to the AUX-in port on the radio.
- Drugi kraj priključite na priključak za slušalice ili audio izlaz vašeg vanjskog uređaja.
- Prebacite se na AUX način rada pomoću MODE dugme.
- Kontrolirajte reprodukciju sa svog vanjskog uređaja.
5.7 Funkcija budilnika
Postavite do dva nezavisna alarma.
- Pritisnite i držite O/M dugme za ulazak u meni.
- Navigate to "Alarm Settings" using the navigation buttons and press OK.
- Odaberite Alarm 1 ili Alarm 2.
- Set the alarm time, source (DAB, FM, or Buzzer), and volume.
- Potvrdite postavke pritiskom na OK.
5.8 Funkcija tajmera za spavanje
Set the radio to automatically turn off after a specified period.
- Pritisnite i držite O/M dugme za ulazak u meni.
- Navigate to "Sleep Timer" and press OK.
- Select the desired duration (e.g., 15, 30, 60 minutes).
- The radio will automatically power off after the set time.
5.9 Korištenje slušalica
Connect 3.5mm headphones to the headphone jack for private listening. The internal speaker will be muted automatically.
6. Održavanje
- čišćenje: Za čišćenje vanjske strane radija koristite meku, suhu krpu. Ne koristite abrazivna sredstva za čišćenje ili rastvarače.
- Održavanje baterije: Da biste produžili vijek trajanja baterije, izbjegavajte često potpuno pražnjenje baterije. Redovno punite uređaj, čak i ako ga ne koristite duži period.
- Skladištenje: Radio čuvajte na hladnom i suhom mjestu, dalje od direktne sunčeve svjetlosti i ekstremnih temperatura.
7. Otkrivanje problema
| Problem | Mogući uzrok | Rješenje |
|---|---|---|
| Nema napajanja / Radio se ne uključuje. | Baterija je prazna. | Napunite radio pomoću priloženog USB kabla. |
| Slab radio prijem (DAB/FM). | Antenna not fully extended or positioned correctly. Weak signal area. | Fully extend and adjust the telescopic antenna. Try moving the radio to a different location. Perform a full scan for stations. |
| Bluetooth uparivanje nije uspjelo. | Radio not in Bluetooth mode. Device too far. Bluetooth not enabled on external device. | Ensure the radio is in Bluetooth mode. Keep devices within range (approx. 10 meters). Enable Bluetooth on your external device and search for "Mycket D009". |
| Nema zvuka iz zvučnika. | Jačina zvuka je preniska. Slušalice su priključene. | Increase the volume. Disconnect headphones if not intended for private listening. |
| Reprodukcija sa USB-a ne radi. | USB drive not inserted correctly. Incompatible file formatu. | Provjerite da li je USB disk potpuno umetnut. files su u MP3 formatu. |
| Uređaj ne reaguje. | Privremeni softverski kvar. | Press the reset button on the side of the radio using a thin object (e.g., a paperclip). |
8. Specifikacije
| Brand | Veoma |
| Model | D009 |
| Radio Modes | DAB, DAB+, FM |
| Bluetooth verzija | 5.0 |
| Opcije reprodukcije | FM, DAB, DAB+, Bluetooth, USB MP3, AUX-in |
| Izlazna snaga zvučnika | 5 Watts |
| Speaker Unit | 4 Ω10 W 78 mm x 1 |
| Display | 2.4-inčni TFT LCD u boji |
| Presets | 40 (20 DAB, 20 FM) |
| Vrsta baterije | Built-in Lithium-ion (18650) |
| Kapacitet baterije | 2200 mAh (3.7V - 2.2 Ah) |
| Vrijeme reprodukcije | Approx. 8-9 hours at 70% volume (up to 12 hours) |
| Vrijeme punjenja | Pribl. 2.5 sati |
| Power Input | 5V preko USB-a |
| Dimenzije (proizvod) | Otprilike 14 cm (D) x 4 cm (Š) x 7.8 cm (V) |
| Izlazne veze | 3.5 mm priključak za slušalice |
9. Garancija i podrška
Mycket products are designed for reliability and performance. This product comes with:
- 12-mesečna garancija: Enjoy a hassle-free 12-month warranty from the date of purchase.
- Korisnička podrška: For any questions, issues, or support needs, please contact Mycket customer service.
Molimo sačuvajte svoj dokaz o kupovini za zahtjeve u vezi s garancijom.