
1. Uvod
Thank you for choosing the MOUNTUP Dual Monitor Arm MU8012-W-07. This instruction manual provides essential information for the safe and correct installation, operation, and maintenance of your new monitor arm. Please read this manual thoroughly before installation and keep it for future reference.
Sigurnosne mjere
- Prije sastavljanja provjerite jesu li sve komponente prisutne i neoštećene. Ne koristite ako bilo koji dio nedostaje ili je neispravan.
- Verify that your desk surface is strong enough to support the combined weight of the monitor arm and your monitors.
- Do not exceed the maximum weight capacity of 10kg (22 lbs) per arm.
- Always follow the installation steps carefully. Improper installation may result in product damage or personal injury.
- Keep children away from the product during assembly. Small parts may be a choking hazard.
2. Sadržaj paketa
Molimo Vas da provjerite da li su sve sljedeće komponente uključene u Vašem paketu:
- Monitor Arm Assembly (x1)
- VESA ploča (x2)
- Desk Clamp Baza (x1)
- Grommet Base (x1)
- Komplet montažnog pribora (vijci, podloške, odstojnici)
- Hex Wrenches (various sizes)
- Uputstvo za upotrebu (x1)
3. Specifikacije
| Feature | Specifikacija |
|---|---|
| Model | MU8012-W-07 |
| Materijal | legirani čelik |
| Boja | Bijelo |
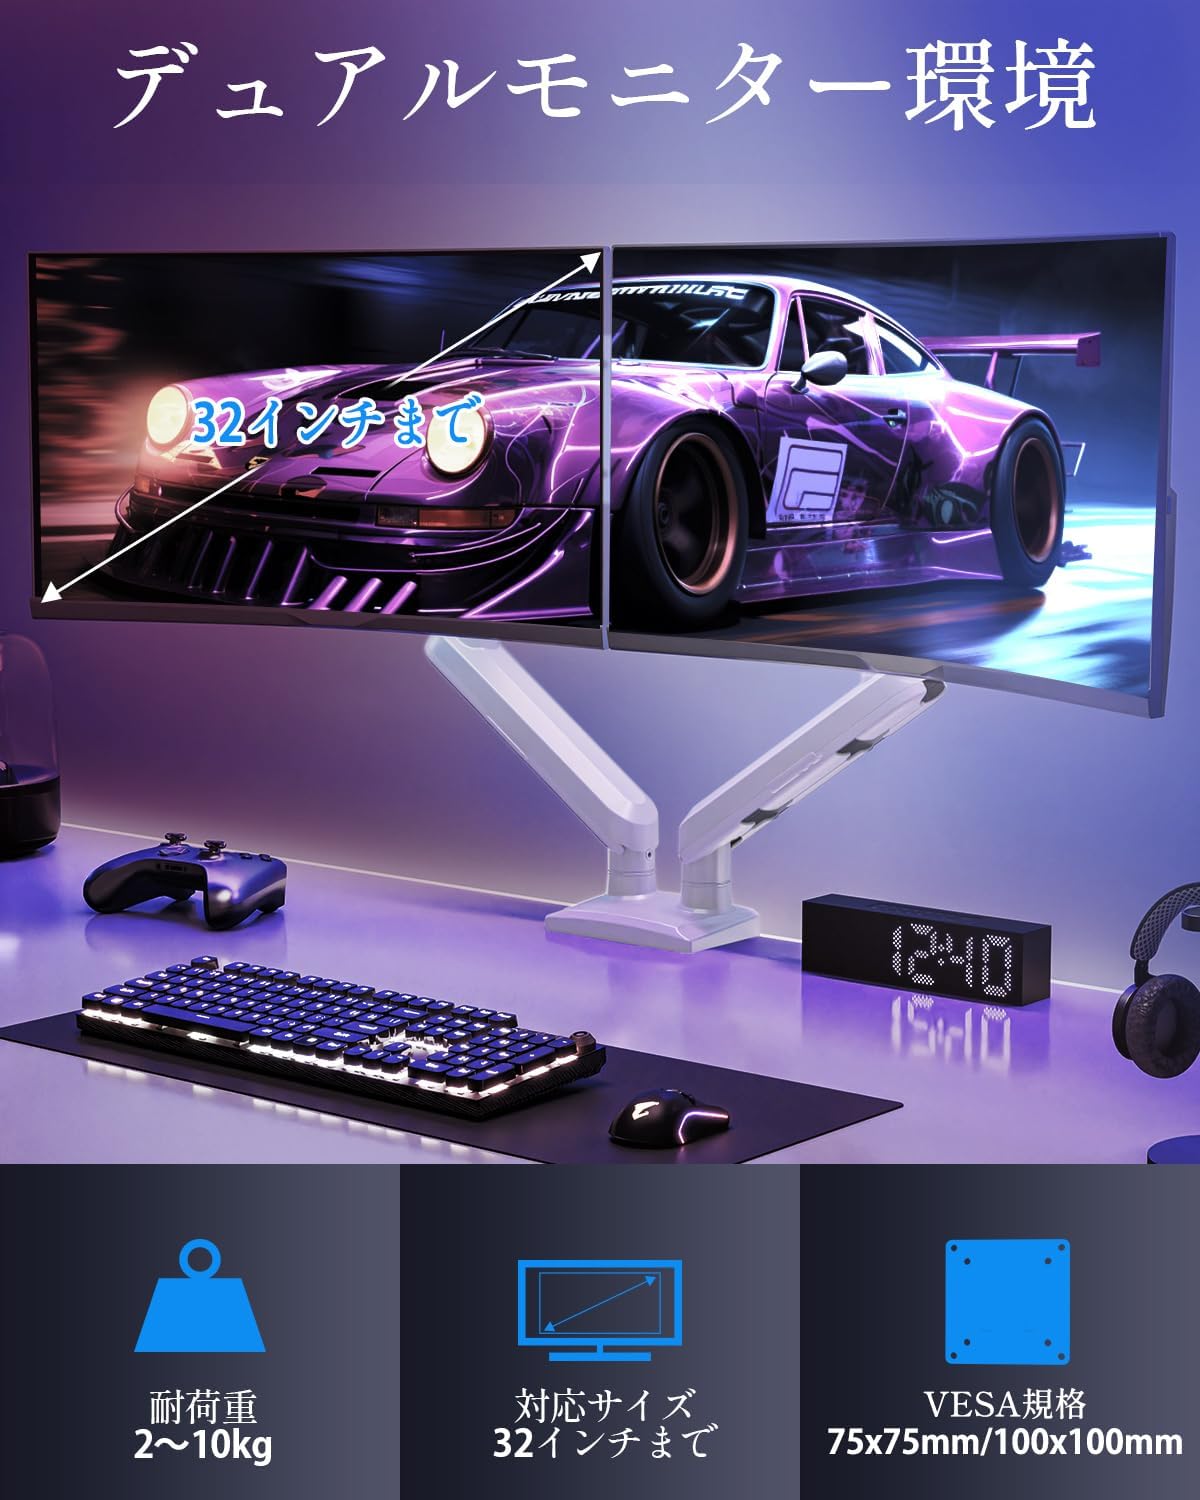
| Kompatibilnost veličine ekrana | 13 - 32 inča |
| Nosivost (po ruci) | 2 - 10 kg (4.4 - 22 funte) |
| VESA kompatibilnost | 75x75mm, 100x100mm |
| Opcije montaže | Clamp, Ušica |
| Raspon nagiba | +85° do -45° |
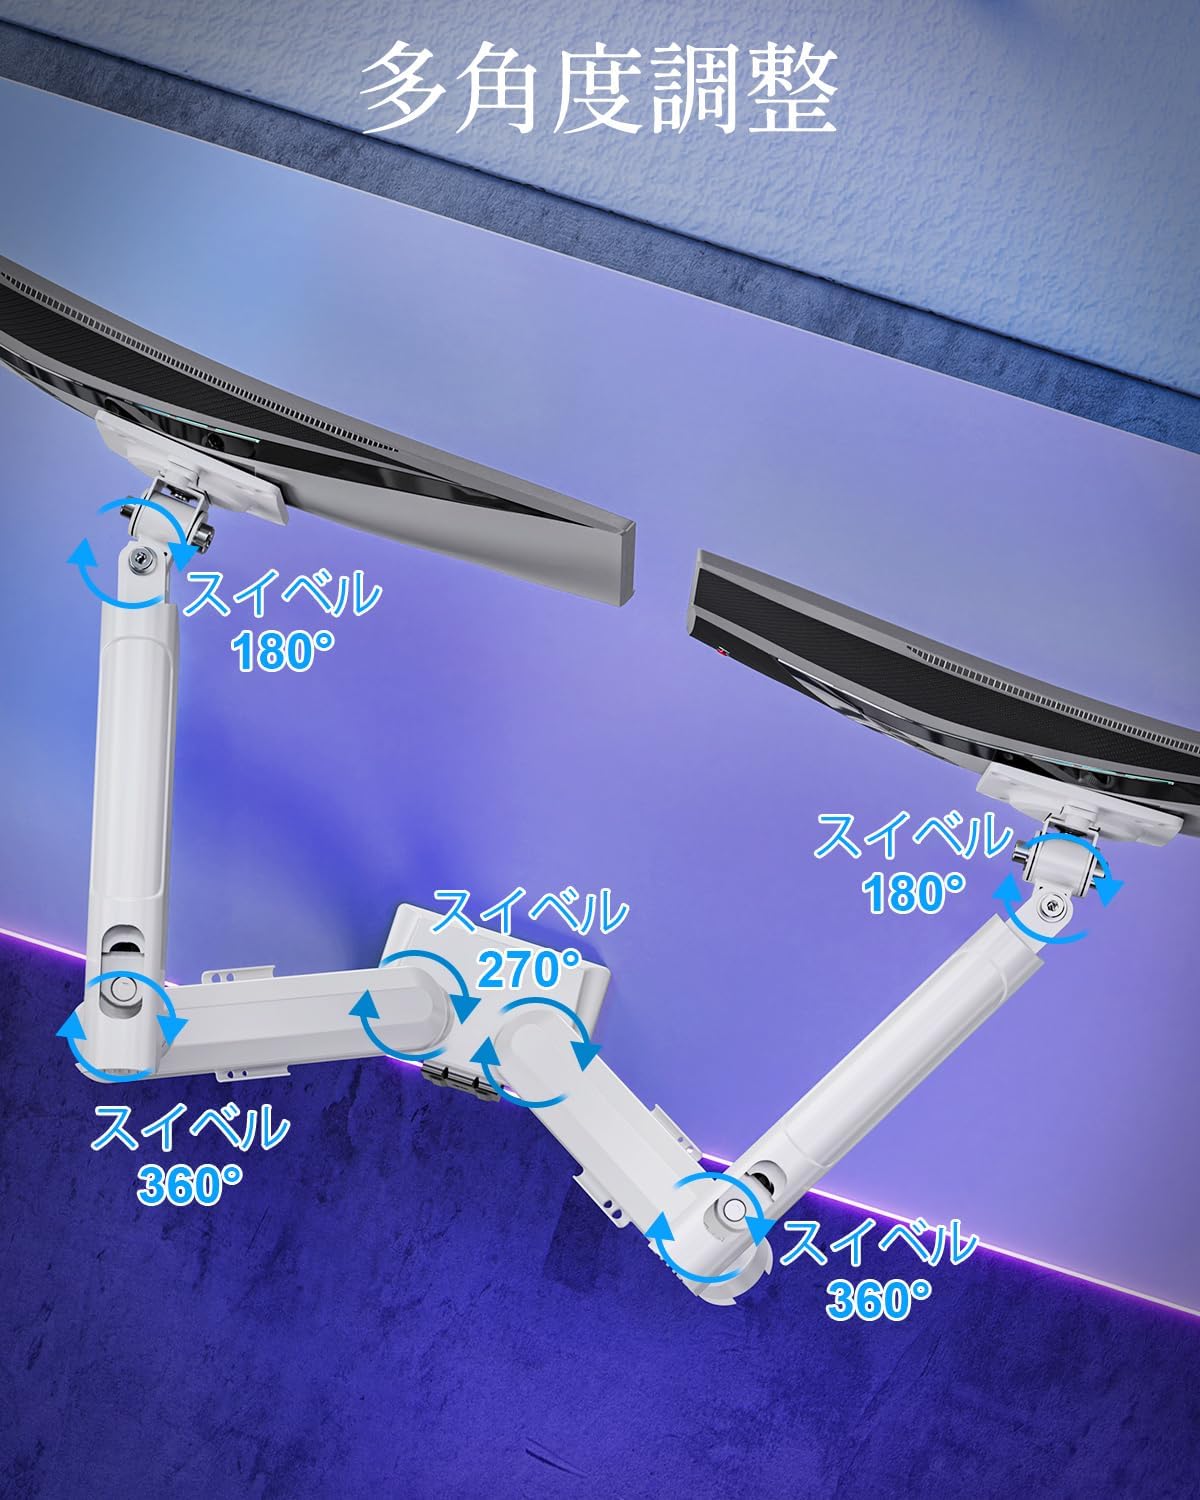
| Okretni domet | 180° (monitor plate), 270° (middle joint), 360° (base) |
| Rotation (Pivot) | 360° |
| Podešavanje maksimalne visine | 44 cm (17.3 inča) |
| Maksimalno istezanje ruke | 50 cm (19.7 inča) |
| Težina proizvoda | 3.1 kg (6.8 lbs) |

4. Postavljanje i instalacija
Korak 1: Odaberite način montaže
The MOUNTUP Dual Monitor Arm supports two installation methods: Clamp Mount and Grommet Mount. Choose the method that best suits your desk.

Clamp Montaža Montaža
- Pričvrstite clamp base to the main pole of the monitor arm.
- Postavite clamp onto the edge of your desk. Ensure the desk thickness is between 10-70mm (0.4-2.7 inches).
- Zategnite clamp screw until the arm is securely fastened to the desk. Ensure it is stable and does not wobble.

Montaža otvora za montažu
- If your desk has a grommet hole, ensure its diameter is between 10-60mm (0.4-2.4 inches) and the desk thickness is between 10-70mm (0.4-2.7 inches).
- Pričvrstite bazu ušice na glavni stub.
- Insert the grommet bolt through the desk hole and secure it from underneath with the provided plate and nut.
- Tighten the nut until the arm is firmly attached to the desk.
Korak 2: Pričvrstite VESA ploče na monitore
- Carefully lay your monitor face down on a soft, clean surface.
- Poravnajte VESA ploču s montažnim otvorima na stražnjoj strani monitora.
- Use the appropriate screws (M4 or M5) and washers from the hardware kit to secure the VESA plate to the monitor. Do not overtighten.
Step 3: Mount Monitors to Arms
- Slide the monitor (with the attached VESA plate) onto the VESA head of the monitor arm.
- Ensure the monitor clicks into place or is securely fastened by the quick-release mechanism.
- Ponovite za drugi monitor.

Korak 4: Upravljanje kablovima
Route your monitor cables through the integrated cable management clips on the underside of the arms. This helps maintain a tidy workspace.

5. Rad i podešavanja
The MOUNTUP Dual Monitor Arm offers flexible adjustments to optimize your viewing iskustvo.

Adjusting Arm Tension (Gas Spring)
The gas spring mechanism allows for smooth height adjustments. If your monitor sags or is difficult to move, you may need to adjust the tension.

- To increase tension (if monitor sags): Use the provided hex wrench to turn the adjustment screw clockwise.
- To decrease tension (if arm is too stiff): Turn the adjustment screw counter-clockwise.
- Always adjust tension with the arm held horizontally. Test the movement after each small adjustment until the monitor holds its position freely.
Podešavanja monitora
- Podešavanje visine: Gently push or pull the monitor up or down to your desired height. The gas spring will assist in holding the position. Max height is 44cm (17.3 inches).
- Podešavanje nagiba: Tilt the monitor screen up to +85° or down to -45° to reduce glare and optimize viewing angles. Loosen the tilt bolt, adjust, then re-tighten.
- Podešavanje okretanja: The arm allows for 180° swivel at the monitor plate, 270° at the middle joint, and 360° at the base, providing wide range of motion.
- Rotation (Pivot): Okrenite monitor za 360° da biste prelazili između pejzažne i portretne orijentacije.

6. Održavanje
- čišćenje: Obrišite krak monitora mekom,amp krpom. Izbjegavajte abrazivna sredstva za čišćenje ili rastvarače koji bi mogli oštetiti završnu obradu.
- Periodične kontrole: Povremeno provjeravajte sve vijke i spojeve kako biste bili sigurni da su čvrsto zategnuti. Po potrebi ih ponovo zategnite.
- Gas Spring Longevity: The high-quality gas spring is tested for over 20,000 cycles. Proper tension adjustment will help maintain its performance over time.

7. Otkrivanje problema
- Monitor Sags or Won't Stay Up: The gas spring tension is too low. Refer to the "Adjusting Arm Tension" section and turn the adjustment screw clockwise to increase tension.
- Arm is Too Stiff or Difficult to Move: The gas spring tension is too high. Refer to the "Adjusting Arm Tension" section and turn the adjustment screw counter-clockwise to decrease tension.
- Treperenje monitora: Ensure all mounting screws (VESA plate to monitor, arm to desk) are securely tightened. Check that the desk clamp or grommet mount is firm.
- Monitor Tilt Angle Won't Hold: The tilt bolt may be loose. Tighten the tilt bolt on the VESA head.
8. Garancija i podrška
MOUNTUP pruža 2 godine garancije kvaliteta od datuma kupovine ovog proizvoda. Ova garancija pokriva proizvodne nedostatke i probleme nastale normalnom upotrebom.
If you encounter any problems with your MOUNTUP Dual Monitor Arm, or if you have questions regarding installation or operation, please contact our customer support. You can typically find seller contact information through your purchase history on the platform where you bought the product (e.g., Amazon order details).
Please have your model number (MU8012-W-07) and purchase date ready when contacting support to ensure a swift resolution.