
1. Važna sigurnosna uputstva
Please read all instructions carefully before using the Teesa Steam Mop TSA5051. Keep this manual for future reference.
- Always ensure the appliance is unplugged before filling the water tank or performing maintenance.
- Do not leave the steam mop unattended while powered on.
- Držite djecu i kućne ljubimce podalje od uređaja tokom rada.
- Use only distilled or demineralized water in the tank to prevent mineral buildup.
- Ne usmjeravajte paru prema ljudima, životinjama ili električnim uređajima.
- Avoid using the steam mop on unsealed hardwood floors or surfaces that are sensitive to heat and moisture.
- Always attach a cleaning pad before operating the steam mop.
- Ako je kabel za napajanje oštećen, mora ga zamijeniti proizvođač, njegov serviser ili slično kvalifikovane osobe kako bi se izbjegla opasnost.
2. Proizvod je gotovview i komponente
Familiarize yourself with the parts of your Teesa Steam Mop TSA5051 before assembly and operation.

Slika 2.1: Fully assembled Teesa Steam Mop TSA5051, front view.

Slika 2.2: Side view of the steam mop, showing the handle and power cord wrap.
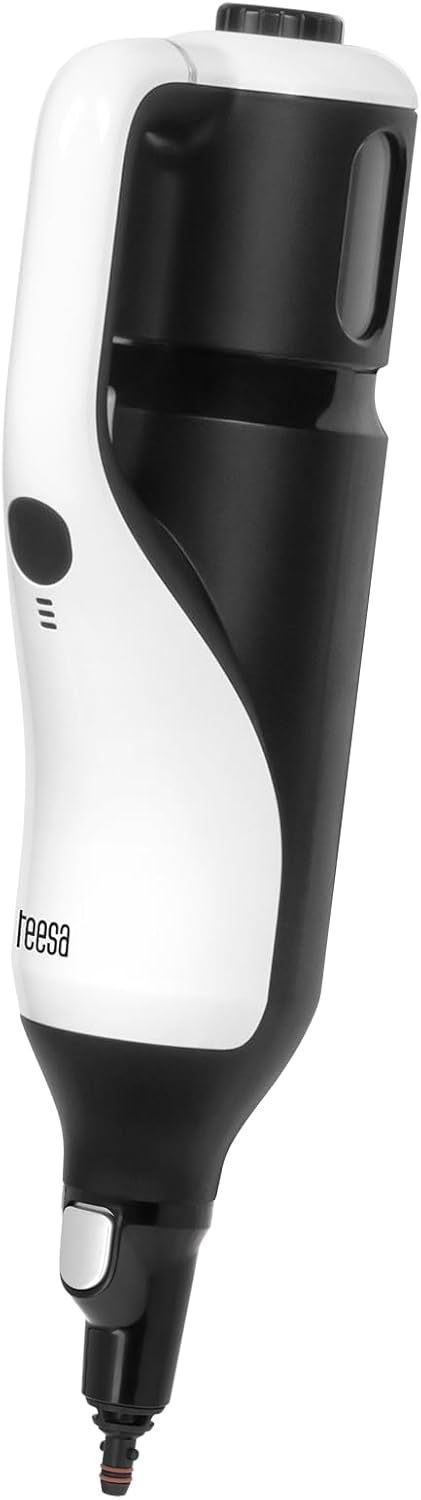
Slika 2.3: The detachable handheld steam unit.

Slika 2.4: Illustration of detaching the handheld unit from the main body.
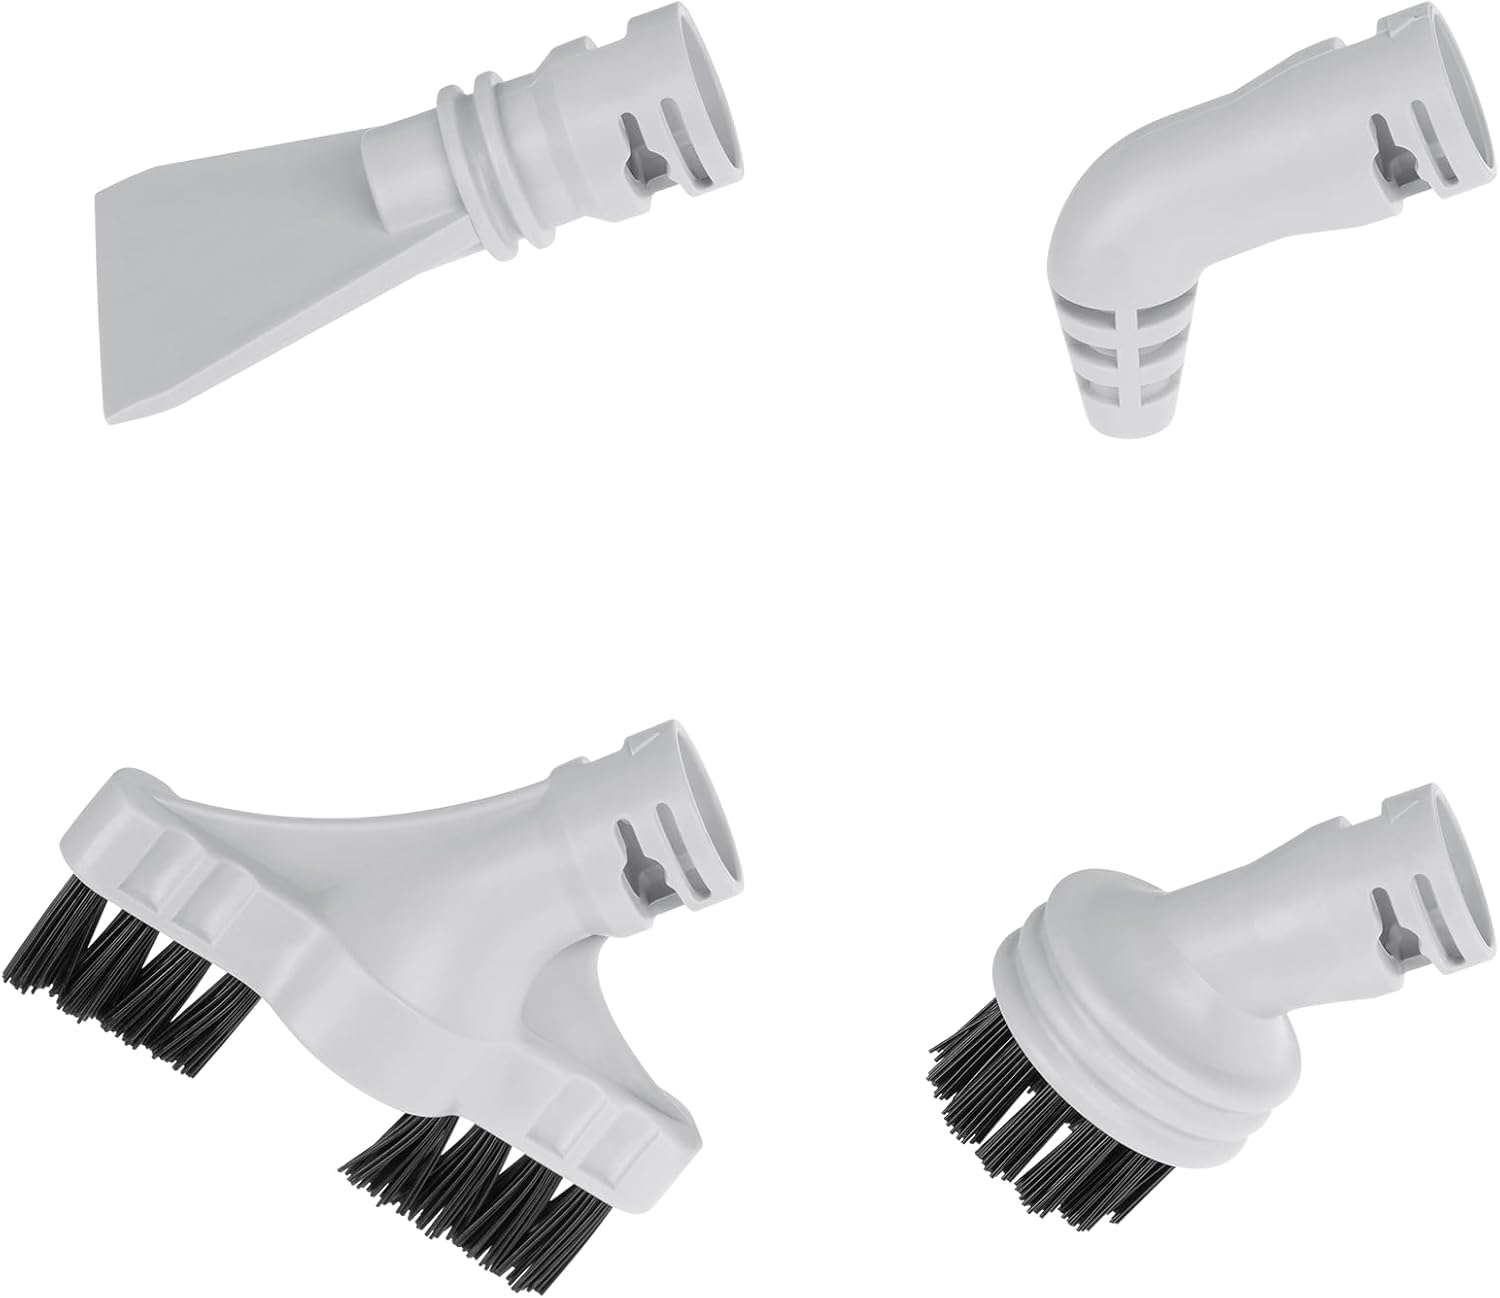
Slika 2.5: Included accessories: round brush, joint accessory, slot nozzle, scraper.

Slika 2.6: Measuring cup for water and adapter for accessories.
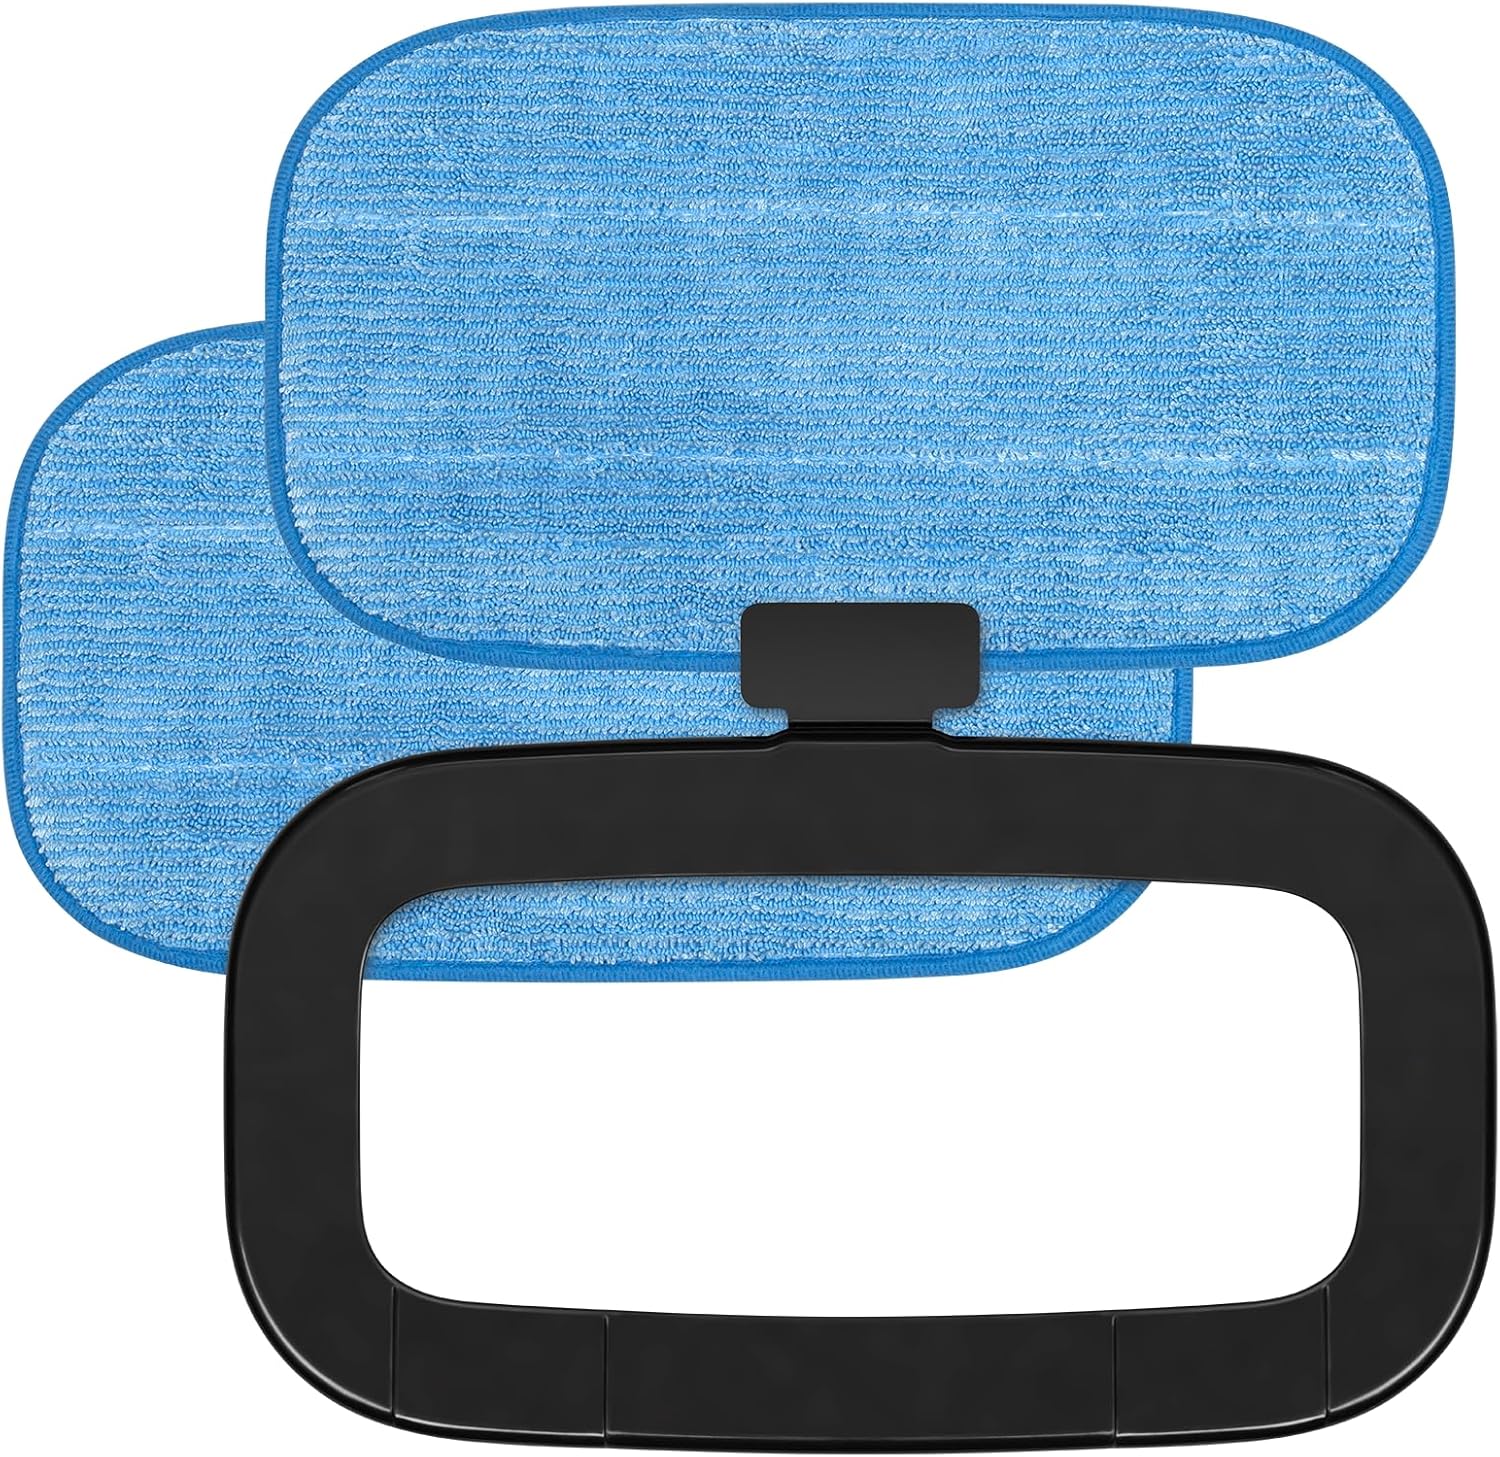
Slika 2.7: Two sponge cloths (mop pads) and the carpet glider frame.
Uključene komponente:
- Main Steam Mop Unit (with detachable handheld steamer)
- Sklop drške
- 2 x Sponge Cloths (Mop Pads)
- Measuring Cup
- Dodatni adapter
- Okrugla četkica
- Joint Accessory
- Slot Nozzle
- Scraper
- Carpet Glider Frame
3. Postavljanje i montaža
- Sastavite ručku: Insert the handle assembly into the main steam mop unit until it clicks securely into place.
- Attach Cleaning Pad: Place one of the sponge cloths onto the bottom of the mop head, ensuring it is securely attached.
- Napunite rezervoar za vodu:
- Otvorite poklopac rezervoara za vodu.
- Using the provided measuring cup, fill the water tank with up to 380 ml of distilled or demineralized water. Do not overfill.
- Čvrsto zatvorite poklopac rezervoara za vodu.
- Optional: Attach Carpet Glider: For refreshing carpets, place the mop head with the attached cleaning pad into the carpet glider frame.
4. Uputstvo za upotrebu
4.1. Korištenje kao parne krpe
- Ensure the water tank is filled and a cleaning pad is attached.
- Plug the power cord into a grounded electrical outlet (220-240 V AC, 50 Hz).
- The steam mop will begin heating. The indicator light will illuminate, signaling preparation. The device is ready in approximately 25 seconds.
- Select the desired steam level (3 levels available) using the control button.
- Begin cleaning by moving the mop head slowly and steadily over the floor surface. The swivel head allows for easy maneuverability.
- For carpet refreshing, ensure the carpet glider is attached and move the mop over the carpet.
- When finished, unplug the appliance and allow it to cool before emptying any remaining water and cleaning.
4.2. Korištenje kao ručnog parnog čistača
- Unplug the steam mop and ensure it is cool.
- Press the release button to detach the handheld steam unit from the main body (refer to Figure 2.4).
- Attach the desired accessory (e.g., round brush, slot nozzle, joint accessory, scraper) to the handheld unit using the accessory adapter if needed.
- Fill the water tank if necessary (follow instructions in Section 3.3).
- Plug in the handheld unit. Wait for the indicator light to show it's ready (approx. 25 seconds).
- Direct the steam towards the surface to be cleaned. Use caution as steam is hot.
- After use, unplug the unit and allow it to cool before detaching accessories and storing.
5. Održavanje
Regular maintenance ensures optimal performance and extends the life of your steam mop.
- Jastučići za čišćenje: The sponge cloths can be machine washed with mild detergent. Do not use bleach or fabric softeners. Air dry only. Replace pads when they become worn or lose their cleaning effectiveness.
- Pražnjenje rezervoara za vodu: After each use, unplug the appliance and allow it to cool. Empty any remaining water from the tank.
- Čišćenje eksterijera: Obrišite vanjski dio parne krpe oglasnim papiromamp tkanina. Nemojte koristiti jake hemikalije ili abrazivna sredstva za čišćenje.
- Uklanjanje kamenca: If you notice a decrease in steam production or mineral residue, descaling may be necessary.
- Mix a solution of 1 part white vinegar to 2 parts water.
- Sipajte rastvor u rezervoar za vodu.
- Plug in the unit and allow it to heat up.
- Run the unit until half of the solution is used, then unplug and let it sit for 30 minutes.
- Plug it back in and run until the tank is empty.
- Rinse the tank thoroughly with fresh water and run two full tanks of fresh water through the unit to flush out any vinegar residue.
- Skladištenje: Store the steam mop in a cool, dry place. Wrap the power cord around the designated cord wraps on the handle (refer to Figure 2.2).
6. Otkrivanje problema
| Problem | Mogući uzrok | Rješenje |
|---|---|---|
| No steam or low steam. |
|
|
| Water leaking from the mop head. |
|
|
| Mop not gliding smoothly. |
|
|
7. Specifikacije
| Broj modela | TSA5051 |
| Snaga | 1500 W |
| Kapacitet rezervoara za vodu | 380 ml |
| Steam Ejection Rate | 21 / 28 ml/min (3 levels) |
| Vrijeme zagrijavanja | Pribl. 25 sekundi |
| Napajanje | 220-240 V AC, 50 Hz |
| Dužina kabla za napajanje | 5 m |
| Težina | 3.0 kg (proizvod), 4 kg (pakovanje) |
| Dimenzije (sastavljeno) | 30 x 25 x 110 cm |
8. Garancija i podrška
Za informacije o garanciji i korisničku podršku, molimo pogledajte garantni list koji ste dobili uz proizvod ili posjetite službenu Teesa stranicu. webSačuvajte dokaz o kupovini za eventualne reklamacije.
For further assistance, you may contact Teesa customer service through their official channels.