1. Uvod
Thank you for choosing the Yoidesu 10-inch Car Radio Stereo. This manual provides essential information for the proper installation, operation, and maintenance of your new car multimedia system. Please read this manual thoroughly before use to ensure optimal performance and safety.
Product Overview
This car stereo features a 10-inch display, runs on Android 10.1, and includes 2GB RAM with 32GB ROM for smooth operation and ample storage for applications. It supports navigation, Bluetooth connectivity, and mobile phone mirror link functionality.
Kompatibilnost
This unit is designed as a replacement for the original car radio stereo in Honda CRV models manufactured between 2012 and 2016.

Image 1.1: The Yoidesu 10-inch Car Radio Stereo with its main interface.
2. Sadržaj paketa
Molimo Vas da provjerite da li se u Vašem paketu nalaze sve dolje navedene stavke:
- 1 x Host Unit (Car Stereo)
- 1 x Pojas za napajanje
- 1 x kabel
- 1 x GPS antena
- 1 x Uputstvo za upotrebu
- 2 x USB Extension Cables
- 1 x Camera Line
- 1 x USB Adapter Cable
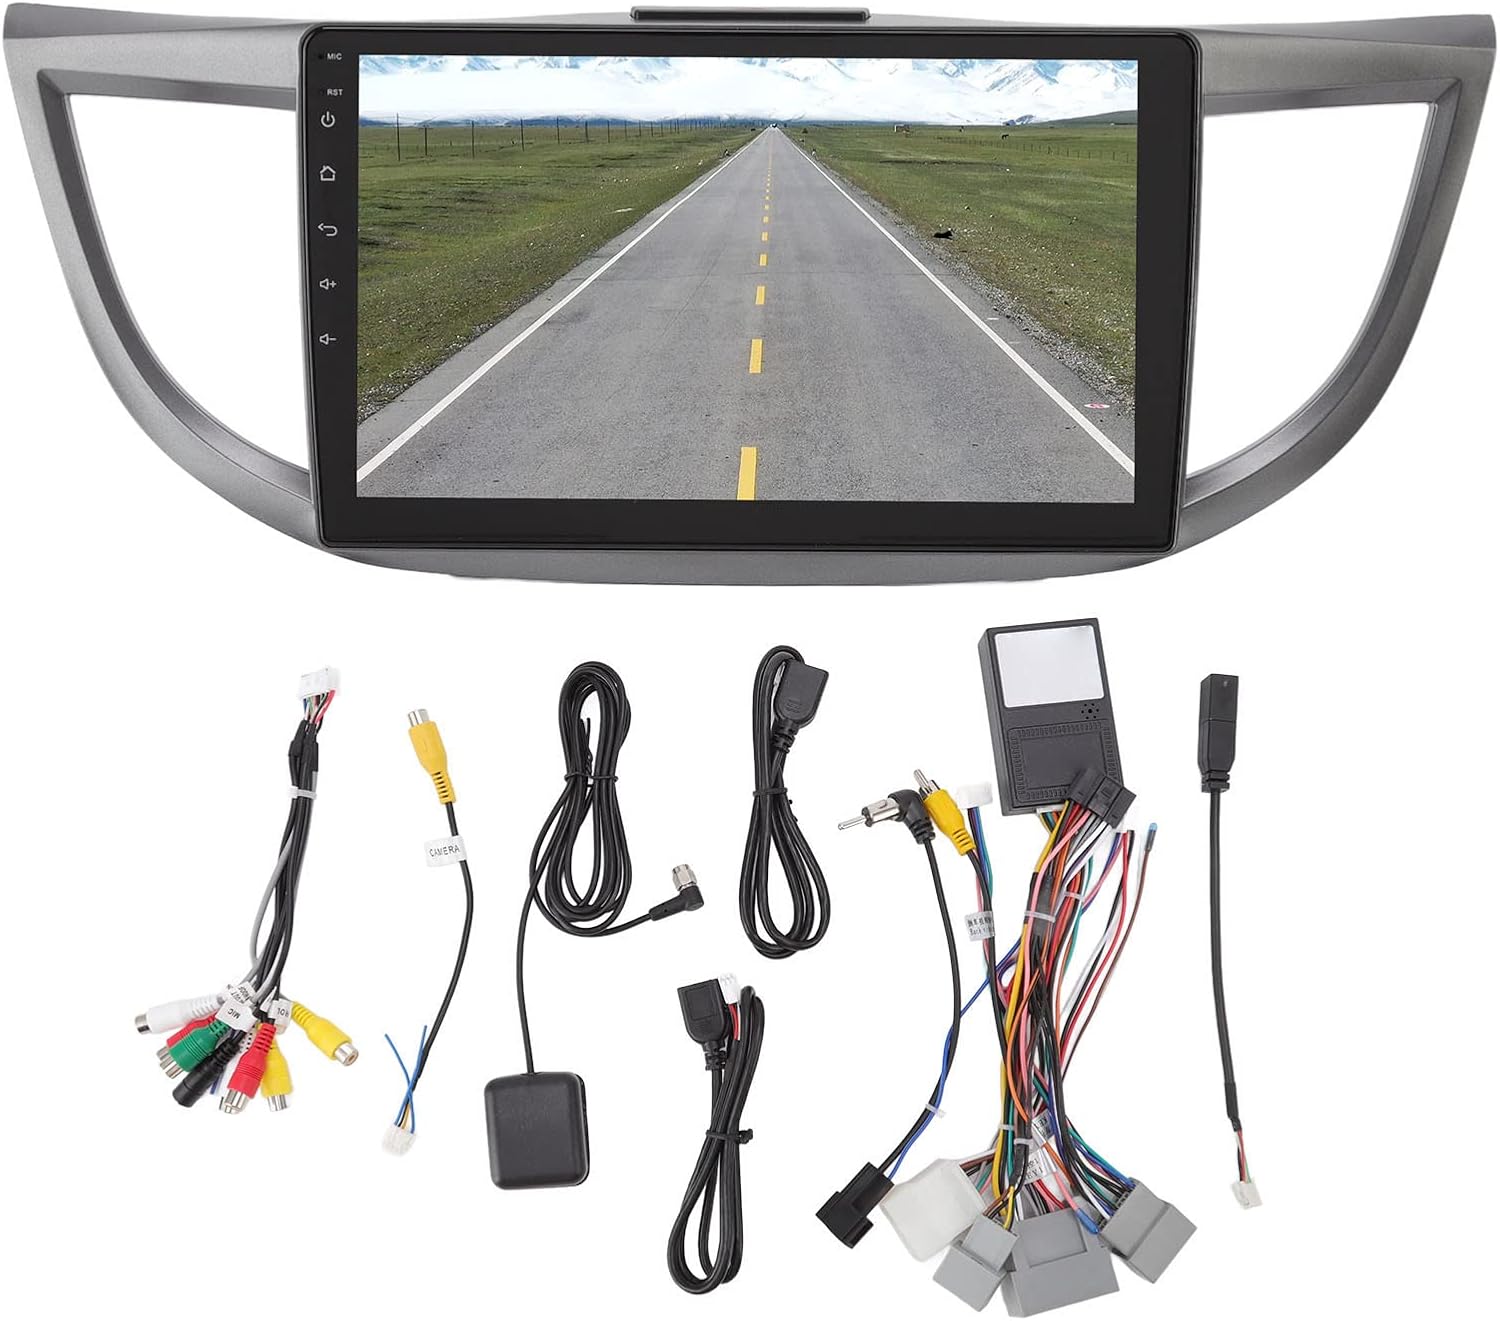
Slika 2.1: Gotovoview of all included accessories and cables.
3. Specifikacije
| Feature | Specifikacija |
|---|---|
| Brand | Yoidsu |
| Naziv modela | Auto radio Stereo |
| Vrsta usluge vozila | Car (Honda CRV 2012-2016) |
| Veličina ekrana | 10 inča |
| Rezolucija | 1024 x 600 |
| Operativni sistem | Android 10.1 |
| Memorija (RAM) | 2GB |
| Pohrana (ROM) | 32GB |
| Tehnologija povezivanja | USB, Wi-Fi, Bluetooth |
| Posebne karakteristike | Bluetooth, Touchscreen, Navigation, Mirror Link, Steering Wheel Control Support |
| Supported Navigation System | GPS (Online/Offline Maps) |
| Način audio izlaza | Zvučnik, stereo |
| Voltage | 12V |
4. Postavljanje i instalacija
Installation of the Yoidesu Car Radio Stereo involves replacing the existing factory unit. Due to the complexity of automotive electrical systems, professional installation is highly recommended to prevent damage to the unit or your vehicle.
General Installation Steps (Consult a professional)
- Priprema: Isključite akumulator vozila kako biste spriječili kratke spojeve.
- Uklonite staru jedinicu: Carefully remove the existing car radio stereo and its surrounding trim.
- Povežite ožičenje: Connect the provided power harness, GPS antenna, USB extension cables, and camera line (if applicable) to the new Yoidesu unit. Ensure all connections are secure.
- Test funkcionalnost: Before fully reassembling, temporarily connect the battery and test basic functions like power, audio, and display.
- Sigurnosna jedinica: Mount the new unit into the dashboard opening and secure it.
- ponovo sastaviti: Reinstall all trim pieces removed earlier.
- Konačna provjera: Reconnect the battery and perform a comprehensive test of all features.

Image 4.1: Before and After installation of the Yoidesu Car Radio Stereo.

Slika 4.2: Pozadi view of the main unit with wiring connections.
5. Uputstvo za upotrebu
5.1 Android 10.1 sistem
The unit runs on Android 10.1, providing a familiar interface. You can download and install various applications from the app store, similar to a smartphone or tablet. The 2GB RAM and 32GB ROM ensure smooth operation and quick application launches.
5.2 Navigacija
The car stereo supports both online and offline navigation applications. It is compatible with popular mapping services like Igo maps and Waze. After connecting to Wi-Fi, you can use online navigation anywhere. The system supports 2D and 3D map displays.
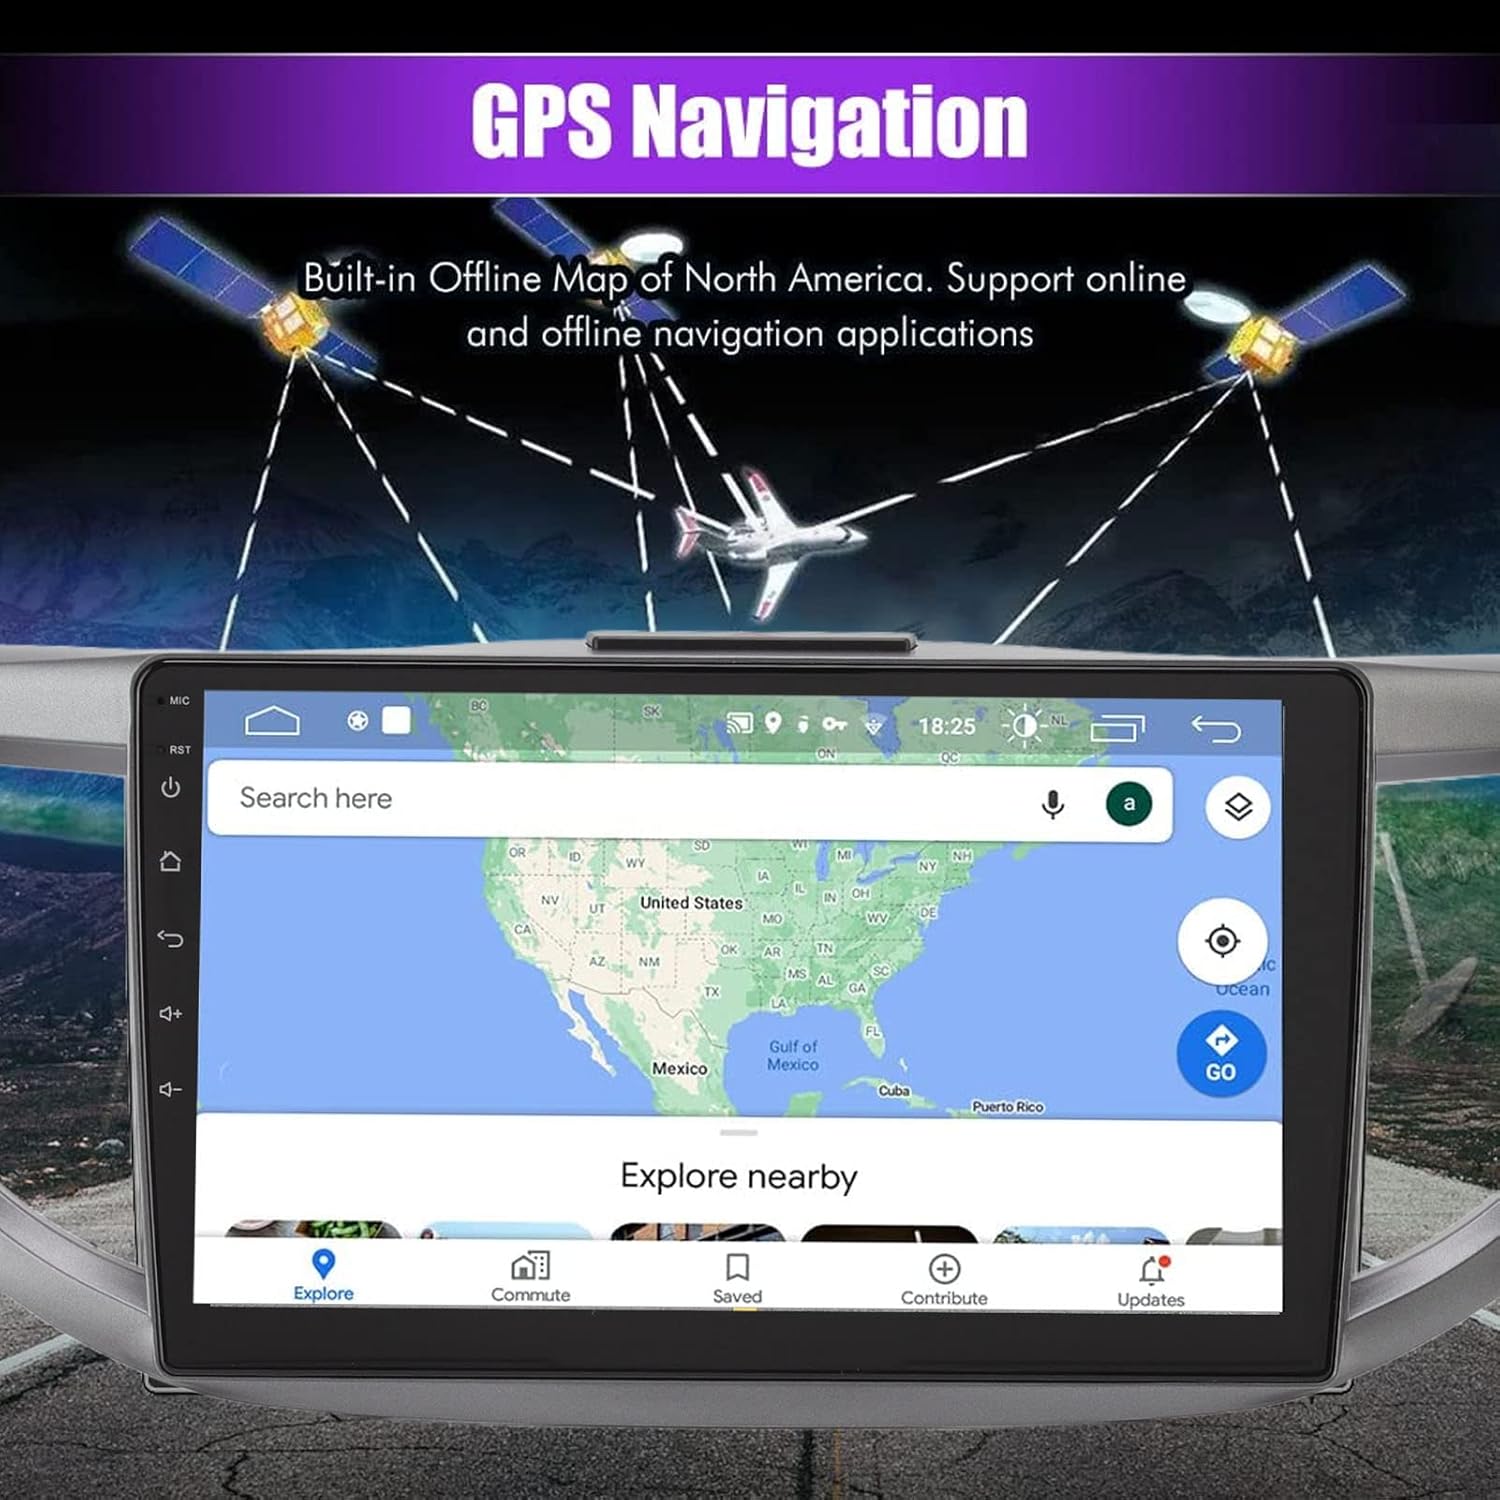
Image 5.1: GPS Navigation interface on the car stereo.
5.3 Bluetooth povezivost
Pair your mobile phone via Bluetooth to enable hands-free calling and audio streaming. The built-in microphone captures your voice, and calls are routed through your car's speakers. To pair, go to the Bluetooth settings on the unit and search for your device.
5.4 Funkcija ogledalne veze
The mirror link function allows you to synchronize your Android or iOS phone's screen with the car stereo display. This enables you to view maps, videos, and other content from your phone directly on the larger car stereo screen. Follow the on-screen instructions on the unit to establish the mirror link connection.
5.5 Kontrole na volanu
The unit is designed to integrate with your vehicle's existing steering wheel controls. This allows you to manage functions such as switching songs, adjusting volume, and changing channels without taking your hands off the wheel. Configuration may be required in the unit's settings menu.
5.6 Pozadi View Ulaz kamere
The system supports high-definition rear view camera input (camera sold separately). When the vehicle is shifted into reverse, the rear view image will automatically display on the screen, assisting with safer parking. The system offers excellent night vision capabilities.
Slika 5.2: Pozadi view prikaz kamere s linijama za pomoć pri parkiranju.
5.7 Postavke zvuka
Access the sound settings to customize your audio experience. The unit provides options for adjusting equalizer settings, balance, and fade to optimize sound output through your car's speakers.
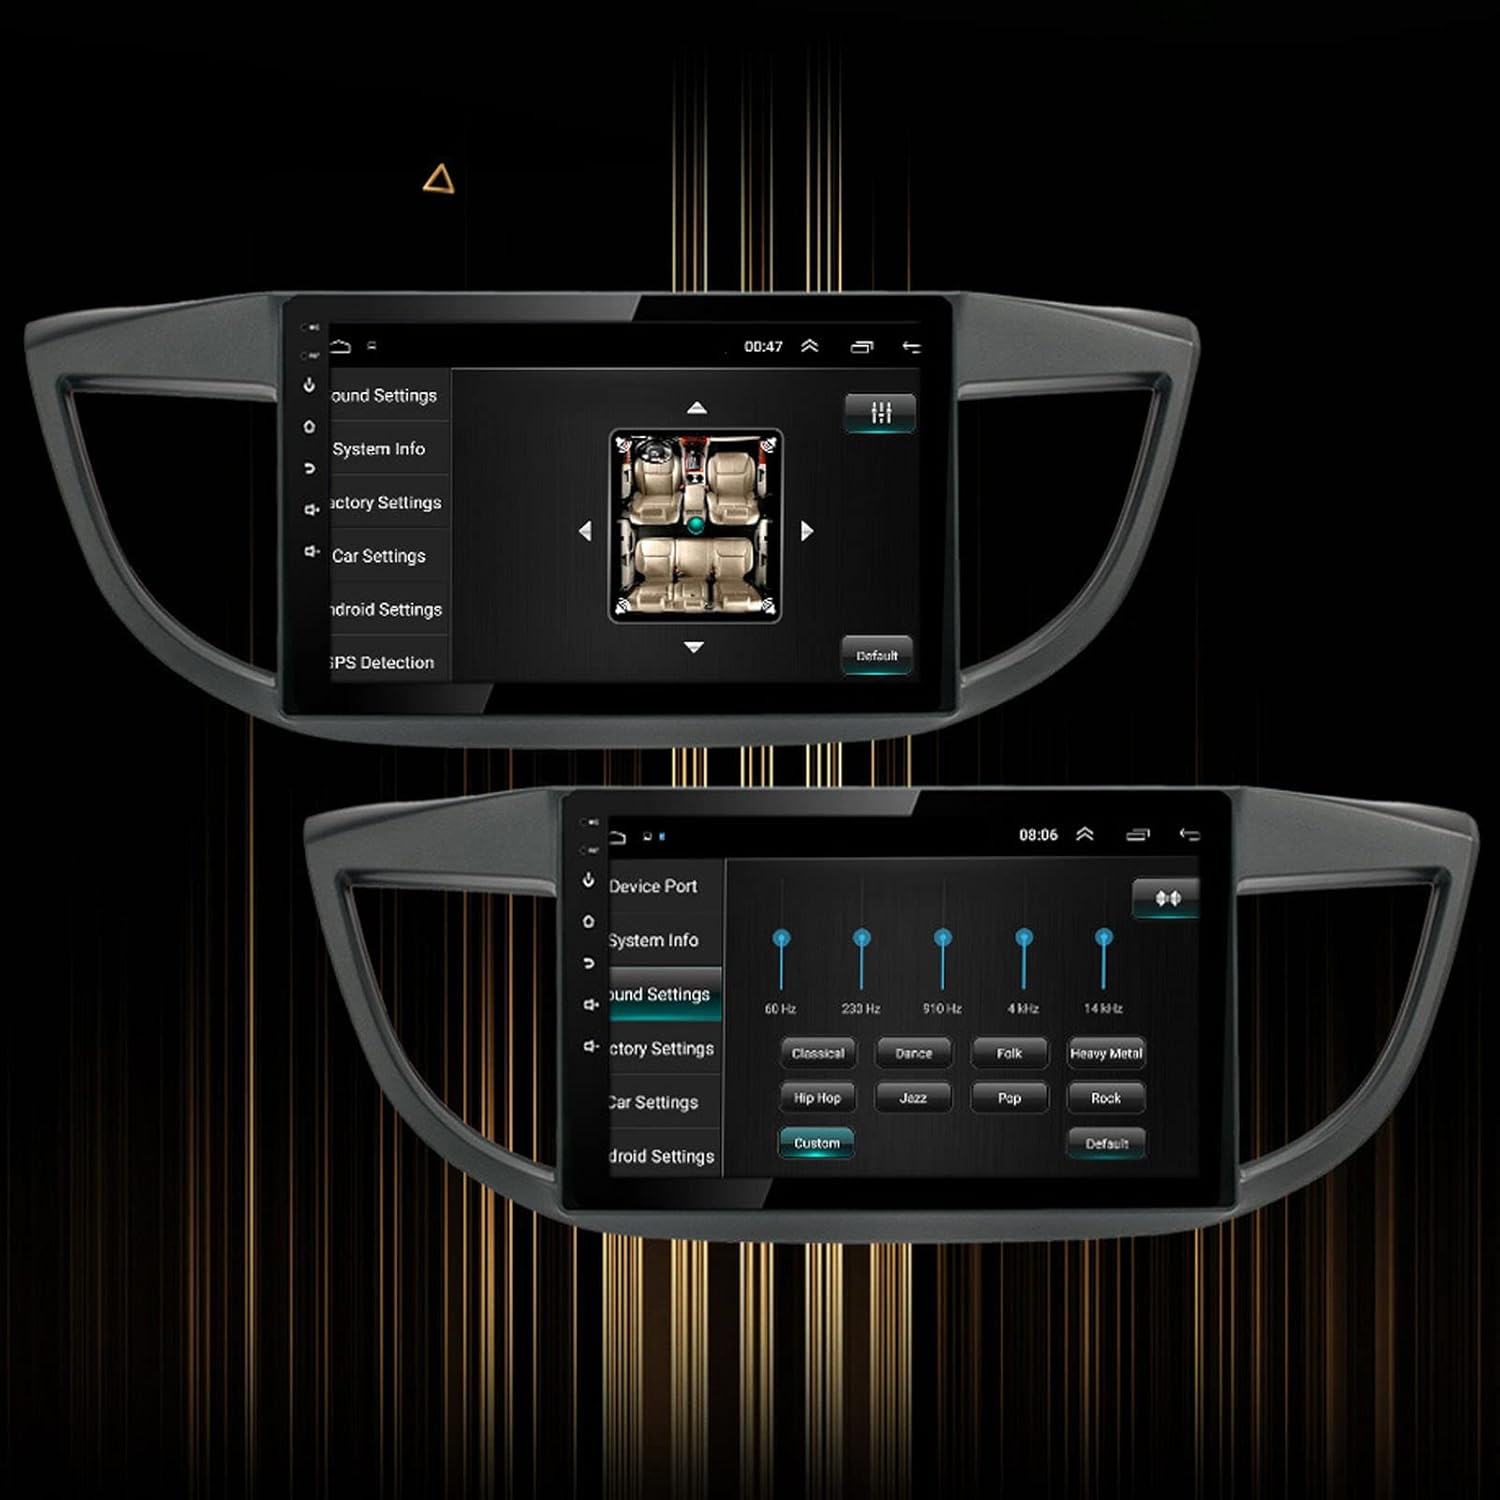
Image 5.3: Sound settings interface with equalizer options.
6. Održavanje
To ensure the longevity and optimal performance of your Yoidesu Car Radio Stereo, follow these maintenance guidelines:
- Čišćenje ekrana: Koristite meku krpu koja ne ostavlja dlačice da nježno obrišete ekran. Za tvrdokorne mrlje, lagano obrišiteampen the cloth with water or a screen-cleaning solution specifically designed for electronics. Avoid harsh chemicals, abrasive materials, or excessive moisture.
- Generalno čišćenje: Keep the unit and surrounding dashboard area free from dust and debris. Use a soft brush or compressed air to clean crevices.
- Ažuriranja softvera: Povremeno provjeravajte dostupna ažuriranja softvera putem postavki uređaja ili proizvođačevih websajt. Ažuriranja mogu poboljšati performanse, dodati funkcije i ispraviti greške.
- Izbjegavajte ekstremne temperature: Do not expose the unit to extreme heat or cold for prolonged periods, as this can affect its electronic components and screen.
7. Otkrivanje problema
If you encounter issues with your Yoidesu Car Radio Stereo, refer to the following common problems and solutions:
| Problem | Mogući uzrok | Rješenje |
|---|---|---|
| Jedinica se ne uključuje | Labav priključak za napajanje, pregorjeli osigurač, problem s akumulatorom vozila. | Provjerite sve kablove za napajanje i priključke. Pregledajte osigurače vozila. Osigurajte da je akumulator vozila napunjen. |
| Nema izlaza zvuka | Speaker wires disconnected, volume too low, incorrect audio source selected. | Verify speaker wire connections. Increase volume. Select the correct audio input source. |
| Gubitak ili netačnost GPS signala | GPS antenna obstructed or improperly installed, unit in an area with poor satellite reception. | Ensure GPS antenna is clear of obstructions and properly connected. Move to an open area for better reception. |
| Problemi sa Bluetooth uparivanjem | Bluetooth not enabled on phone/unit, device too far, interference. | Ensure Bluetooth is active on both devices. Keep devices close. Restart both devices. |
| Komande na volanu ne rade | Incorrect wiring, software configuration needed, compatibility issue. | Check wiring for steering wheel control adapter. Configure controls in the unit's settings. Note: Some users have reported potential limitations with steering wheel control functionality on specific CRV models. Ensure full compatibility before installation. |
| Ekran osjetljiv na dodir ne reagira | Software glitch, screen protector interference, physical damage. | Ponovo pokrenite uređaj. Uklonite sve zaštitne folije sa ekrana da biste ih testirali. Ako problem i dalje postoji, kontaktirajte podršku. |
If these solutions do not resolve the issue, please contact customer support for further assistance.
8. Garancija i podrška
Informacije o garanciji
Yoidesu products are manufactured to high-quality standards. For specific warranty terms and conditions, please refer to the warranty card included with your product or contact the seller/manufacturer directly. Keep your purchase receipt as proof of purchase for any warranty claims.
Korisnička podrška
For technical assistance, installation queries, or any other support needs, please contact your retailer or the Yoidesu customer service team. Contact information can typically be found on the product packaging or the official Yoidesu website.
Online resursi:
- Posjetite Yoidesu Store on Amazon za informacije o proizvodima i ažuriranja.