
1. Uvod
The Festnight RICHMETERS RM409B is a handheld digital multimeter designed for high reliability and portability. This instrument is suitable for various applications in laboratories, factories, and homes. It features 9999 counts with True-RMS measurement and auto-ranging capabilities, allowing for precise measurements of AC/DC voltage, AC/DC struja, otpor, kapacitet, frekvencija i temperatura.
Key features include a large LCD backlight display for clear readings in various lighting conditions, a data hold function, and automatic power-off to conserve battery life. The device also incorporates a Non-Contact Voltage (NCV) detection function for enhanced safety.
2. Sigurnosne informacije
To ensure safe operation and prevent damage to the multimeter, please observe the following safety precautions:
- Measurements must be performed using the correct input terminals and functions, and within the allowable measuring range for the selected function.
- Do not use the product in environments containing explosive gas, vapor, or in damp ili vlažnim uslovima.
- A low battery level can lead to incorrect readings. Replace the batteries promptly when the low battery indicator appears.
- Do not attempt to make measurements if the battery compartment door is not properly closed and secured.
- Uvijek isključite mjerne kablove iz strujnog kola prije promjene funkcija ili raspona.
- Budite izuzetno oprezni kada radite sa voltagiznad 36V DC ili 25V AC RMS, jer to može predstavljati opasnost od strujnog udara.
3. Proizvod je gotovview
The Festnight RICHMETERS RM409B Digital Multimeter consists of the main unit, test leads, and a temperature test cable. Familiarize yourself with the components and controls before operation.

Figure 3.1: Front panel of the RM409B Multimeter with key components labeled.
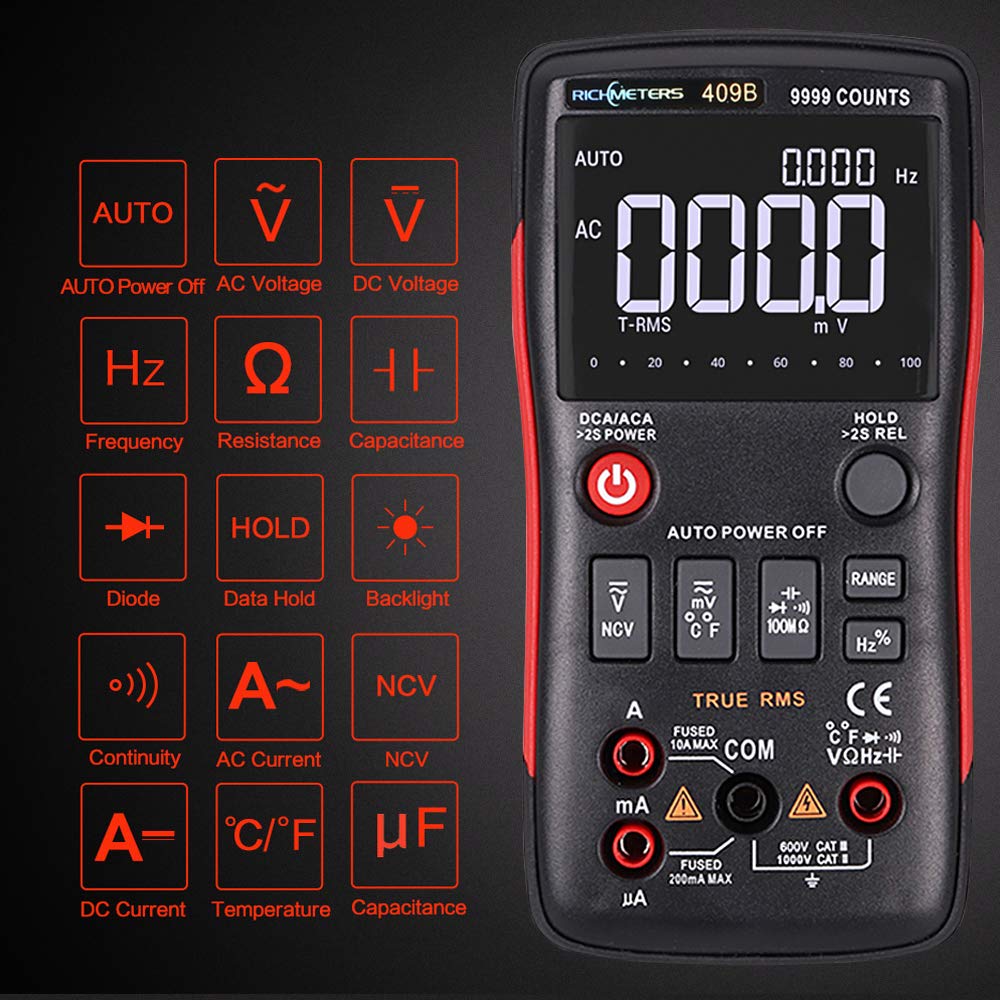
Slika 3.2: Gotovoview of symbols and functions available on the RM409B Multimeter.
3.1. Kontrole i terminali
- LCD ekran: Prikazuje očitanja mjerenja, jedinice i indikatore funkcija.
- Dugme za napajanje: Turns the multimeter ON/OFF. Press and hold for 2 seconds to activate/deactivate.
- Funkcijska dugmad: Selects specific measurement modes (e.g., NCV, Temperature, Range, Frequency/Duty Cycle).
- Dugme HOLD: Freezes the current display reading. Press and hold for 2 seconds for REL (Relative Measurement) function.
- Ulazni priključci:
- COM: Zajednički terminal za sva mjerenja (crni mjerni kabel).
- VΩHz: Ulaz za voltage, resistance, frequency, capacitance, diode, and continuity measurements (red test lead).
- mA/µA: Unos za miliampovdje i mikroampere current measurements (red test lead). Fused 200mA MAX.
- 10A MAKS.: Input for high current measurements up to 10A (red test lead). Fused 10A MAX.
4. Podešavanje
4.1. Instalacija baterije
The RM409B multimeter requires two 1.5V AA batteries (not included). To install or replace batteries:
- Provjerite je li multimetar isključen i da su svi mjerni kabeli isključeni.
- Pronađite poklopac odjeljka za baterije na stražnjoj strani uređaja.
- Koristite odvijač da biste otpustili vijak(e) koji pričvršćuju poklopac.
- Remove the cover and insert two 1.5V AA batteries, observing the correct polarity (+/-) as indicated inside the compartment.
- Vratite poklopac odjeljka za baterije i čvrsto zategnite vijke.
4.2. Povezivanje ispitnih vodova
Uvijek spojite crni mjerni kabel na COM terminal. Connect the red test lead to the appropriate input terminal based on the desired measurement:
- Za Voltage, Resistance, Capacitance, Frequency, Diode, and Continuity measurements, connect the red test lead to the VΩHz terminal.
- Za miliampere (mA) ili mikroampere (µA) current measurements, connect the red test lead to the mA/µA terminal.
- For high current (up to 10A) measurements, connect the red test lead to the 10A MAX terminal.
4.3. Connecting Temperature Probe
To measure temperature, connect the temperature test cable to the VΩHz i COM terminals, ensuring correct polarity.

Figure 4.1: Included accessories with the RM409B Multimeter.
5. Uputstvo za upotrebu
5.1. Uključivanje/isključivanje
Pritisnite i držite Snaga button for approximately 2 seconds to turn the multimeter ON or OFF. The device will automatically power off after 5 minutes of inactivity to save battery life.
5.2. Auto/Manual Ranging
The RM409B operates in auto-ranging mode by default. To switch to manual ranging, press the RANGE button. Each subsequent press will cycle through available ranges. To return to auto-ranging, press and hold the RANGE dugme.
5.3. svtagMjerenje (AC/DC)
- Spojite crni ispitni vod COM i crveni testni kabel za VΩHz.
- Odaberite voltage measurement function (AC or DC) using the appropriate button or rotary switch.
- Spojite mjerne kabele paralelno s krugom ili komponentom koja se testira.
- Pročitajte voltage vrijednost na LCD zaslonu.
5.4. Mjerenje struje (AC/DC)
Oprez: Uvijek spajajte multimetar serijski s kolom prilikom mjerenja struje. Nikada ga ne spajajte paralelno s voltom.tage izvor.
- Spojite crni ispitni vod COM.
- For currents up to 200mA, connect the red test lead to mA/µAZa struje do 10A, spojite crveni mjerni kabel na 10A MAX.
- Select the current measurement function (AC or DC).
- Otvorite strujni krug u kojem treba mjeriti struju i spojite multimetar serijski.
- Očitajte trenutnu vrijednost na LCD zaslonu.
5.5. Mjerenje otpora
- Spojite crni ispitni vod COM i crveni testni kabel za VΩHz.
- Select the resistance (Ω) measurement function.
- Prije mjerenja otpora provjerite je li strujno kolo bez napona. Spojite mjerne kablove preko komponente.
- Očitajte vrijednost otpora na LCD ekranu.
5.6. Mjerenje kapacitivnosti
- Spojite crni ispitni vod COM i crveni testni kabel za VΩHz.
- Select the capacitance (F) measurement function.
- Prije spajanja mjernih vodova provjerite je li kondenzator potpuno ispražnjen.
- Spojite mjerne kablove preko kondenzatora.
- Pročitajte vrijednost kapacitivnosti na LCD zaslonu.
5.7. Merenje frekvencije
- Spojite crni ispitni vod COM i crveni testni kabel za VΩHz.
- Select the frequency (Hz) measurement function.
- Spojite mjerne kabele na izvor signala.
- Pročitajte vrijednost frekvencije na LCD zaslonu.
5.8. Mjerenje temperature
- Connect the temperature test cable to the VΩHz i COM terminals, observing polarity.
- Select the temperature (°C/°F) measurement function.
- Place the temperature probe in contact with the object or environment to be measured.
- Read the temperature value on the LCD display. The unit can be switched between Celsius and Fahrenheit.
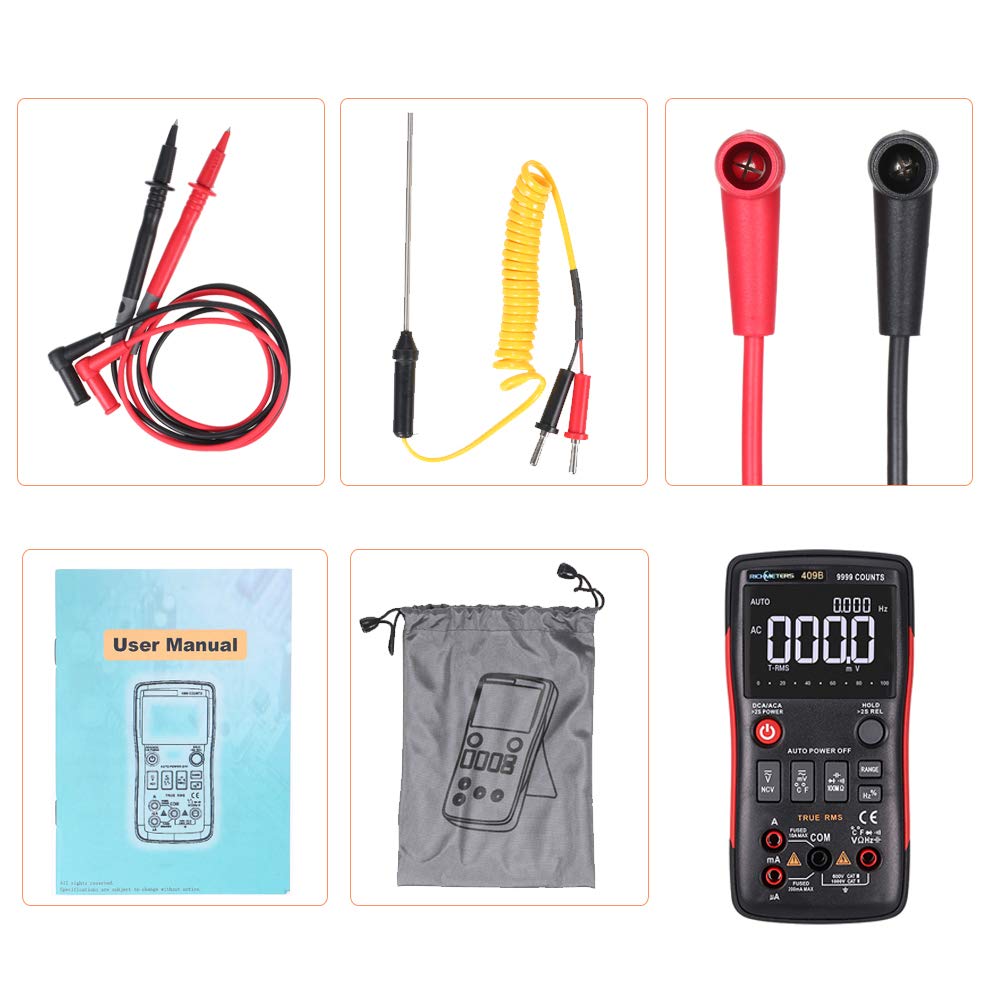
Figure 5.1: Temperature measurement function in use.
5.9. Test diode
- Spojite crni ispitni vod COM i crveni testni kabel za VΩHz.
- Select the diode test function.
- Spojite crveni mjerni kabel na anodu, a crni mjerni kabel na katodu diode.
- Pročitajte naprijed voltagpad na displeju. Zamijenite mjesta žicama da biste provjerili da li postoji otvoreni strujni krug.
5.10. Test kontinuiteta
- Spojite crni ispitni vod COM i crveni testni kabel za VΩHz.
- Odaberite funkciju testiranja kontinuiteta.
- Spojite mjerne kabele preko strujnog kola ili komponente.
- Ako postoji kontinuitet (otpor ispod određenog praga), oglasit će se zujalica.
5.11. Non-Contact Voltage (NCV) Detekcija
NCV funkcija omogućava detekciju AC volumnatage without direct contact with conductors, enhancing safety.
- Pritisnite NCV button to activate the function.
- Move the top part of the multimeter close to the conductor or outlet.
- The display will show segments and an audible beep will indicate the presence of AC voltage. The number of segments and frequency of beeps increase with stronger voltage.

Slika 5.2: NCV (Beskontaktni volumentage) detection in use.
5.12. Zadržavanje podataka
Pritisnite HOLD dugme za zamrzavanje trenutnog očitanja na ekranu. Ponovo pritisnite dugme za otključavanje funkcije pauze.
6. Održavanje
6.1. Zamjena baterije
When the low battery indicator appears on the display, replace the two 1.5V AA batteries as described in Section 4.1. Ensure the multimeter is off and leads are disconnected before opening the battery compartment.
6.2. Čišćenje
Očistite multimetar casing with a soft, dry cloth. Do not use abrasive cleaners, solvents, or chemicals, as these may damage the casing ili unutrašnjih komponenti.
6.3. Skladištenje
When not in use for extended periods, remove the batteries to prevent leakage. Store the multimeter in a dry, cool environment, away from direct sunlight and extreme temperatures.
7. Otkrivanje problema
If you encounter issues with your RM409B multimeter, refer to the following common troubleshooting steps:
- No Display / Device Does Not Turn On: Provjerite jesu li baterije pravilno instalirane i dovoljno napunjene. Po potrebi zamijenite baterije.
- Netačna očitanja: Ensure the correct function and measurement range are selected. Verify that the test leads are properly connected to the correct input terminals and are making good contact with the circuit. Check battery level.
- Nema zvučnog signala kontinuiteta: Confirm the continuity function is selected. Ensure the circuit is de-energized.
- Fuse Blown (for current measurements): If the multimeter does not measure current, the internal fuse for the current input may be blown. This requires professional service for replacement.
8. Specifikacije
| Parametar | Specifikacija |
|---|---|
| Broj modela | RM409B |
| Radna temperatura | 0 - 40 ℃ |
| Radna vlažnost | ≤75%RH |
| Stanje skladištenja | -20~60℃ |
| Vlažnost skladištenja | ≤80%RH |
| Raspon mjerenja kapacitivnosti | 9.99nF / 99.99nF / 999.9nF / 9.99uF / 99.99uF / 999.9uF / 9.999MF |
| Measuring Voltage domet | 999.9mV / 9.999V / 99.99V / 999.9V |
| Raspon mjerenja struje | 999.9uA / 99.99uA / 999.9mA / 10A |
| Raspon mjerenja otpora | 99.99Ω / 999.9Ω / 9.999kΩ / 99.99kΩ / 999.9KΩ / 9.999MΩ / 99.99MΩ |
| Frekvencijski opseg | 99.99Hz / 999.9Hz / 9.999KHz / 99.99KHz / 999.9KHz / 5MHz |
| Duty Cycle | 1% - 99% |
| Sample Rate | 3 puta u sekundi |
| Snaga | 2 * 1.5V AA batteries |
| Veličina artikla | 145 * 74 * 35 mm (5.71 * 2.91 * 1.38 inča) |
| Težina artikla | 168 g (5.93 unci) |
| Brand | Festnight |
| GTIN / UPC | 793169099571 |

Figure 8.1: Dimensions of the RM409B Multimeter.
9. Garancija i podrška
For information regarding warranty coverage, technical support, or service, please refer to the manufacturer's official website or contact your retailer directly. Keep your purchase receipt as proof of purchase.