HP AF621A
HP AF621A Digital KVM Switch User Manual
Model: AF621A | Brand: HP
Product Overview
The HPE KVM IP Console Switch is designed for remote management of servers, network devices, and technology infrastructure. It enables administrators to manage up to 1024 servers across two tiers from a single local console in cascaded environments. When tiered with additional HPE Console Switches with Virtual Media application installations and upgrades can be pushed to any server from the local console or remotely.
It provides remote access to multiple servers running various operating systems via the IP Console Viewer. Virtual Media functionality allows a removable drive or ISO image to be remotely mapped to an attached server or a remote office. The intuitive Local Console User Interface mirrors the On Board Web Interface (OBWI) for remote management, offering menus for configuration, virtual media, display, security, and upgrades. Enhanced security features include Smart Card or Common Access Card (CAC) support for two-factor authentication.
Key features include improved functionality, performance, and security, with new video compression supporting resolutions up to 1600x1200 @ 60Hz or 1680 x 1050 @ 60Hz 16-bit color for remote sessions without impacting performance. Access is available using SSH or Telnet compliant clients. Up to 32 target server ports per switch for diverse rack density requirements.
Vodič za postavljanje
Sadržaj paketa
Prije početka instalacije, provjerite da li su sve komponente prisutne:
- HP AF621A Digital KVM Switch unit
- Kablovi za napajanje (specifični za regiju)
- Komplet za montažu u rack
- Documentation (this manual, safety information)
- KVM cables (may be sold separately)
Fizička instalacija
The HP AF621A KVM Switch is designed for rack-mounting. Follow these steps for secure installation:
- Select a suitable 1U rack space with adequate ventilation.
- Attach the provided rack-mounting brackets to the sides of the KVM switch using the supplied screws.
- Secure the KVM switch into the rack using appropriate rack screws. Ensure it is firmly seated and level.
- Osigurajte odgovarajući protok zraka oko uređaja kako biste spriječili pregrijavanje.

Slika 1: Prednja strana view of the HP AF621A Digital KVM Switch. This view shows the compact 1U rack-mountable design with the HP logo centrally placed and ventilation grilles on either side, ensuring proper airflow for internal components.
Povezivanje uređaja
Refer to the rear panel image for port identification. Connect your devices as follows:
- Priključak za napajanje: Connect the provided power cords to the AC inlets on the rear of the KVM switch and to a grounded power outlet. The unit supports redundant power inputs for reliability.
- Veza lokalne konzole:
- Connect a VGA monitor to the "SETUP" VGA port.
- Connect a USB keyboard and mouse to the dedicated USB ports labeled for local console use.
- Server Connections (KVM Ports): Connect KVM cables from your servers' video, USB (for keyboard/mouse), and optionally serial ports to the corresponding KVM ports (1-16) on the switch. The switch supports up to 16 computers directly.
- Network Connections (LAN Ports): Connect Ethernet cables from your network infrastructure to the "LAN 1" and "LAN 2" RJ-45 ports for remote access capabilities. These ports enable IP-based remote management.
- Tiering Port: If cascading multiple KVM switches, connect the tiering port to another compatible HPE KVM switch.
- Serijski port: Connect serial devices or use for management if required.

Figure 2: Rear panel of the HP AF621A Digital KVM Switch. This image highlights the various connectivity options, including dual power inputs, two LAN ports (LAN 1, LAN 2), a VGA setup port, USB ports for local console peripherals, and 16 dedicated KVM ports for connecting managed servers. Also visible are the tiering port and a serial port.
After all connections are made, power on the KVM switch. The unit will perform a self-test and initialize.
Operacija
Local Console Operation
Once powered on and connected to a local monitor, keyboard, and mouse, the KVM switch provides an intuitive On-Screen Display (OSD) or Local Console User Interface (LCUI). Use the connected keyboard and mouse to navigate the menus for:
- Server Selection: Switch between connected servers.
- Konfiguracija: Adjust network settings, user accounts, security parameters.
- Virtuelni mediji: Mount ISO images or connect USB drives to remote servers.
- Postavke ekrana: Optimize video output.
- sigurnost: Manage user access and authentication methods, including Smart Card/CAC support.
- Nadogradnje firmvera: Initiate firmware updates for the KVM switch.
Remote Access (IP Console Viewer)
The KVM switch supports remote access via its IP Console Viewer, allowing management from anywhere on the network. To establish a remote connection:
- Ensure the KVM switch is connected to the network via its LAN ports.
- Obtain the IP address of the KVM switch (can be found via the local console or network discovery tools).
- Otvori a web browser and enter the KVM switch's IP address to access the On Board Web Interface (OBWI).
- Prijavite se koristeći svoje akreditive.
- From the OBWI, you can launch the IP Console Viewer, which provides full KVM control of connected servers with near-local performance.
- SSH or Telnet compliant clients can also be used for command-line access.
Virtual Media Functionality
The Virtual Media feature allows you to remotely map a removable drive (e.g., USB flash drive, CD/DVD drive) or an ISO image from your local workstation to a connected server. This is crucial for:
- Operating system installations.
- Software and driver updates.
- Firmware upgrades for servers.
- Diagnostics and troubleshooting.
Access this feature through the Local Console User Interface or the On Board Web Interface (OBWI) via the IP Console Viewer.
Održavanje
Regular maintenance ensures the longevity and optimal performance of your HP AF621A Digital KVM Switch:
- čišćenje: Periodically clean the exterior of the unit with a soft, dry cloth. Ensure ventilation grilles are free from dust and debris to maintain proper airflow. Do not use liquid cleaners directly on the unit.
- Ažuriranja firmvera: Provjerite službenu HP podršku website regularly for new firmware versions. Keeping the firmware updated ensures access to the latest features, performance improvements, and security patches. Follow the instructions provided with the firmware update package carefully.
- Upravljanje kablovima: Ensure all cables are neatly organized and securely connected. Loose or tangled cables can impede airflow and lead to connection issues.
- Uslovi okoline: Operate the KVM switch within its specified environmental limits (temperature, humidity) to prevent damage.
Rješavanje problema
Ovaj odjeljak nudi rješenja za uobičajene probleme s kojima se možete susresti:
- Nema video prikaza:
- Verify that the monitor is powered on and correctly connected to the KVM switch's VGA port.
- Ensure the KVM cable connecting the server to the switch is securely attached at both ends.
- Check the server's video output. Try connecting the monitor directly to the server to confirm it's functioning.
- Adjust display settings via the KVM's OSD/LCUI or OBWI.
- Tastatura/miš ne reaguje:
- Ensure the keyboard and mouse are properly connected to the KVM switch's USB ports.
- Verify the KVM cable connecting the server includes USB connectivity.
- Try connecting the keyboard/mouse directly to the server to confirm functionality.
- Restart the KVM switch and the affected server.
- Cannot Access KVM Remotely:
- Confirm the KVM switch is powered on and its LAN ports are connected to an active network.
- Verify the KVM switch's IP address and ensure your client device is on the same network or has routing access.
- Check network cable integrity and switch/router status.
- Ensure no firewall rules are blocking access to the KVM switch's management ports (e.g., HTTP/HTTPS, SSH).
- Try pinging the KVM switch's IP address from your client device.
- Virtuelni medij ne radi:
- Ensure the Virtual Media feature is enabled on the KVM switch.
- Verify the client-side drive or ISO image is correctly selected and mounted via the IP Console Viewer.
- Check network bandwidth and latency, as large file transfers can be affected.
- Ensure the target server's BIOS/UEFI is configured to boot from USB or CD/DVD if performing an OS installation.
Tehničke specifikacije
| Feature | Specifikacija |
|---|---|
| Broj modela | AF621A |
| Brand | HP |
| Dimenzije proizvoda | 9.32 x 17.24 x 1.72 inča |
| Težina artikla | 7.05 funti |
| Computer Connections | Up to 16 (direct) |
| Lokalni korisnici | 1 |
| Udaljeni korisnici | 2 |
| Max Video Resolution (Remote) | 1600x1200 @ 60Hz or 1680x1050 @ 60Hz (16-bit color) |
| Mrežni interfejs | RJ-45 (Ethernet) |
| Na postolje | 1U |
| Power Input | 100-240V~, 1.25A, 50/60 Hz |
| Način rada | AUTOMATSKI |
| Tip konektora | RJ-45, SFP |
| Kontakt materijal | Bakar |
| Međunarodna ocjena zaštite | IP65 |
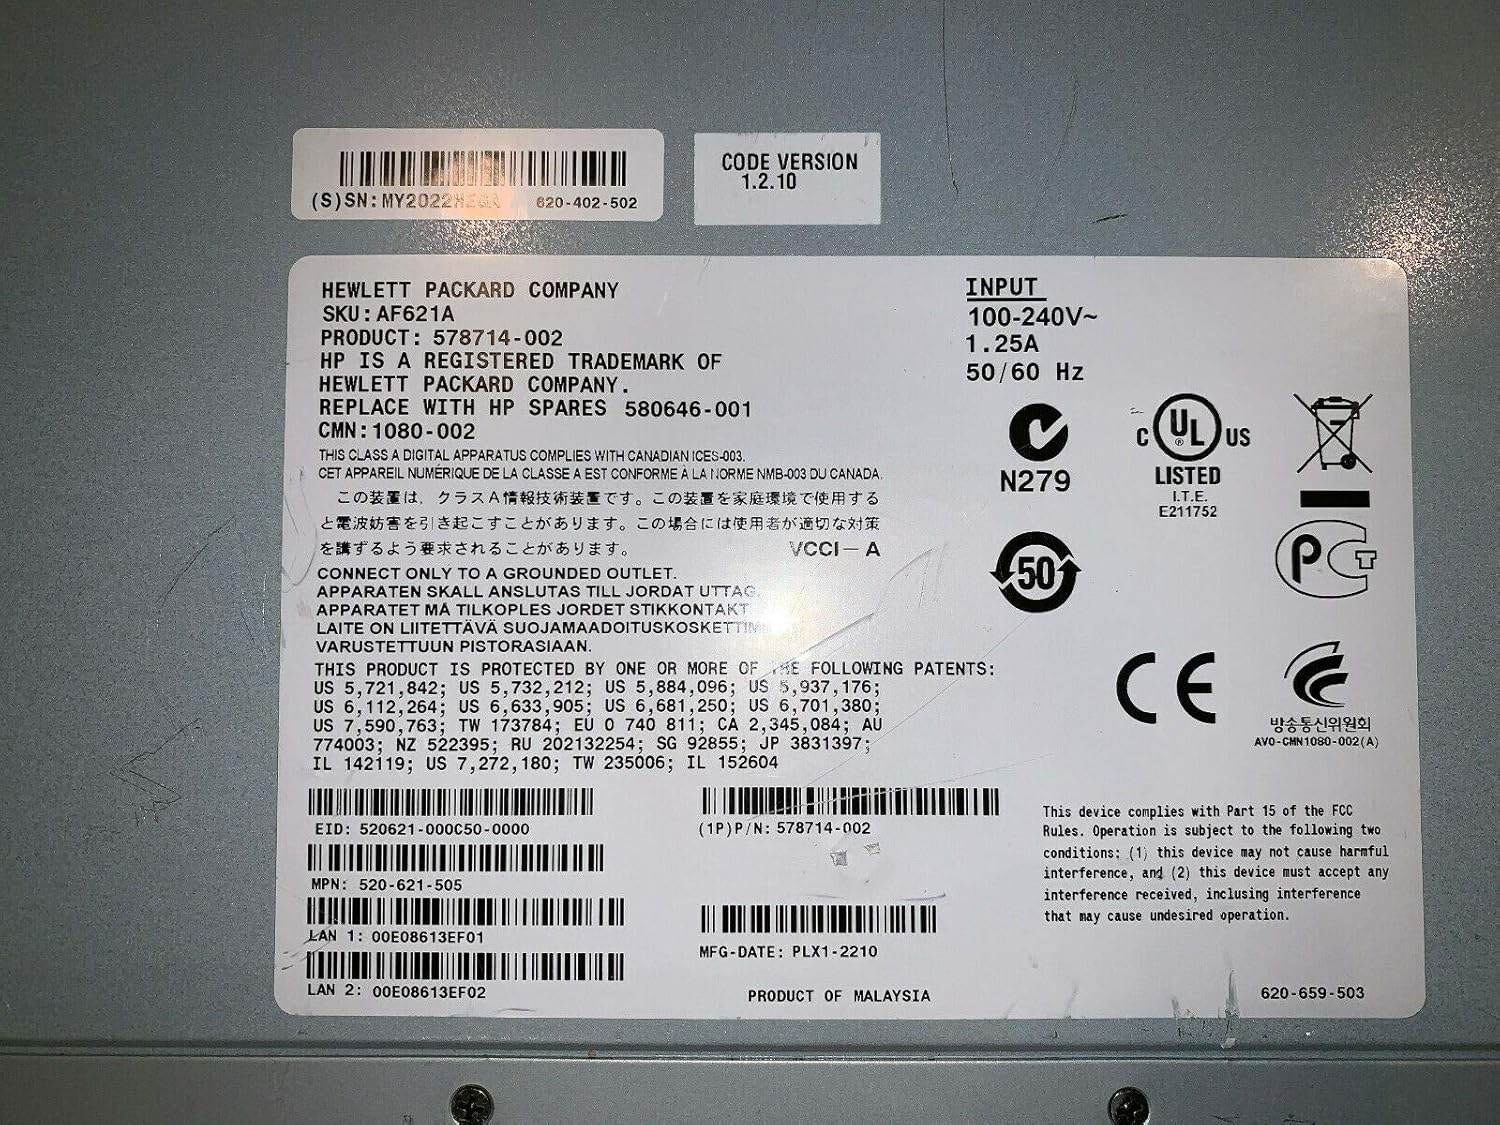
Figure 3: Product label details for the HP AF621A KVM Switch. This label provides critical information such as the SKU, input power requirements (100-240V~, 1.25A, 50/60 Hz), various regulatory compliance marks (UL, CE, VCCI, N279), and specific manufacturing and serial numbers like SKU: AF621A, Product: 578714-002, CPN: 1080-002, and LAN MAC addresses.
Garancija i podrška
For detailed warranty information, please refer to the warranty statement included with your product or visit the official HP support website. HP provides comprehensive support resources, including:
- Online baza znanja i često postavljana pitanja.
- Preuzimanje drajvera i firmvera.
- Technical support contact information (phone, chat, email).
- Service and repair options.
When contacting support, please have your product model number (AF621A) and serial number (found on the product label) ready to expedite assistance.