
1. Proizvod je gotovview
The Thermaltake The Tower 900 is a full tower PC case designed for high-end PC enthusiasts and modders. Developed in collaboration with Watermod France, this chassis emphasizes a unique vertical installation layout and features durable 5mm tempered glass panels to showcase internal components. It supports extensive liquid cooling configurations and offers ample space for various hardware components.

Slika 1: Prednja strana view of the Thermaltake The Tower 900 showcasing internal components and custom liquid cooling setup.
Key features include a spacious interior for custom liquid cooling loops, support for XL ATX motherboards, and multiple drive bays for storage. The design prioritizes both aesthetic display and functional cooling performance.
2. Postavljanje i instalacija
This section provides general guidelines for assembling your PC components within The Tower 900 chassis. Due to its modular design, many parts can be disassembled for easier installation.
2.1 Raspakivanje i početni pregled
Carefully remove the chassis from its packaging. Inspect for any damage that may have occurred during transit. Keep all packaging materials for future transport or warranty claims.

Slika 2: Eksplodirao view illustrating the modular components of The Tower 900 for easier assembly.
2.2 Uklanjanje bočnih panela
The tempered glass side panels are secured with thumbscrews. Unscrew these to remove the panels, providing full access to the interior for component installation.
2.3 Instalacija matične ploče
- Install the necessary motherboard standoffs onto the motherboard tray according to your motherboard's form factor (XL ATX, ATX, microATX).
- Pažljivo postavite matičnu ploču na odstojnike, poravnavajući rupe za vijke.
- Pričvrstite matičnu ploču vijcima.
2.4 Instalacija jedinice za napajanje (PSU).
The PSU is mounted at the rear of the chassis. Ensure proper orientation and secure it with screws. Route cables through the designated cutouts for clean management.

Slika 3: View of the power supply unit mounting area at the rear of the chassis.
2.5 Instalacija diska za pohranu podataka
The case features multiple drive bays for 3.5-inch HDDs and 2.5-inch SSDs. Utilize the removable drive trays for easy installation. The case supports up to six 3.5-inch drives or twelve 2.5-inch drives.
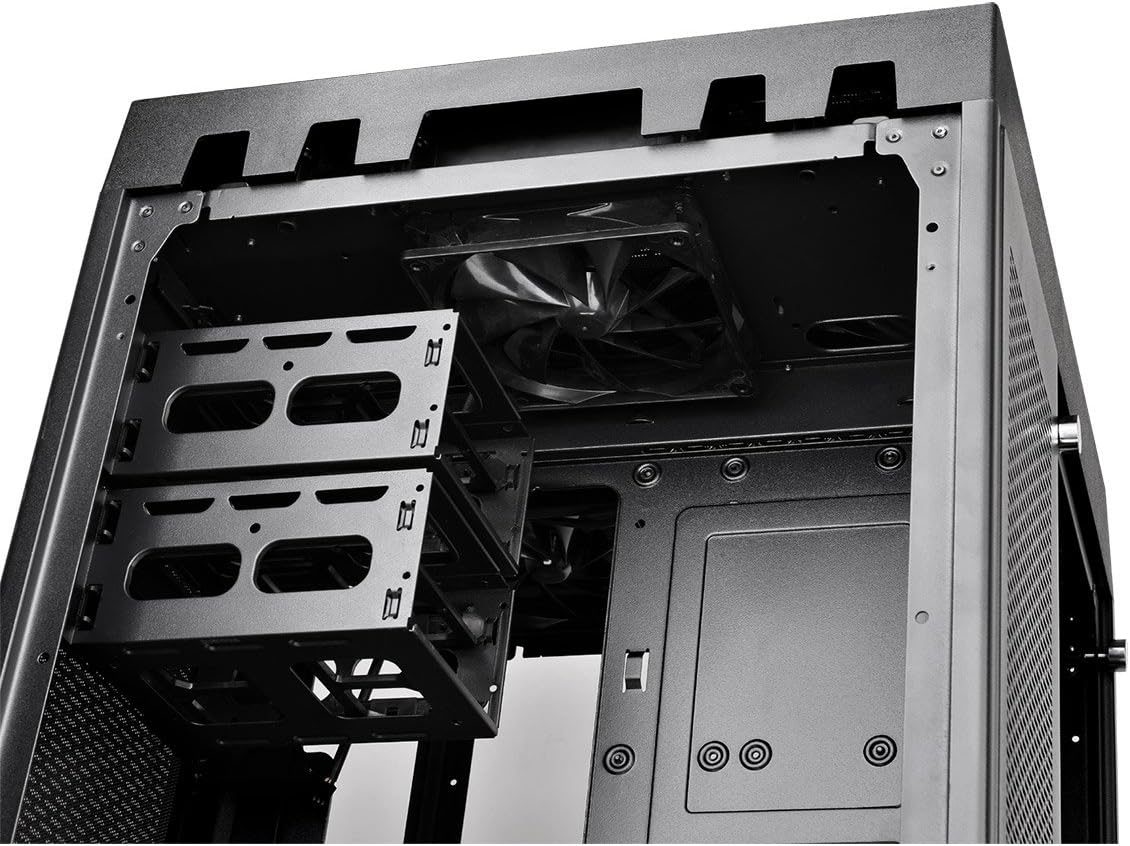
Figure 4: Removable drive trays for 3.5-inch and 2.5-inch storage devices.
2.6 Ugradnja sistema za hlađenje (ventilatori/radijatori)
The Tower 900 is optimized for liquid cooling, supporting up to two 560mm radiators. Install fans and radiators in the designated areas, ensuring proper airflow direction. The case comes with two pre-installed 140mm fans at the top.

Slika 5: Bočna strana view showing fan mounting locations, ideal for radiator installation.
For custom liquid cooling, the case provides dedicated space for pumps and reservoirs. Note that pump brackets are designed for Thermaltake D5 pumps; other pump models may require custom mounting solutions.
2.7 Upravljanje kablovima
Utilize the numerous cable routing holes and tie-down points behind the motherboard tray to ensure a clean build and optimal airflow. Long SATA and PSU cables are recommended for this large chassis.
3. Uputstvo za upotrebu
Once all components are installed and secured, and the side panels are reattached, connect your peripherals and power cable.
3.1 Prednja I/O ploča
The top front panel provides convenient access to essential ports and controls:
- Dugme za napajanje: Za uključivanje/isključivanje sistema.
- Dugme za resetiranje: Za ponovno pokretanje sistema.
- USB 3.0 portovi (x4): Za brzi prijenos podataka.
- Audio Jacks (Headphone/Microphone): Za audio ulaz/izlaz.

Figure 6: Close-up of the top I/O panel featuring USB 3.0 ports, audio jacks, and power/reset buttons.
3.2 Uključivanje sistema
Press the power button on the front I/O panel to start your system. Ensure all cables are securely connected before powering on.
4. Održavanje
Redovno održavanje pomaže u osiguravanju optimalnih performansi i dugotrajnosti komponenti vašeg računara.
4.1 Čišćenje filtera za prašinu
The Tower 900 is equipped with magnetic dust filters on various intake points. These filters should be cleaned regularly (e.g., monthly in a living area) to prevent dust buildup inside the chassis, which can impede airflow and cooling efficiency.

Figure 7: Various magnetic dust filters included with the chassis for easy removal and cleaning.
- Gently remove the magnetic dust filters from their respective locations.
- Clean the filters using compressed air or by rinsing them with water. Ensure they are completely dry before reattaching.
4.2 Njega kaljenog staklenog panela
Očistite kaljene staklene ploče mekom krpom koja ne ostavlja dlačice i sredstvom za čišćenje stakla. Izbjegavajte abrazivne materijale koji bi mogli ogrebati površinu.
4.3 Unutrašnje čišćenje
Periodically, use compressed air to remove dust from internal components such as fans, heatsinks, and graphics cards. Ensure the system is powered off and unplugged before performing internal cleaning.
5. Otkrivanje problema
This section addresses common issues that may arise during or after PC assembly.
5.1 Sistem se ne uključuje
- Provjerite je li kabel za napajanje sigurno spojen i na PSU i na zidnu utičnicu.
- Ensure the PSU's power switch is in the "ON" position.
- Provjerite sve interne priključke za napajanje, posebno 24-pinski ATX i 8-pinski CPU kablove za napajanje matične ploče.
- Confirm that the front panel power switch cable is correctly connected to the motherboard's header.
5.2 Prekomjerna buka
- Identify the source of the noise (e.g., fan, HDD).
- Ensure all fans are securely mounted and free from obstructions.
- Check for loose cables or components that might be vibrating against the chassis.
- If using HDDs, ensure they are properly secured in their drive bays to minimize vibration.
5.3 Poor Cooling Performance
- Očistite sve filtere za prašinu i unutrašnje komponente kako je opisano u odjeljku Održavanje.
- Verify that all fans are spinning and oriented correctly for optimal airflow (intake/exhaust).
- Ensure radiators are not obstructed and have adequate airflow.
- For liquid cooling systems, check pump operation and coolant levels.
6. Specifikacije
| Feature | Detalj |
|---|---|
| Brand | Thermaltake |
| Naziv modela | Toranj 900 |
| Tip slučaja | pun toranj |
| Kompatibilnost matične ploče | XL ATX, ATX, Micro ATX |
| Materijal | Čelik, Kaljeno staklo |
| Boja | Crna |
| Dimenzije (D x Š x V) | 48.3P x 42.6d x 75.2V cm (19.02 x 16.77 x 29.61 inča) |
| Težina | 24.5 kg (54 lbs) |
| Drive Bays | 6 x 3.5" or 12 x 2.5" (internal) |
| Slotovi za proširenje | 7 |
| Prednji I / O portovi | 4 x USB 3.0, HD Audio |
| Metoda hlađenja | Air, Liquid (supports up to 2x 560mm radiators) |
| Unaprijed instalirani ventilatori | 2 x 140mm (top) |
| Vrsta napajanja | Standard PS2 PSU (rear mount) |
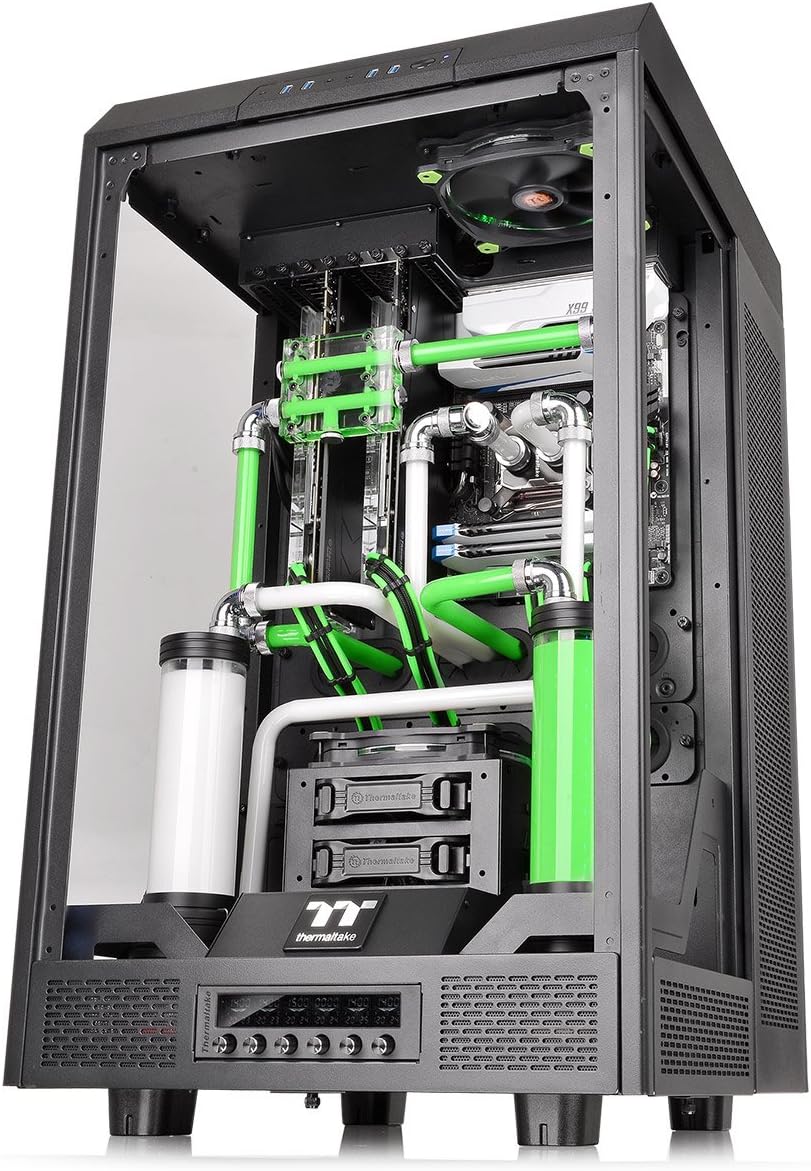
Figure 8: Diagram illustrating the dimensions of The Tower 900 chassis.
7. Garancija i podrška
7.1 Informacije o garanciji
The Thermaltake The Tower 900 comes with a 2-godišnja garancija proizvođačaMolimo sačuvajte dokaz o kupovini za reklamacije u okviru garancije. Garancija pokriva nedostatke u materijalu i izradi pri normalnoj upotrebi.
7.2 Korisnička podrška
For technical assistance, troubleshooting, or warranty inquiries, please contact Thermaltake customer support. Refer to the official Thermaltake webstranicu za najnovije kontakt informacije i resurse podrške.
- Online podrška: Visit the Thermaltake official website for FAQs, driver downloads, and support tickets.
- Kontakt informacije: Specific regional contact details can be found on the support section of the Thermaltake website.
Thermaltake is committed to providing excellent support and innovative products, driven by a passion for DIY and PC modding.