Uvod
This manual provides comprehensive instructions for the installation, operation, and maintenance of your KitVision Observer 1080p Dashboard Camera. Please read this manual thoroughly before using the device to ensure proper functionality and safety. This device is designed to record your journeys, providing a reliable record of events on the road.
Product Overview
Komponente
The KitVision Observer 1080p Dashboard Camera package includes the following items:
- KV Observer 1080p Dashboard Camera
- Punjač za automobil
- Mini USB kabl
- Usisni nosač
- Uputstvo za upotrebu (ovaj dokument)
Ključne karakteristike
The KitVision Observer 1080p Dashboard Camera offers a range of features to enhance your driving experience and provide security:
- Full HD 1080P Recording: Captures video at 30 frames per second for clear footage.
- Širokougaoni objektiv: A 170-degree ultra-wide angle lens covers a broad view na putu.
- LCD ekran od 2.45 inča: Allows for real-time viewing and playback of recorded footage.
- Ugrađeni G-senzor: Automatically detects collisions and saves the corresponding footage da spriječite prepisivanje.
- Kontinuirano snimanje u petlji: Records continuously, overwriting the oldest unneeded files kada je memorijska kartica puna.
- 12 Megapixel Photo Mode: Enables capturing high-resolution still images.
- WDR (široki dinamički raspon) tehnologija: Provides enhanced visibility and recording quality in varying light conditions, including low light.
- Detekcija pokreta: Automatically starts recording when motion is detected in front of the camera.
- Način rada za parkiranje: Provides surveillance even when the vehicle is parked and turned off.
Proizvod Views

Slika 1: Front view of the KitVision Observer 1080p Dashboard Camera, highlighting the main lens and branding.
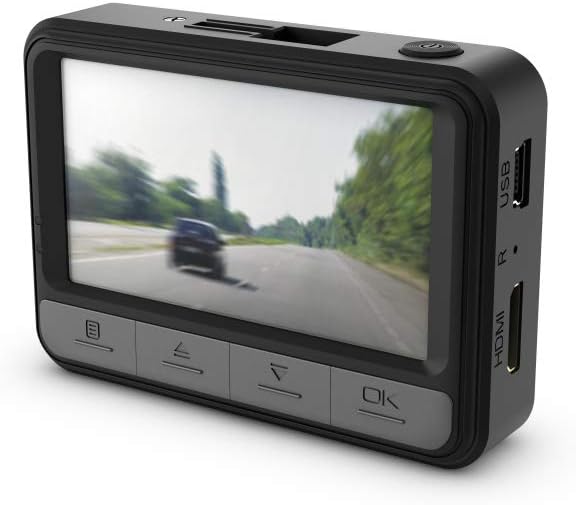
Slika 2: Pozadi view of the dashboard camera, showing the LCD screen and the navigation buttons for menu control.

Slika 3: Side view of the camera, illustrating the USB and HDMI connectivity ports.

Slika 4: The dashboard camera with its screen articulated upwards, providing a different viewugao uređaja.
Setup
1. Umetanje memorijske kartice
Before first use, a compatible microSD card (not included) must be inserted into the camera. Ensure the camera is powered off before inserting or removing the card. Locate the microSD card slot on the side of the camera and gently push the card in until it clicks into place. To remove, push the card in again until it springs out.
2. Montaža kamere
- Clean the desired area on your windshield where the camera will be mounted. Ensure it does not obstruct your view na putu.
- Attach the suction mount to the camera.
- Čvrsto pritisnite vakuumsku čašicu na vjetrobransko staklo i povucite polugu za zaključavanje da biste je učvrstili.
- Podesite ugao kamere kako biste osigurali da jasno snima put ispred vas.

Slika 5: Close-up view of the dashboard camera securely mounted on the vehicle's windshield.

Slika 6: The dashboard camera installed in a vehicle, demonstrating its placement for optimal road recording.
3. Priključak za napajanje
Connect the in-car charger to the camera's power input port and plug the other end into your vehicle's 12V power outlet (cigarette lighter socket). The camera will typically power on and begin recording automatically when the vehicle's ignition is turned on.
4. Početne postavke
Upon first power-on, you may need to set the date, time, and language. Use the navigation buttons below the screen to adjust settings and the 'OK' button to confirm. Refer to the 'Operating Instructions' section for detailed menu navigation.
Uputstvo za upotrebu
1. Uključivanje/isključivanje
- automatski: The camera powers on and off with your vehicle's ignition.
- Priručnik: Press and hold the power button (usually located on the top or side) to manually turn the camera on or off.
2. Načini snimanja
- Kontinuirano snimanje u petlji: The default mode. The camera records video in segments (e.g., 1, 3, or 5 minutes) and automatically overwrites the oldest unlocked files kada je memorijska kartica puna.
- G-Sensor (Collision Detection): When the built-in G-Sensor detects a sudden impact or collision, the current recording segment is automatically locked and saved to a protected folder, preventing it from being overwritten.
- Detekcija pokreta: When enabled in the settings, the camera will start recording automatically if it detects movement in its field of view while parked. This feature requires a continuous power supply.
- Način rada za parkiranje: Similar to motion detection, this mode provides surveillance when the vehicle is parked. It typically activates upon detecting impact or motion, recording for a short period. This also requires a continuous power supply or sufficient internal battery charge.
3. Navigacija kroz meni i postavke
Use the buttons located below the LCD screen to navigate the camera's menu. Typically, there are buttons for Menu, Up, Down, and OK/Confirm. Press the 'Menu' button to access settings such as video resolution, loop recording duration, G-sensor sensitivity, date/time, and more.
4. Reprodukcija
To review snimljeno footage directly on the camera, enter playback mode via the menu. Use the navigation buttons to select and play video files. Alternatively, you can remove the microSD card and view files on a computer, or connect the camera directly to a computer using the Mini USB cable.
5. Photo Mode
Switch to photo mode via the menu to capture still images. Press the 'OK' button to take a picture. The camera supports 12 Megapixel photos.
Održavanje
1. Čišćenje kamere
- Za čišćenje kućišta fotoaparata koristite meku, suhu krpu.
- For the lens and screen, use a lens cleaning cloth specifically designed for optics to avoid scratches. Do not use abrasive cleaners or solvents.
2. Upravljanje memorijskim karticama
- Formatiranje: It is recommended to format the microSD card periodically (e.g., once a month) using the camera's menu function. This helps maintain optimal recording performance and prevents data corruption. Formatting will erase all data on the card, so back up any important files prvi.
- Zamjena: Memory cards have a limited lifespan. If you experience frequent recording errors or data corruption, consider replacing the microSD card with a new, high-quality card.
3. Održavanje baterije
The camera contains a Lithium Ion battery. Avoid exposing the camera to extreme temperatures for prolonged periods, as this can affect battery life and performance. If the camera will not be used for an extended time, ensure it is stored in a cool, dry place with a partial charge.
Rješavanje problema
If you encounter issues with your KitVision Observer 1080p Dashboard Camera, refer to the following common solutions:
- Kamera se ne uključuje: Ensure the in-car charger is securely connected to both the camera and the vehicle's power outlet. Check if the vehicle's power outlet is functioning.
- Kamera ne snima: Verify that a microSD card is inserted correctly and has sufficient free space. Format the memory card if necessary (after backing up important files). Check recording settings in the menu.
- Loš kvalitet videa: Clean the camera lens. Ensure the windshield area in front of the camera is clean. Check the video resolution settings in the menu.
- G-Sensor not triggering: Adjust the G-sensor sensitivity in the camera's settings. If set too low, it may not detect minor impacts.
- Dugmad ne reagiraju: Try resetting the camera by pressing the reset button (if available, often a small pinhole) or by disconnecting and reconnecting the power.
- Date/Time incorrect: Re-enter the correct date and time in the camera's settings menu.
Ako problem i dalje postoji nakon isprobavanja ovih rješenja, obratite se korisničkoj podršci.
Specifikacije
| Feature | Detalj |
|---|---|
| Dimenzije proizvoda | 9.25 x 2.16 x 4.52 inča |
| Težina artikla | 5.3 unce (0.33 funte) |
| ASIN | B00EUUD01C |
| Broj modela stavke | KVOBS108 |
| Baterije | Potrebna je 1 litijum-jonska baterija (uključena) |
| Datum prve dostupnosti | 14. oktobar 2013 |
| Proizvođač | Kondor Limited |
| Brand | KitVision |
| Naziv modela | Kitvision Observer 1080p Dashboard Camera |
| Vrsta usluge vozila | Auto |
| Tehnologija povezivanja | USB |
| Posebna karakteristika | Motion Sensing |
| Rezolucija video snimanja | 1080p |
| Uključene komponente | KV Observer 1080p Dashboard Camera, In-car charger, Mini USB cable, Suction mount, User manual |
| Boja | Crna |
| Kontrolni metod | Touch (referring to buttons, not touch screen) |
Garancija i podrška
For warranty information, please refer to the documentation included with your product or visit the official KitVision website. If you require technical assistance or have questions not covered in this manual, please contact KitVision customer support through their official channels.