
Coby CAM3002
Coby SNAPP CAM3002 Mini Camcorder User Manual
Model: CAM3002
1. Uvod
Thank you for choosing the Coby SNAPP CAM3002 Mini Camcorder. This compact device is designed for easy video recording and photo capture, offering portability and user-friendly operation. This manual provides detailed instructions to help you set up, operate, and maintain your camcorder effectively.
2. Sadržaj paketa
Molimo Vas da provjerite paket za sljedeće stavke:
- Coby SNAPP CAM3002 Mini Camcorder
- 2 x AA alkalne baterije
- TV Connection Cable (RCA/Composite Video Cable)
- Muvee Software (on CD or via download link)
- Korisnički priručnik (ovaj dokument)
3. Camcorder Overview
Familiarize yourself with the main components of your Coby SNAPP CAM3002 Mini Camcorder:
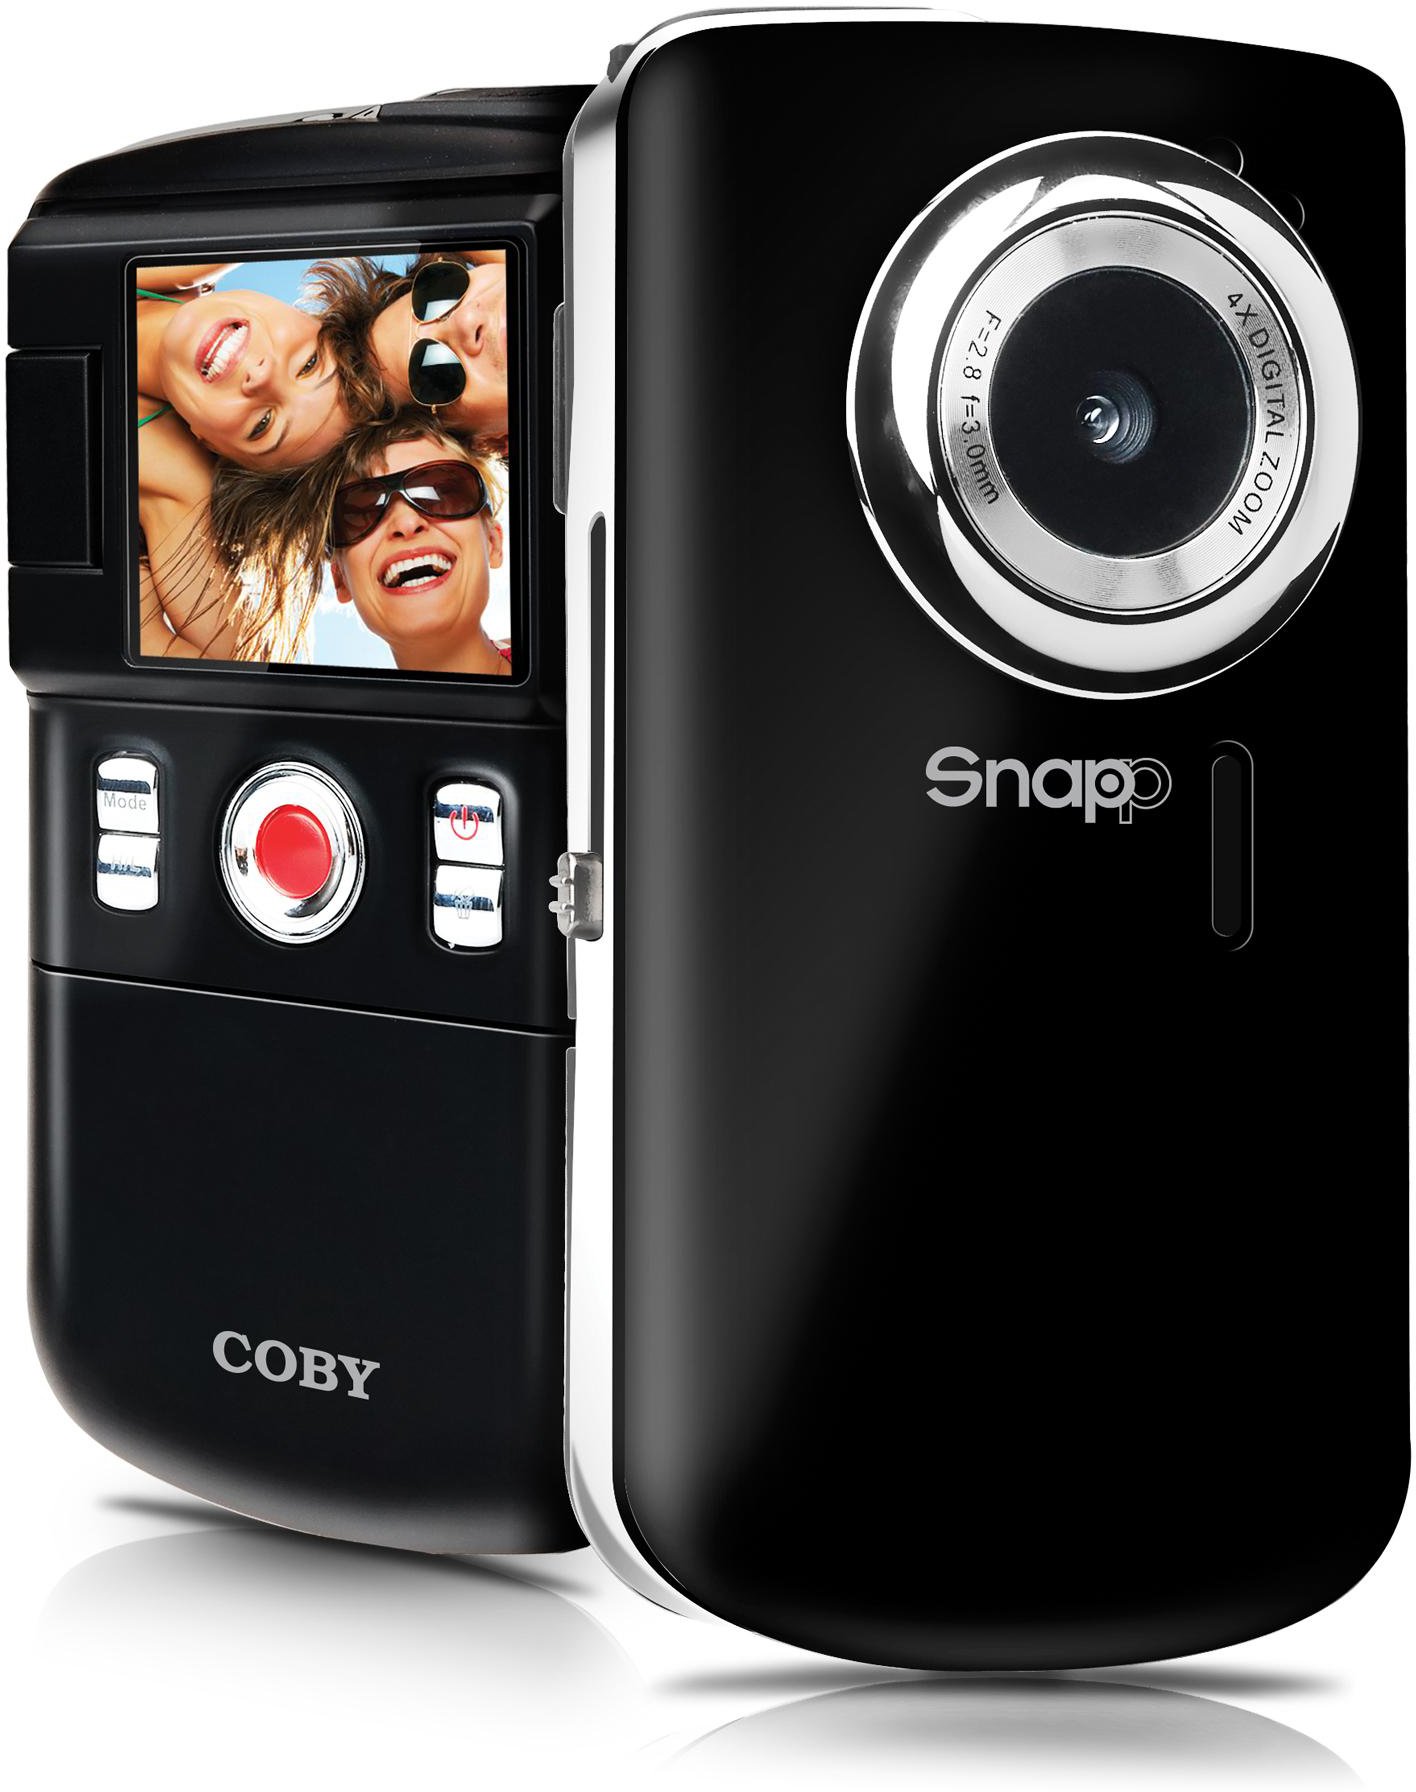
This image displays the front of the Coby SNAPP CAM3002 Mini Camcorder. Visible features include the camera lens, a small microphone opening, and several control buttons on the side, indicating its compact and portable design.
- Objektiv kamere: Snima video i fotografije.
- mikrofon: Snima zvuk tokom snimanja videa.
- LCD ekran od 1.8 inča: Displays menus, live view, and playback. This screen can flip out for self-portraits.
- Kontrolna dugmad: For power, mode selection, recording, photo capture, and navigation.
- Pretinac za baterije: Holds 2 AA alkaline batteries.
- Utor za SD/SDHC karticu: Za umetanje memorijske kartice (do 16 GB).
- Integrated USB Plug: Za direktno povezivanje sa računarom file transfer and charging (if rechargeable batteries are used).
- TV izlaz: For connecting to a television using the included cable.
4. Podešavanje
4.1. Instaliranje baterija
- Locate the battery compartment cover on the camcorder.
- Slide or lift the cover to open it.
- Insert two (2) AA alkaline batteries, ensuring correct polarity (+/-) as indicated inside the compartment.
- Čvrsto zatvorite poklopac odeljka za baterije.
4.2. Umetanje memorijske kartice
The camcorder requires an SD or SDHC memory card (up to 16GB) to store videos and photos.
- Locate the SD/SDHC card slot on the camcorder.
- Insert the memory card with the metal contacts facing down (or as indicated by a diagram near the slot) until it clicks into place.
- To remove the card, gently push it in until it clicks, then release, and it will eject slightly.
4.3. Uključivanje / isključivanje napajanja
- To power on, press and hold the Power button until the LCD screen illuminates.
- To power off, press and hold the Power button again until the screen turns off. The camcorder may also power off automatically after a period of inactivity to conserve battery life.
5. Upravljanje kamkorderom
5.1. Izbor načina
Use the Mode button to switch between the following functions:
- Način snimanja videa: For capturing moving images with sound.
- Režim za fotografisanje: For taking single photographs.
- Način reprodukcije: Za reviewing recorded videos and photos.
5.2. Snimanje videa
- Prebacite se u način snimanja videa.
- Frame your subject using the 1.8-inch LCD screen. The screen can be flipped out for self-recording.
- Press the Record/Capture button to start recording. A red indicator or timer will appear on the screen.
- Press the Record/Capture button again to stop recording.
5.3. Fotografisanje
- Prebacite se na način rada za fotografiranje.
- Kadrirajte svoj subjekt pomoću LCD ekrana.
- Press the Record/Capture button to take a photo. The image will be saved to the memory card.
5.4. Reprodukcija
- Prebacite se u način reprodukcije.
- Use the navigation buttons to browse through your recorded videos and photos.
- Press the Record/Capture button to play a video or view fotografija preko cijelog ekrana.
5.5. Povezivanje s televizorom
Možeš view your recorded content on a larger screen using the included TV connection cable.
- Ensure both the camcorder and the television are powered off.
- Connect one end of the TV connection cable to the TV Out port on the camcorder.
- Connect the other end of the cable to the corresponding video (yellow) and audio (white) input jacks on your television.
- Power on the television and select the correct AV input source.
- Power on the camcorder and switch to Playback Mode to view vašim medijima.
5.6. Prenošenje Files na računar
The camcorder features an integrated USB plug for easy file transfer.
- Uvjerite se da je kamkorder uključen.
- Extend the integrated USB plug from the camcorder.
- Plug the camcorder directly into an available USB port on your computer (Mac or PC).
- Your computer should recognize the camcorder as a removable storage device. You can then access the files (videos and photos) and copy them to your computer.
5.7. Using Muvee Software
The included Muvee software is designed to help you edit your videos and photos, and facilitate uploading them to online platforms.
- Install the Muvee software on your computer using the provided CD or download link.
- Follow the software's on-screen instructions for editing and sharing your media.
6. Održavanje
6.1. Čišćenje
- Za čišćenje vanjštine kamkordera koristite meku, suhu krpu.
- Za objektiv i LCD ekran koristite specijaliziranu krpu i otopinu za čišćenje objektiva kako biste izbjegli ogrebotine.
- Ne koristite jake kemikalije ili abrazivna sredstva za čišćenje.
6.2. Skladištenje
- Kada se ne koristi duži period, izvadite baterije kako biste spriječili curenje.
- Čuvajte kameru na hladnom i suhom mjestu, dalje od direktne sunčeve svjetlosti i ekstremnih temperatura.
7. Otkrivanje problema
Ako naiđete na probleme s kamkorderom, pogledajte sljedeće uobičajene probleme i rješenja:
| Problem | Moguće rješenje |
|---|---|
| Kamkorder se ne uključuje. | Check if batteries are correctly inserted and fully charged. Replace with fresh AA alkaline batteries if necessary. |
| Poor video or photo quality. | Ensure sufficient lighting in the environment. Hold the camcorder steady during recording/capture. Clean the lens if it appears smudged. |
| Nije moguće prenijeti files na računar. | Ensure the camcorder is powered on and correctly connected via the integrated USB plug. Try a different USB port on your computer. Verify your computer's operating system recognizes the device. |
| Kratko trajanje baterije. | Use fresh, high-quality AA alkaline batteries. Reduce screen brightness if possible (check settings). |
| Greška memorijske kartice. | Ensure the memory card is correctly inserted. Try reformatting the card (this will erase all data). Try a different compatible SD/SDHC card. |
8. Specifikacije
| Feature | Specifikacija |
|---|---|
| Naziv modela | CAM3002 |
| Display | 1.8-inch Full-color LCD Electronic Viewfinder (flips out) |
| Video Rezolucija | 480p (640x480) |
| Rezolucija fotografije | 0.3 MP |
| Digitalni zum | 4x |
| Mediji za pohranu | SD/SDHC Memory Card (up to 16GB) |
| Povezivanje | Integrated Hi-speed USB 2.0 plug, TV Out (RCA) |
| Izvor napajanja | 2 x AA alkalne baterije |
| Podržano File Formati | Video: MP4, Photo: JPEG |
| Posebne karakteristike | Built-in speaker, Muvee software included |
9. Garancija i podrška
Coby products are manufactured to high-quality standards. This product is covered by a limited warranty against defects in materials and workmanship. Please refer to the warranty card included with your purchase for specific terms and conditions.
For technical support or customer service inquiries, please visit the official Coby webweb-mjesto ili kontaktirajte njihovu liniju za korisničku podršku. Sačuvajte račun kao dokaz o kupovini za reklamacije u slučaju garancije.
Ask a question about this manual
Ask about setup, troubleshooting, compatibility, parts, safety, or missing instructions. Manuals+ will review the question and use this page’s manual context to help answer it.