
ECS Elitegroup P4M800-M7
ECS P4M800-M7 Motherboard User Manual
Model: P4M800-M7
Uvod
This manual provides detailed instructions for the installation, operation, and maintenance of the ECS P4M800-M7 motherboard. The P4M800-M7 is designed to support Socket LGA775 Intel Pentium 4 / Pentium D / Celeron D Processors with FSB 800/533 MHz and Hyper-Threading Technology.
Key features include 64-bit support, FSB 800MHz, RAID0, RAID1, and Serial ATA capabilities.
Product Overview

Figure 1: ECS P4M800-M7 Motherboard Layout. This image displays the main components of the motherboard, including the CPU socket (LGA 775), two DDR RAM slots, PCI and AGP expansion slots, and various I/O ports.
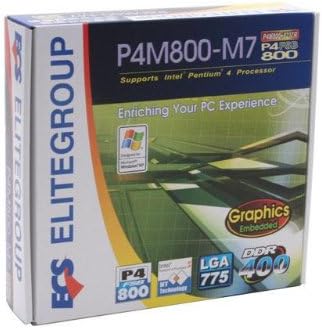
Figure 2: ECS P4M800-M7 Retail Box. The product packaging indicates support for Intel Pentium 4 processors, embedded graphics, and DDR400 memory, along with the LGA 775 socket type.
Postavljanje i instalacija
Follow these steps for proper installation of the ECS P4M800-M7 motherboard into your computer system.
1. Pripremite svoj sistem
- Ensure your power supply is disconnected from the wall outlet.
- Ispraznite statički elektricitet dodirivanjem uzemljenog metalnog predmeta.
2. Install the CPU
- Otvorite polugu za utičnicu procesora.
- Carefully align the CPU (Intel Pentium 4 / Pentium D / Celeron D) with the socket, ensuring the notches match.
- Pažljivo spustite CPU u utičnicu. Nemojte ga silom umetnuti.
- Zatvorite polugu utičnice kako biste osigurali CPU.
- Apply a thin layer of thermal paste to the CPU surface.
- Instalirajte hladnjak procesora prema uputama proizvođača.
3. Install Memory Modules
The motherboard supports DDR memory. Insert DDR modules into the available memory slots (2 slots).
- Otvorite kopče na oba kraja DIMM utora.
- Poravnajte memorijski modul sa slotom, pazeći da se zarez na modulu poklapa sa ključem u slotu.
- Press down firmly on both ends of the module until the clips snap into place.
4. Mount the Motherboard
- Install standoffs in your PC case that align with the motherboard's mounting holes.
- Pažljivo postavite matičnu ploču na odstojnike, poravnavajući I/O štitnik s otvorom kućišta.
- Pričvrstite matičnu ploču vijcima.
5. Connect Power and Peripherals
Connect the 20-pin ATX main power connector and the 4-pin ATX 12V power connector from your power supply to the motherboard. Connect SATA and IDE devices, front panel connectors, and expansion cards as needed.
Uputstvo za upotrebu
Once the motherboard is installed and all components are connected, you can proceed with system operation.
1. Početno pokretanje
After connecting the power supply and monitor, power on your system. The system should display the BIOS POST screen. Press the designated key (usually DEL or F2) to enter the BIOS setup utility.
2. BIOS konfiguracija
In the BIOS, you can configure various system settings, including boot order, date/time, and hardware parameters. Refer to the BIOS section of the full manual for detailed settings. Save changes and exit the BIOS to continue.
3. Instalacija operativnog sistema
Insert your operating system installation media (e.g., Windows CD/DVD) and follow the on-screen prompts to install the OS. Ensure all necessary drivers (chipset, audio, network, graphics) are installed after the OS installation for optimal performance. Drivers are typically provided on a CD with the motherboard or can be downloaded from the ECS Elitegroup website.
Održavanje
Pravilno održavanje osigurava dugotrajnost i stabilan rad vaše matične ploče.
- Uklanjanje prašine: Regularly clean dust from inside your computer case, especially from heatsinks and fans, using compressed air. Ensure the system is powered off and unplugged before cleaning.
- Upravljanje kablovima: Ensure internal cables are neatly routed to allow for proper airflow.
- Ažuriranja BIOS-a: Periodically check the ECS Elitegroup website for BIOS updates. Only update the BIOS if necessary and follow the instructions precisely to avoid system instability.
- Ažuriranja drajvera: Keep your device drivers updated to ensure compatibility and performance.
Rješavanje problema
This section addresses common issues you might encounter with the ECS P4M800-M7 motherboard.
| Problem | Mogući uzrok | Rješenje |
|---|---|---|
| Sistem se ne uključuje. | Power cables not connected, faulty power supply, or short circuit. | Check all power connections (20-pin ATX, 4-pin 12V). Test power supply. Ensure no metal objects are touching the motherboard. |
| Nema prikaza na monitoru. | Monitor cable loose, faulty graphics card (if external), or RAM not seated correctly. | Verify monitor cable connection. Reseat RAM modules. If using an external graphics card, ensure it is properly seated and powered. |
| Sistem se zamrzava ili ruši. | Overheating, unstable drivers, or faulty RAM. | Check CPU and chipset temperatures. Update drivers. Test RAM modules individually. |
| Operativni sistem nije pronađen. | Incorrect boot order in BIOS, or hard drive not detected. | Enter BIOS and set the correct boot order. Check SATA/IDE cable connections to the hard drive. |
Specifikacije
| Feature | Detalj |
|---|---|
| Proizvođač | ECS |
| Broj modela | P4M800-M7 |
| CPU Socket | LGA 775 |
| Kompatibilni procesori | Intel Celeron D, Intel Pentium 4, Intel Pentium |
| Tip čipseta | Intel |
| Dostupni memorijski slotovi | 2 |
| System Bus Standard Supported | SATA 3 |
| FSB Support | 800/533 MHz |
| Hyper-Threading tehnologija | Podržano |
| RAID podrška | RAID0, RAID1 |
| UPC | 881038001678 |
| Datum prve dostupnosti | 5. aprila 2006 |
Garancija i podrška
For warranty information and technical support, please refer to the documentation included with your purchase or visit the official ECS Elitegroup webstranica. Uslovi i odredbe garancije mogu se razlikovati u zavisnosti od regije i prodavca.
Official ECS Elitegroup Webstranica: ECS Elitegroup Store on Amazon (Note: This link directs to the brand's store page on Amazon, where further support information might be available.)
Ask a question about this manual
Ask about setup, troubleshooting, compatibility, parts, safety, or missing instructions. Manuals+ will review the question and use this page’s manual context to help answer it.